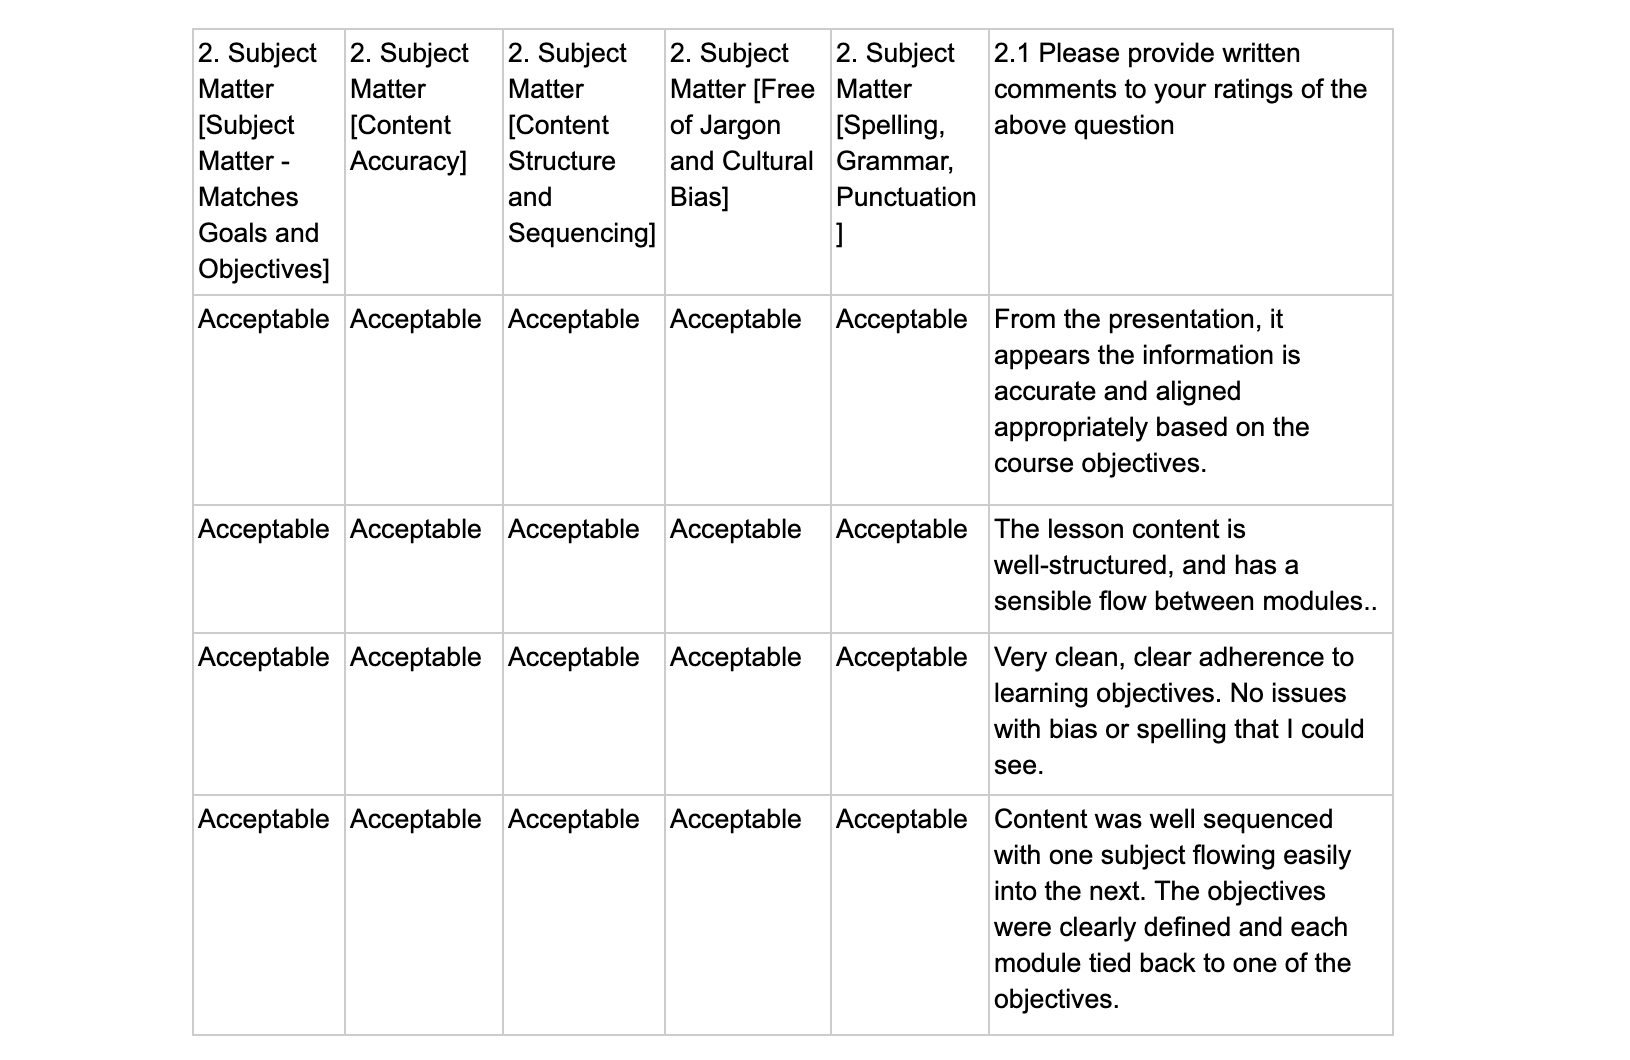
2024 Pregnancy Reveal Photos

Our 2nd Pregnancy

We always knew we wanted to reveal our pregnancy in a fun way, but we also knew long before that we wanted to wait to share the news with everyone until we reached 6 months. In February 2023, we had a very short lived pregnancy (Learn about Mary Anne’s 2023 pregnancy reveal to Joe here). We only knew we were pregnant for about 2 weeks before miscarrying during a work trip I had to the East Coast. Most people tell me I downplayed the experience. I typically believe everything happens in it’s own time, but most of all… I knew of many stories from family and friends that were far more tragic than what we were experience. So for better or worse, that got me through the experience alongside having a really great work trip at the same time. Had I just been at home while it was happening, maybe it would have played out differently, but I actually had a really great distraction at the time.

+ A Depressing Start

Though we are extremely excited for her to arrive now and it was an expected pregnancy, there were some mixed feelings at the start. We were excited to learn we were still fertile, but it wasn’t long before the numbers and other logistics had started flooding back in for me. We thought we did a bit of research the first time, but it turns out not nearly enough in my opinion. Also, I had a very unpleasant first trimester. It wasn’t long before I started feeling stripped of my independence. I wasn’t able to eat what I wanted, do what I wanted, and now all of a sudden all of these big decisions had to be navigated around this new person who hasn’t even been so much as a thought for that long.

I experience quite a bit of unexpected depression to start and enough that it had me bouncing back and forth about whether we should terminate the pregnancy or not. All of a sudden things got “too real.” I felt like I had just started getting adjusted into this new life we made in Los Angeles, in my career, and other areas of my life. Although I recognize some people are able to make room for all of these things with kids, it didn’t feel that way for me.

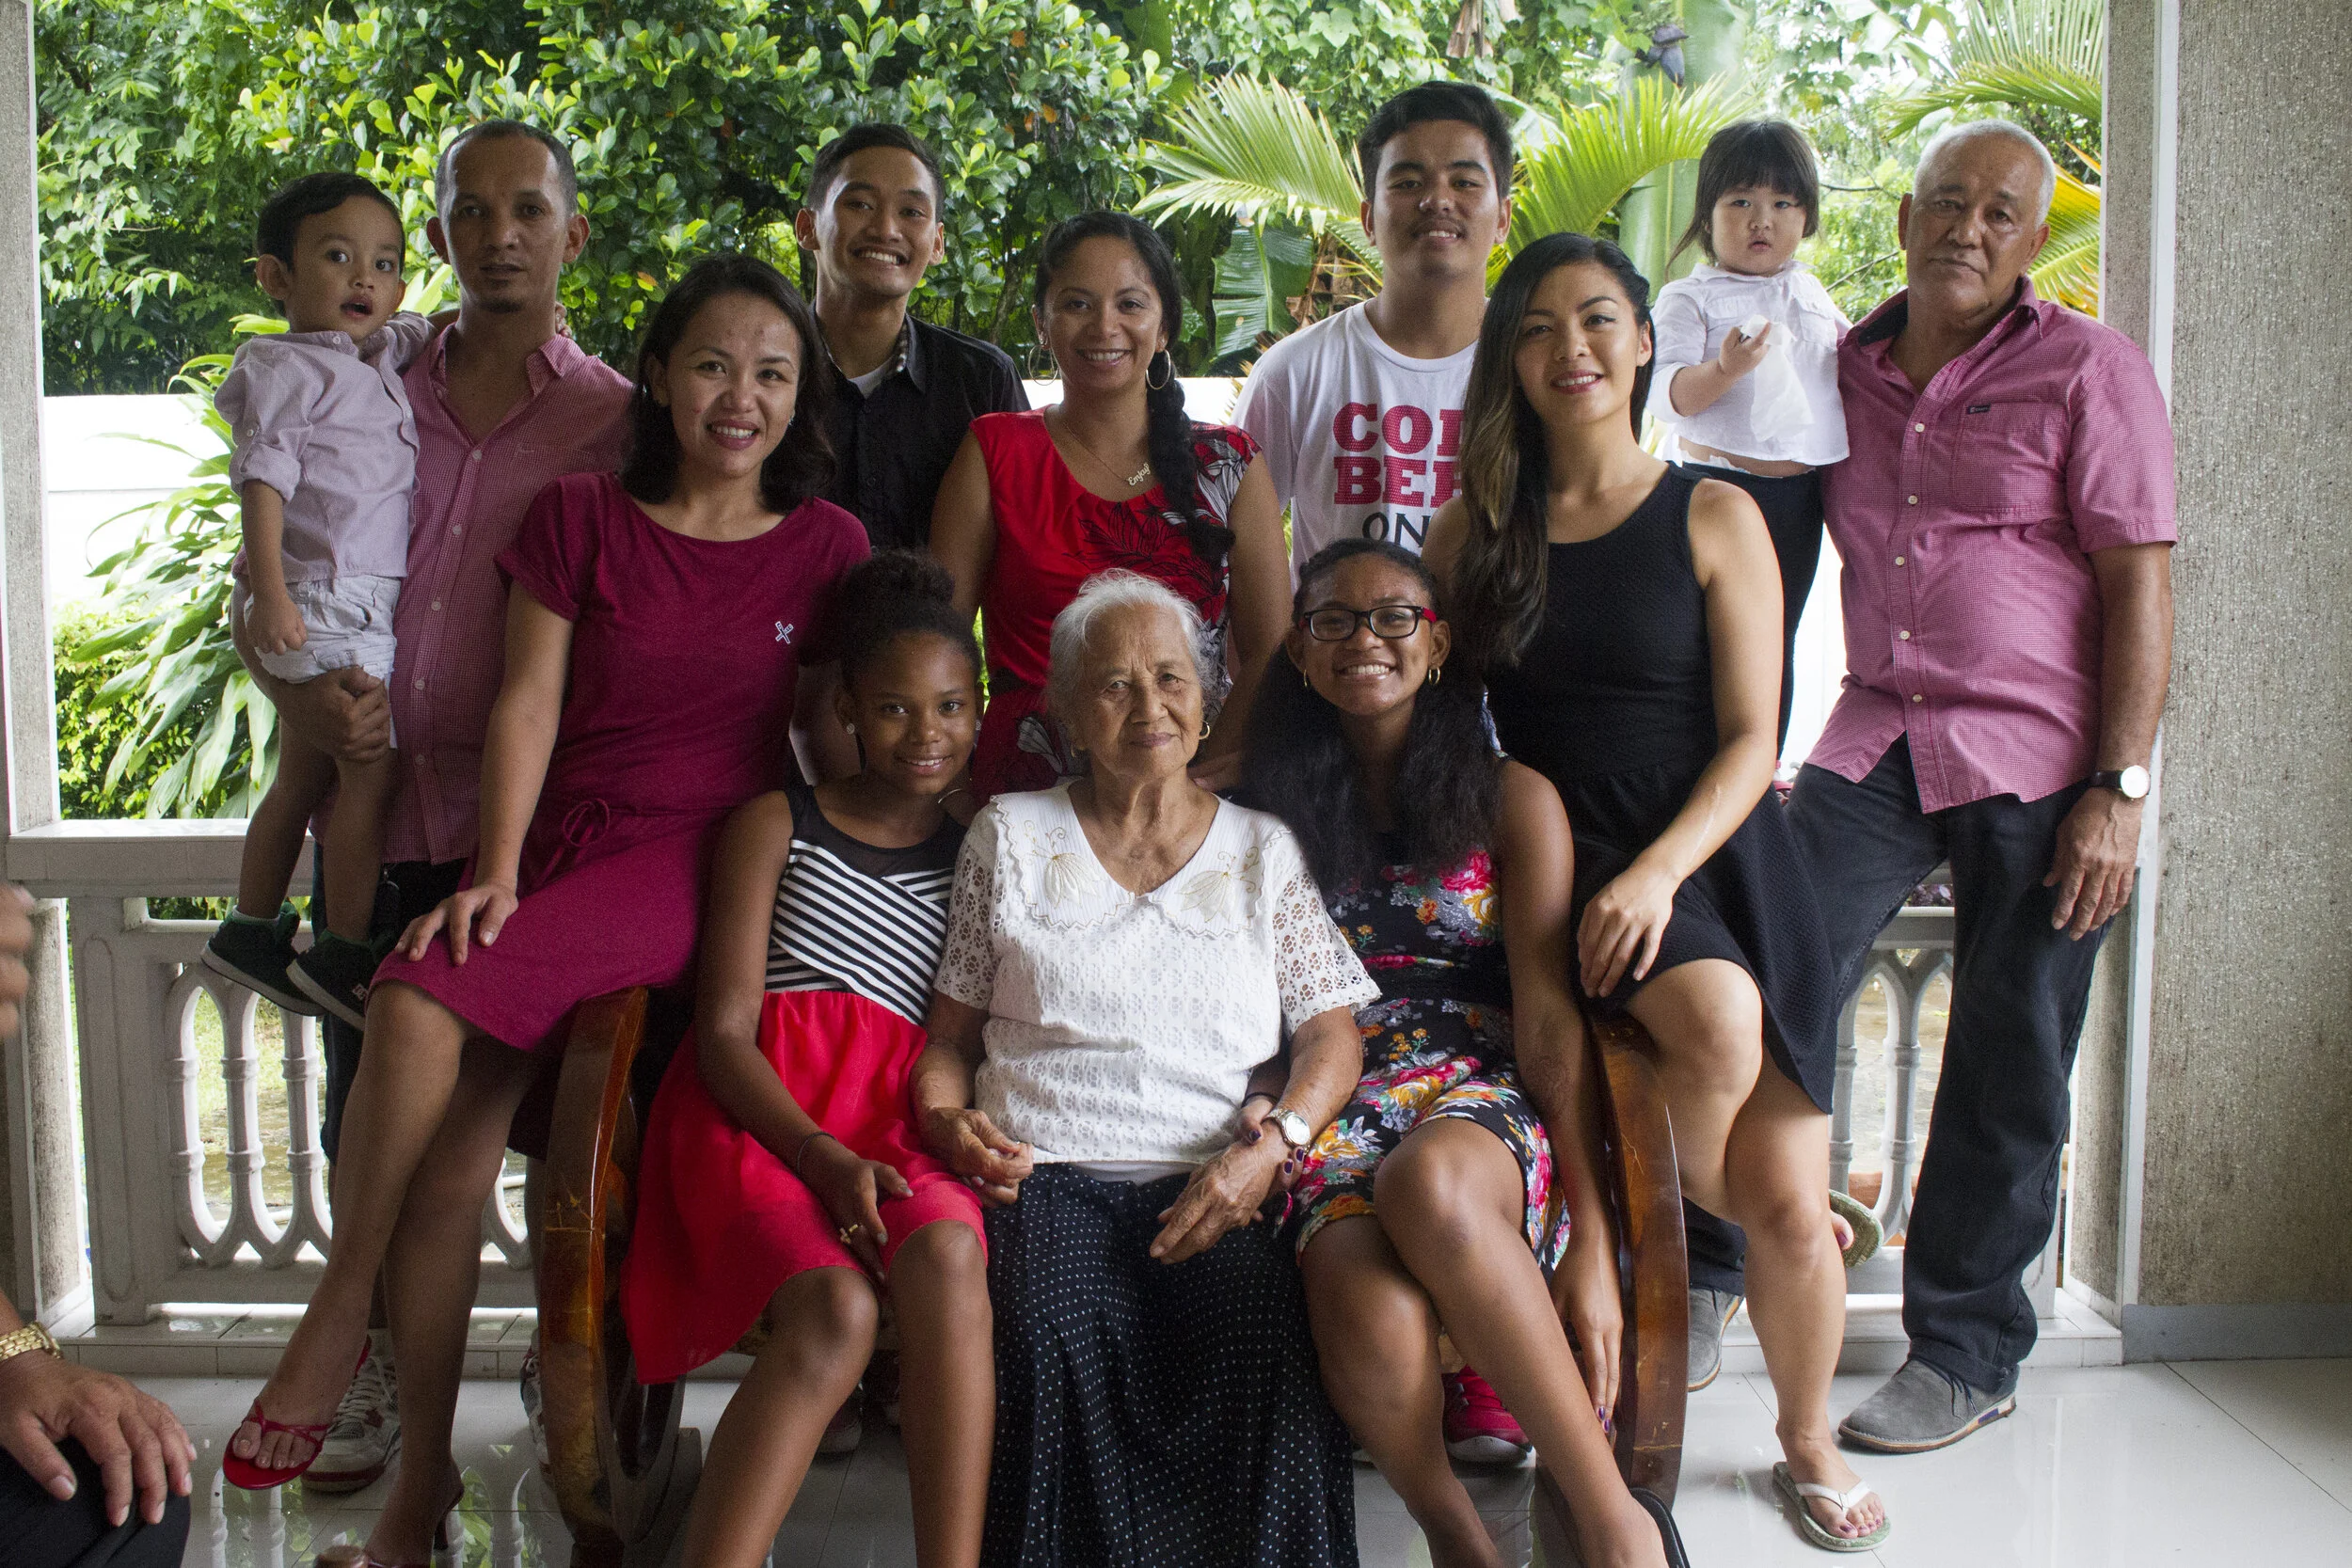
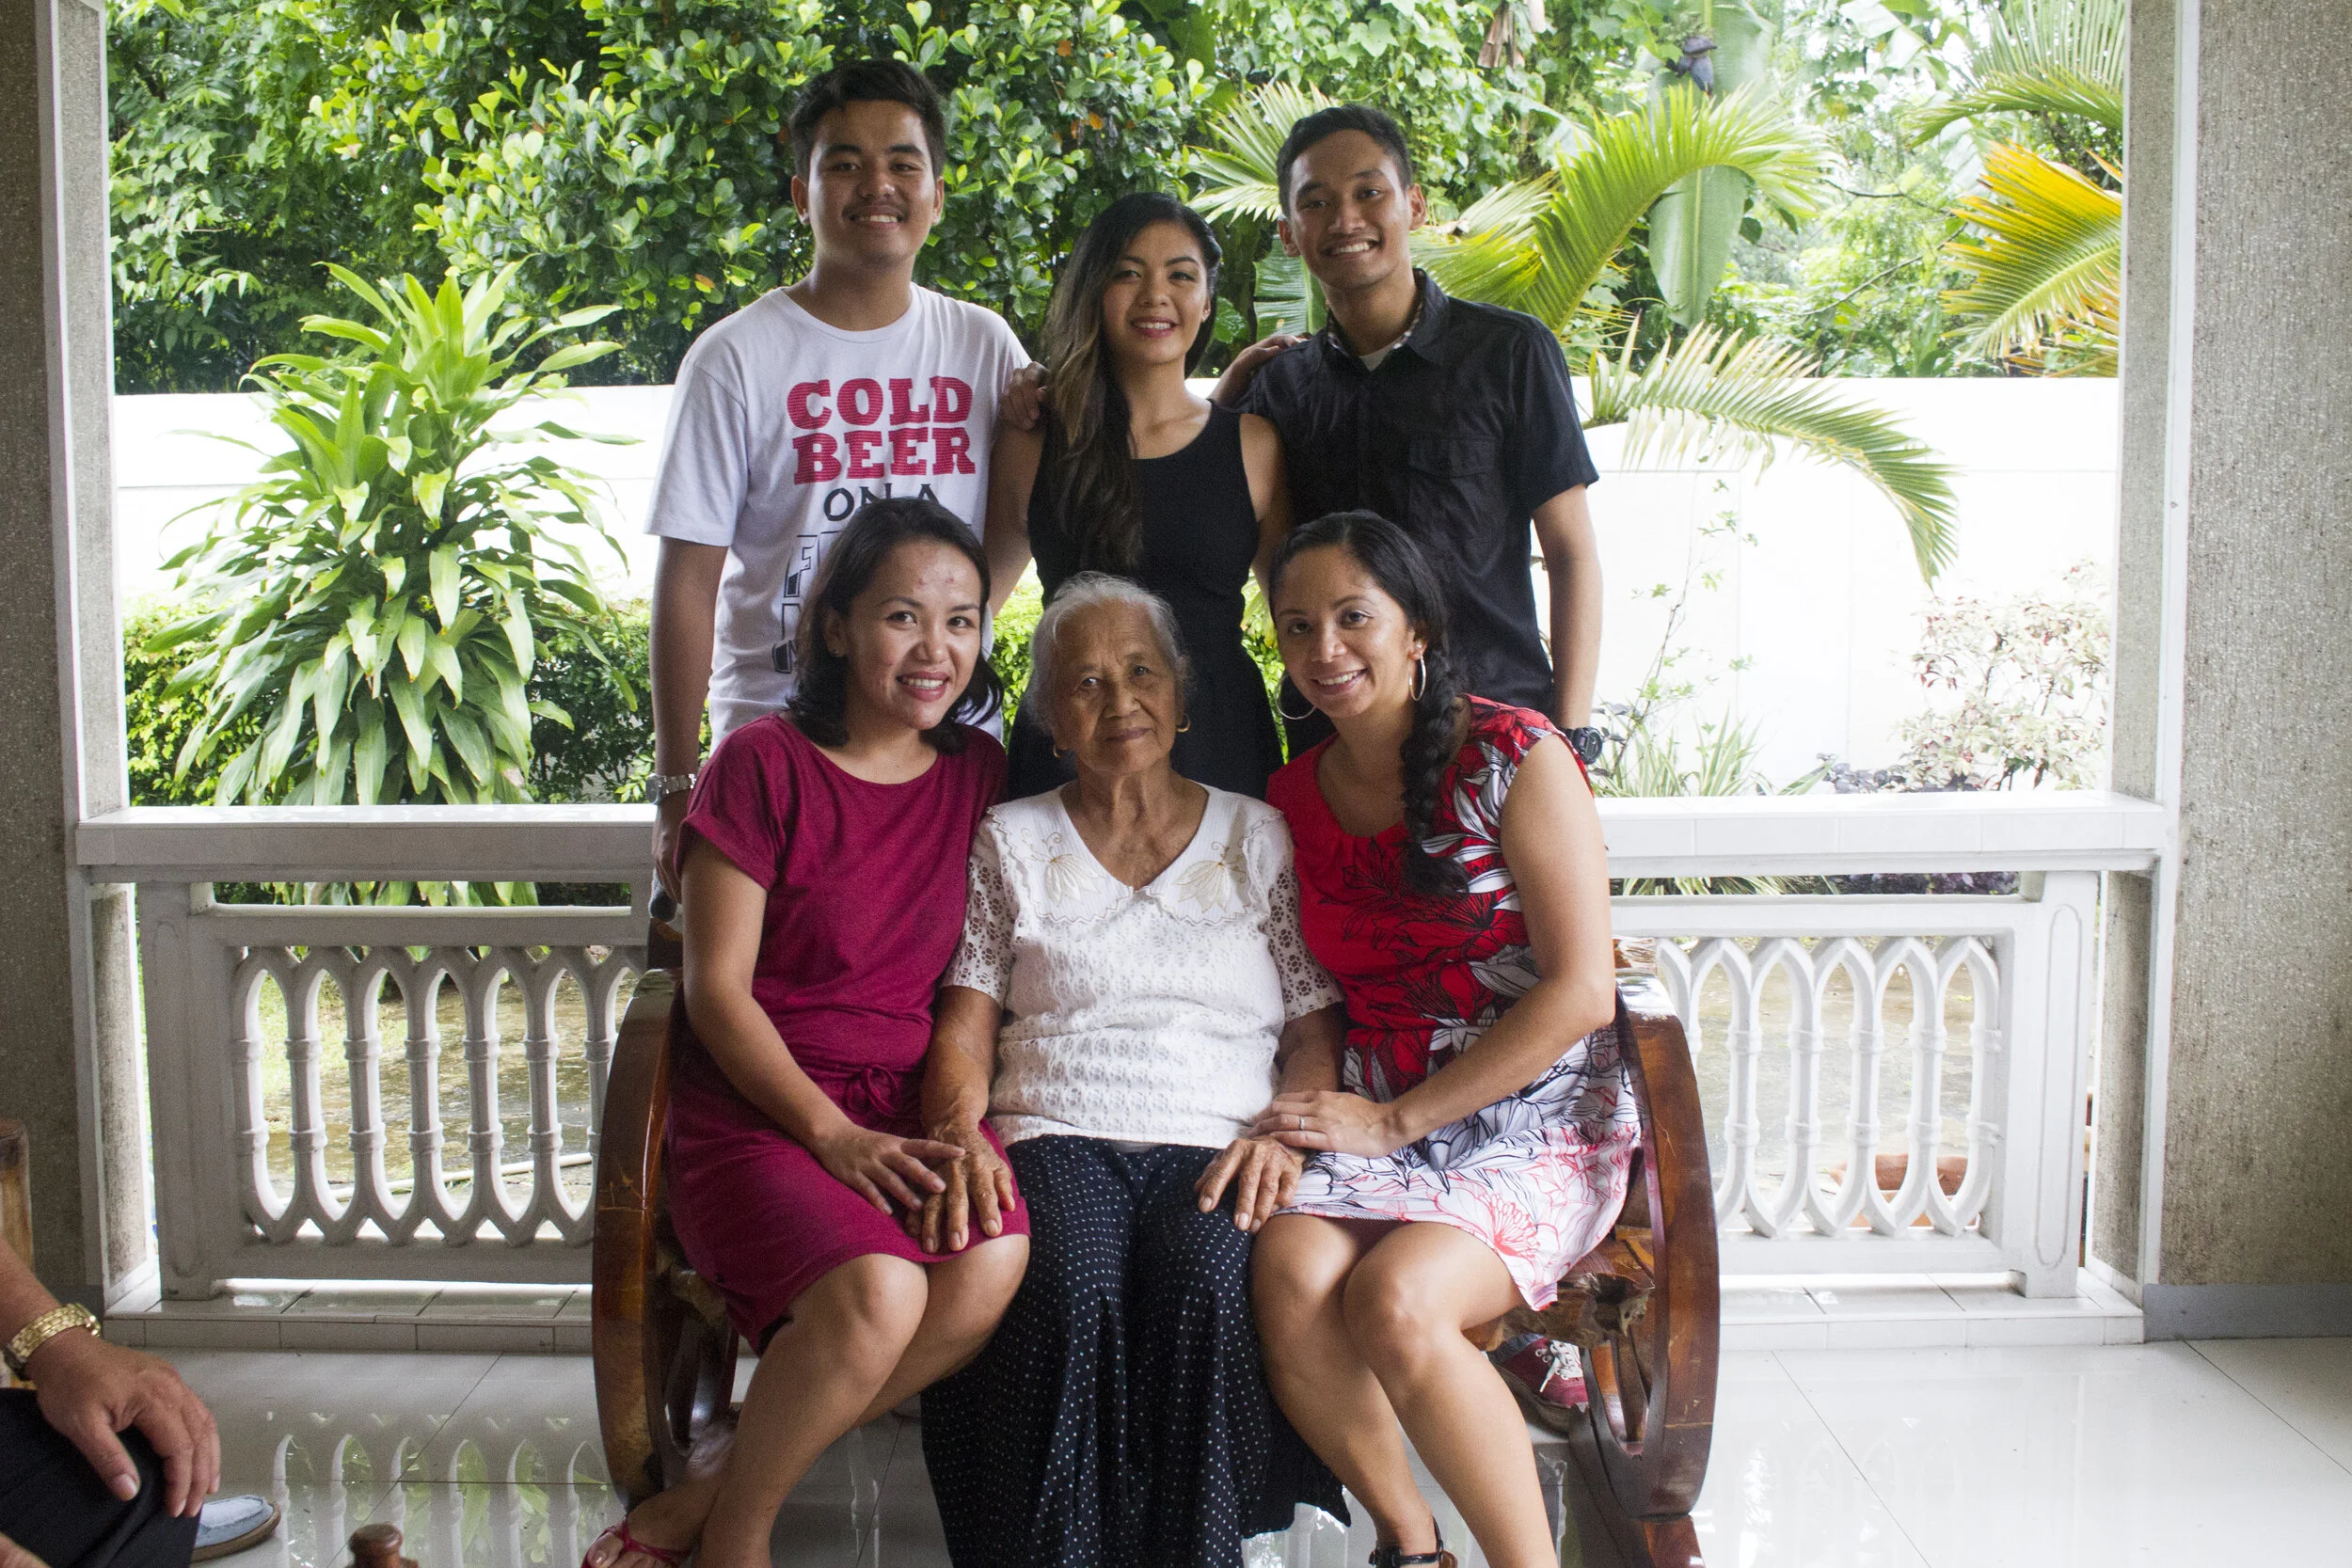
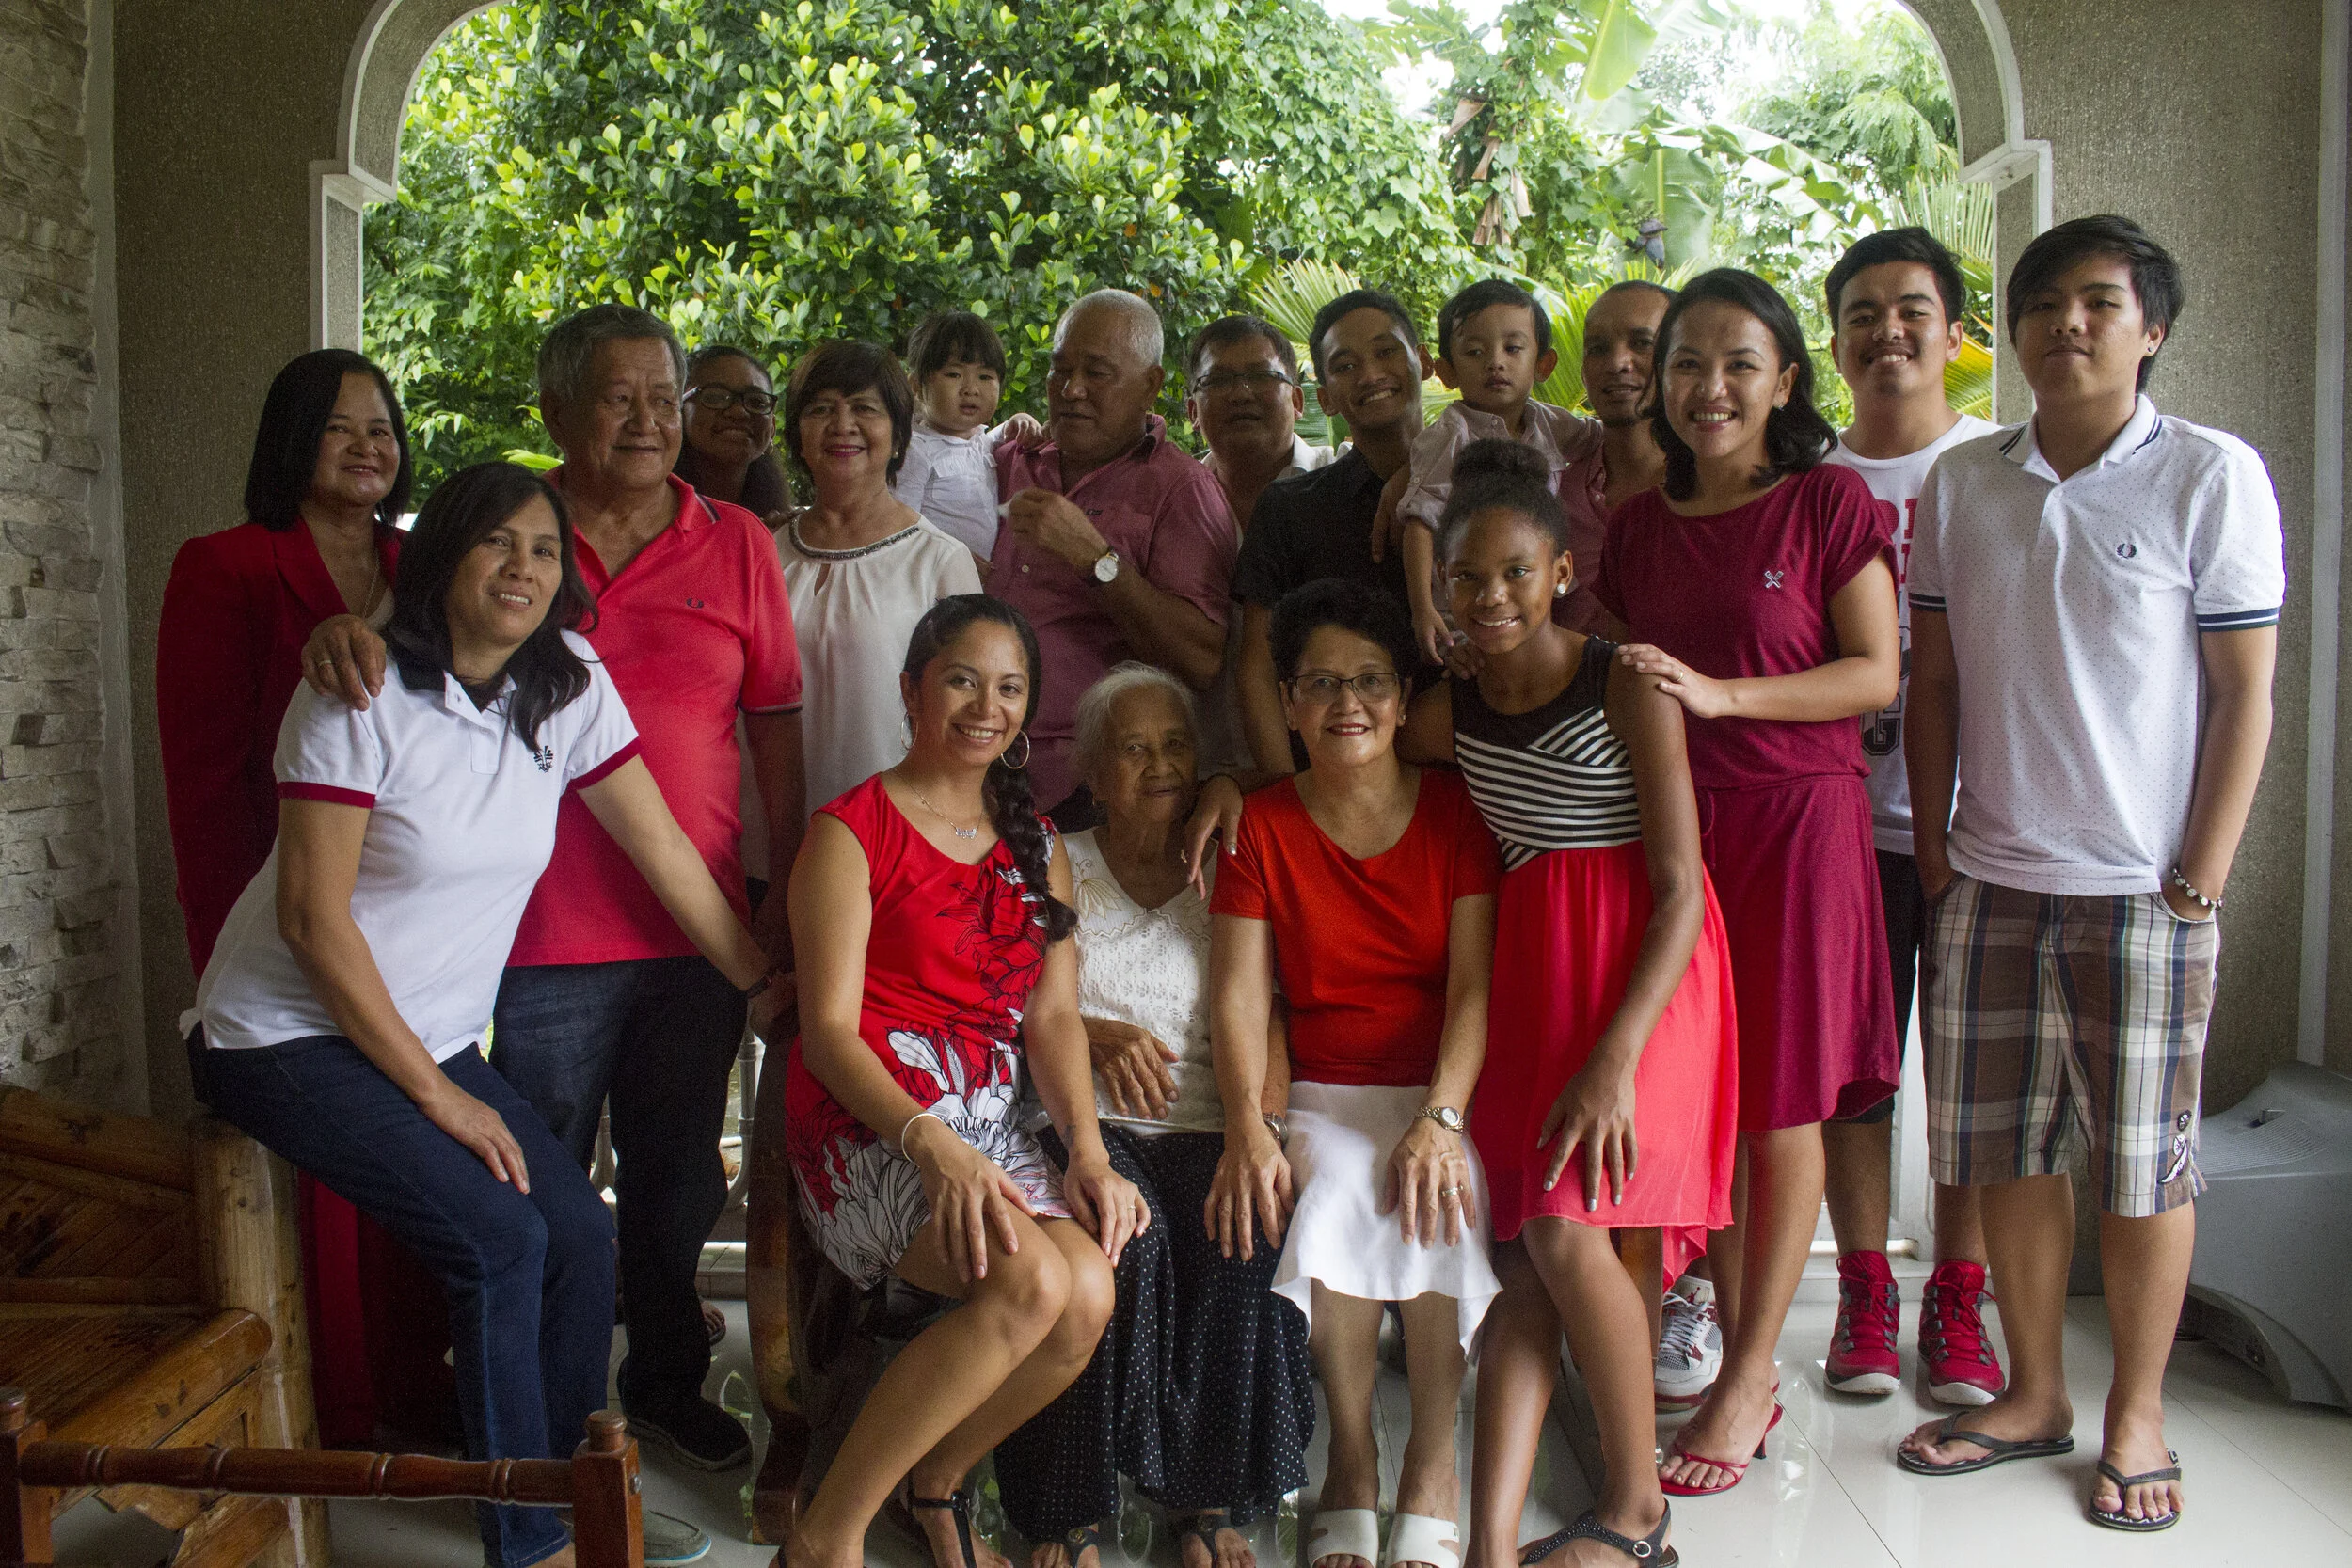
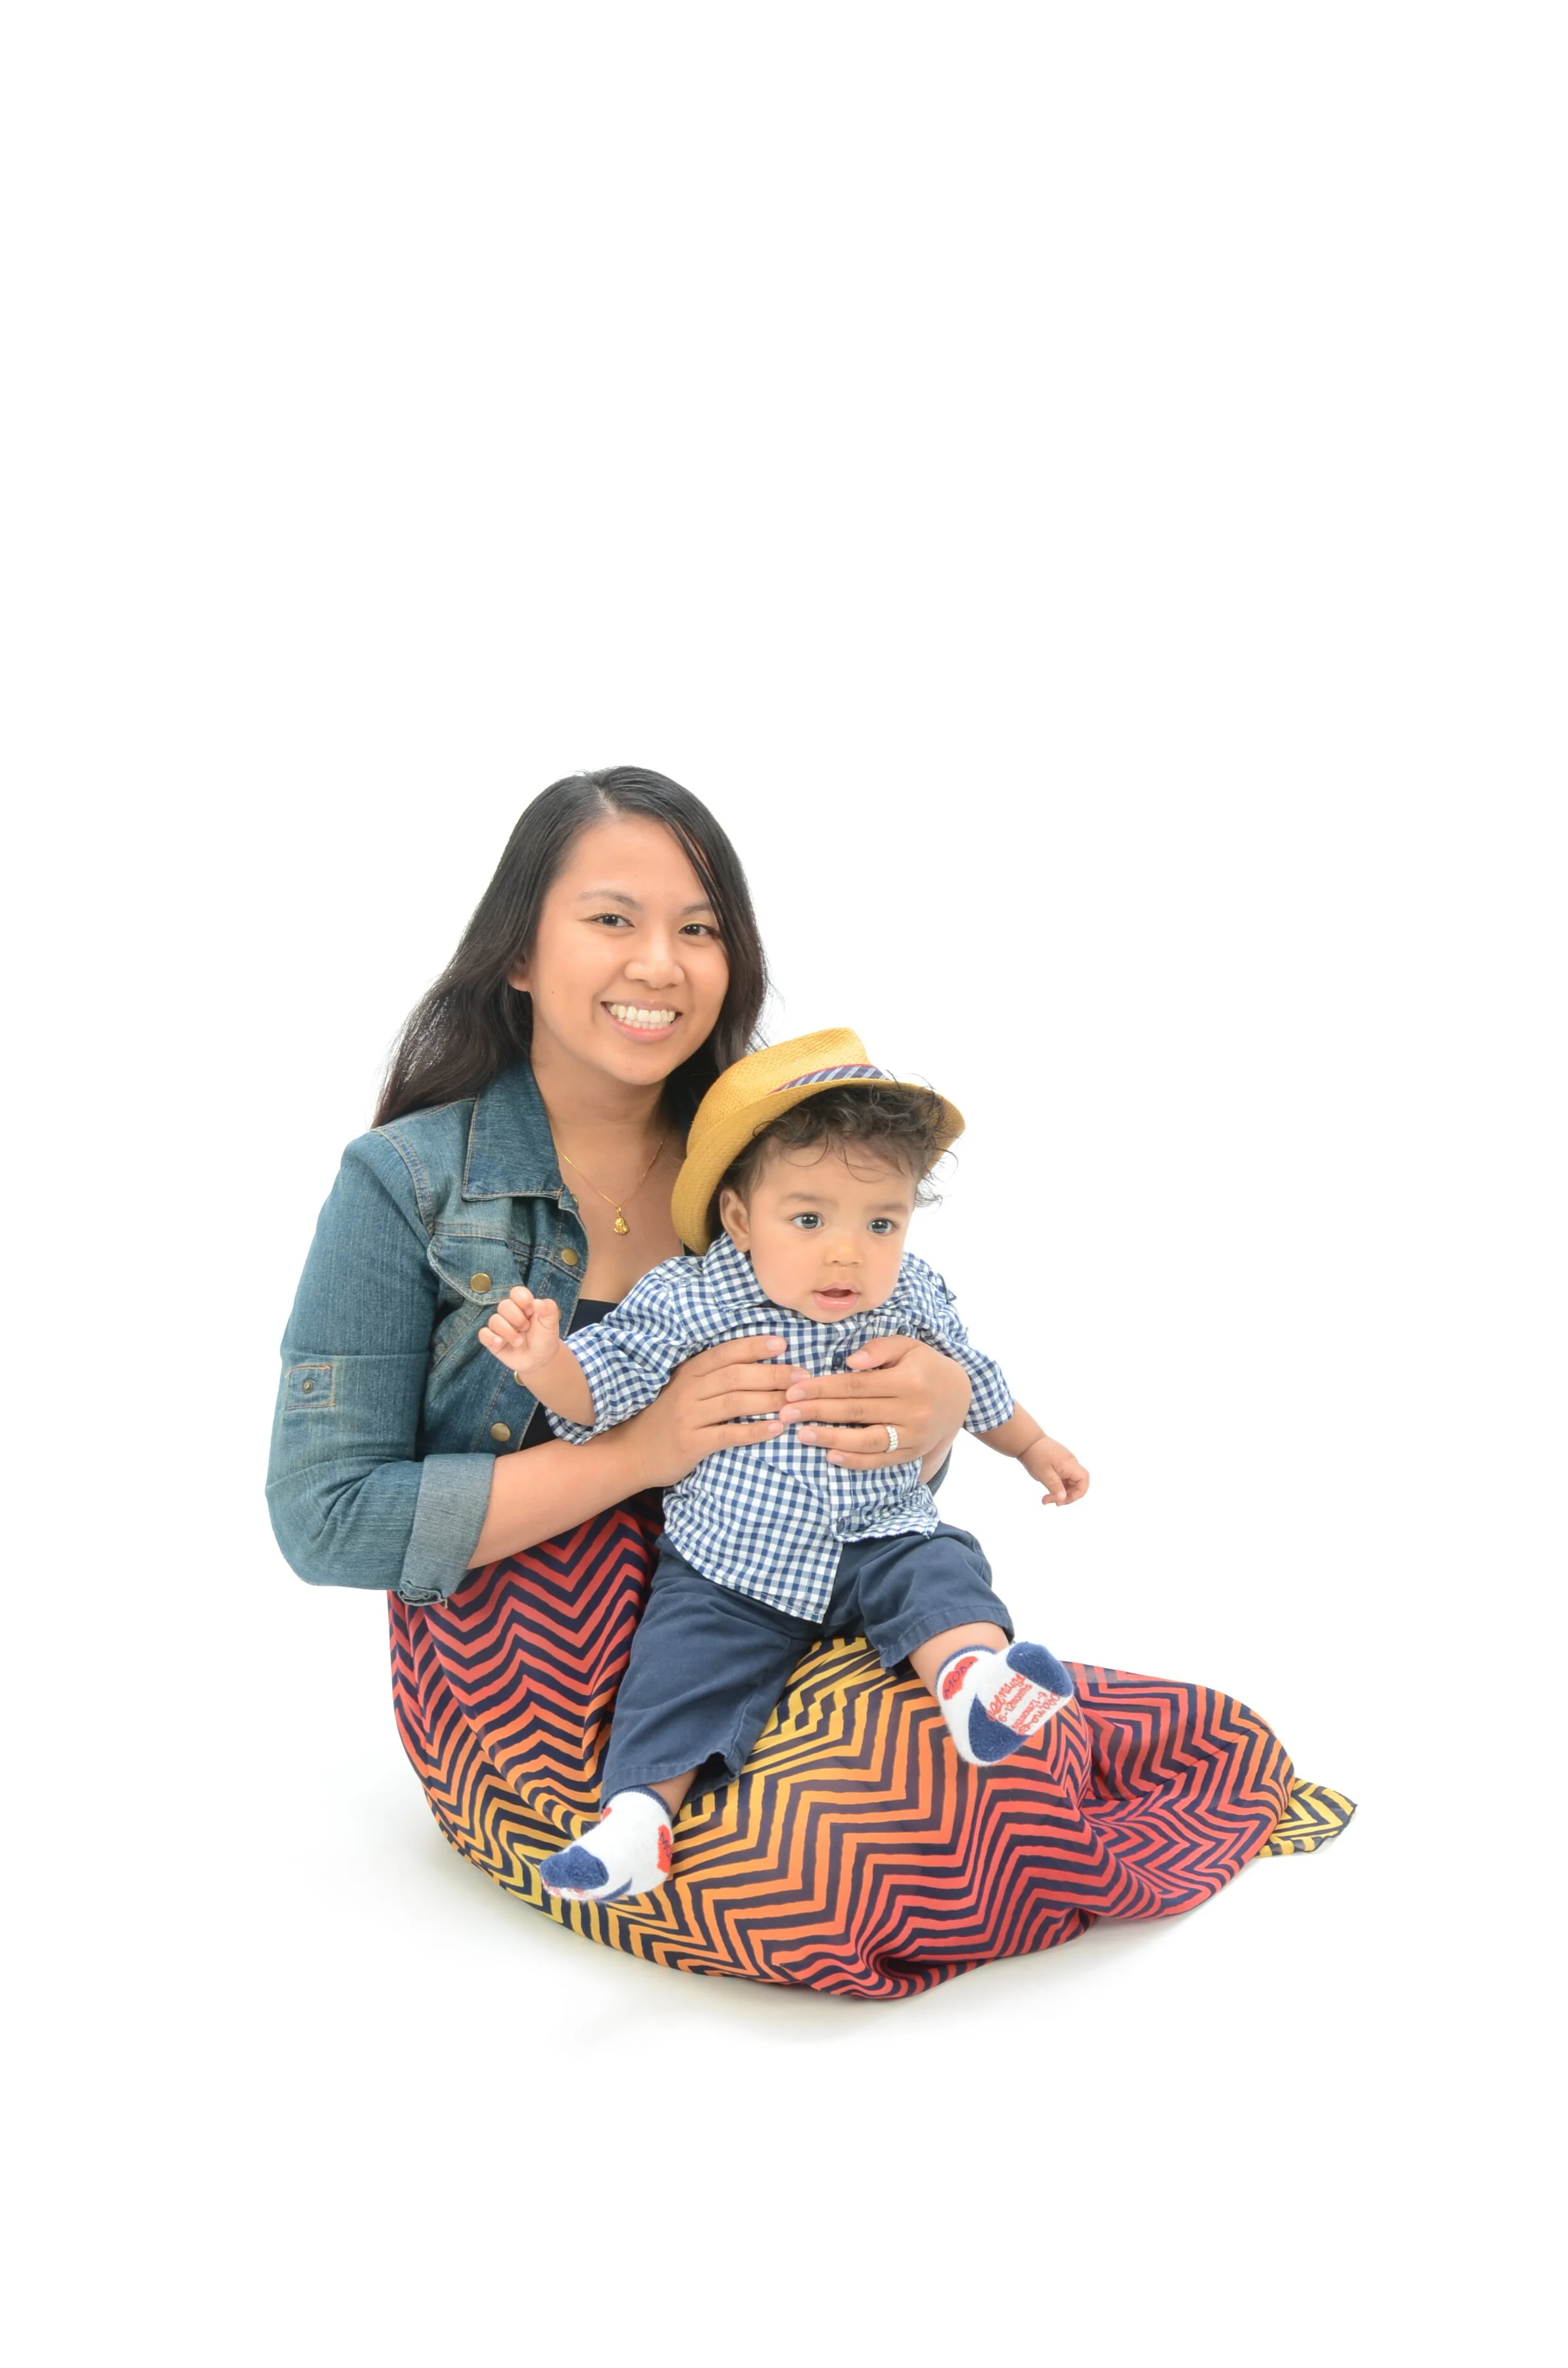
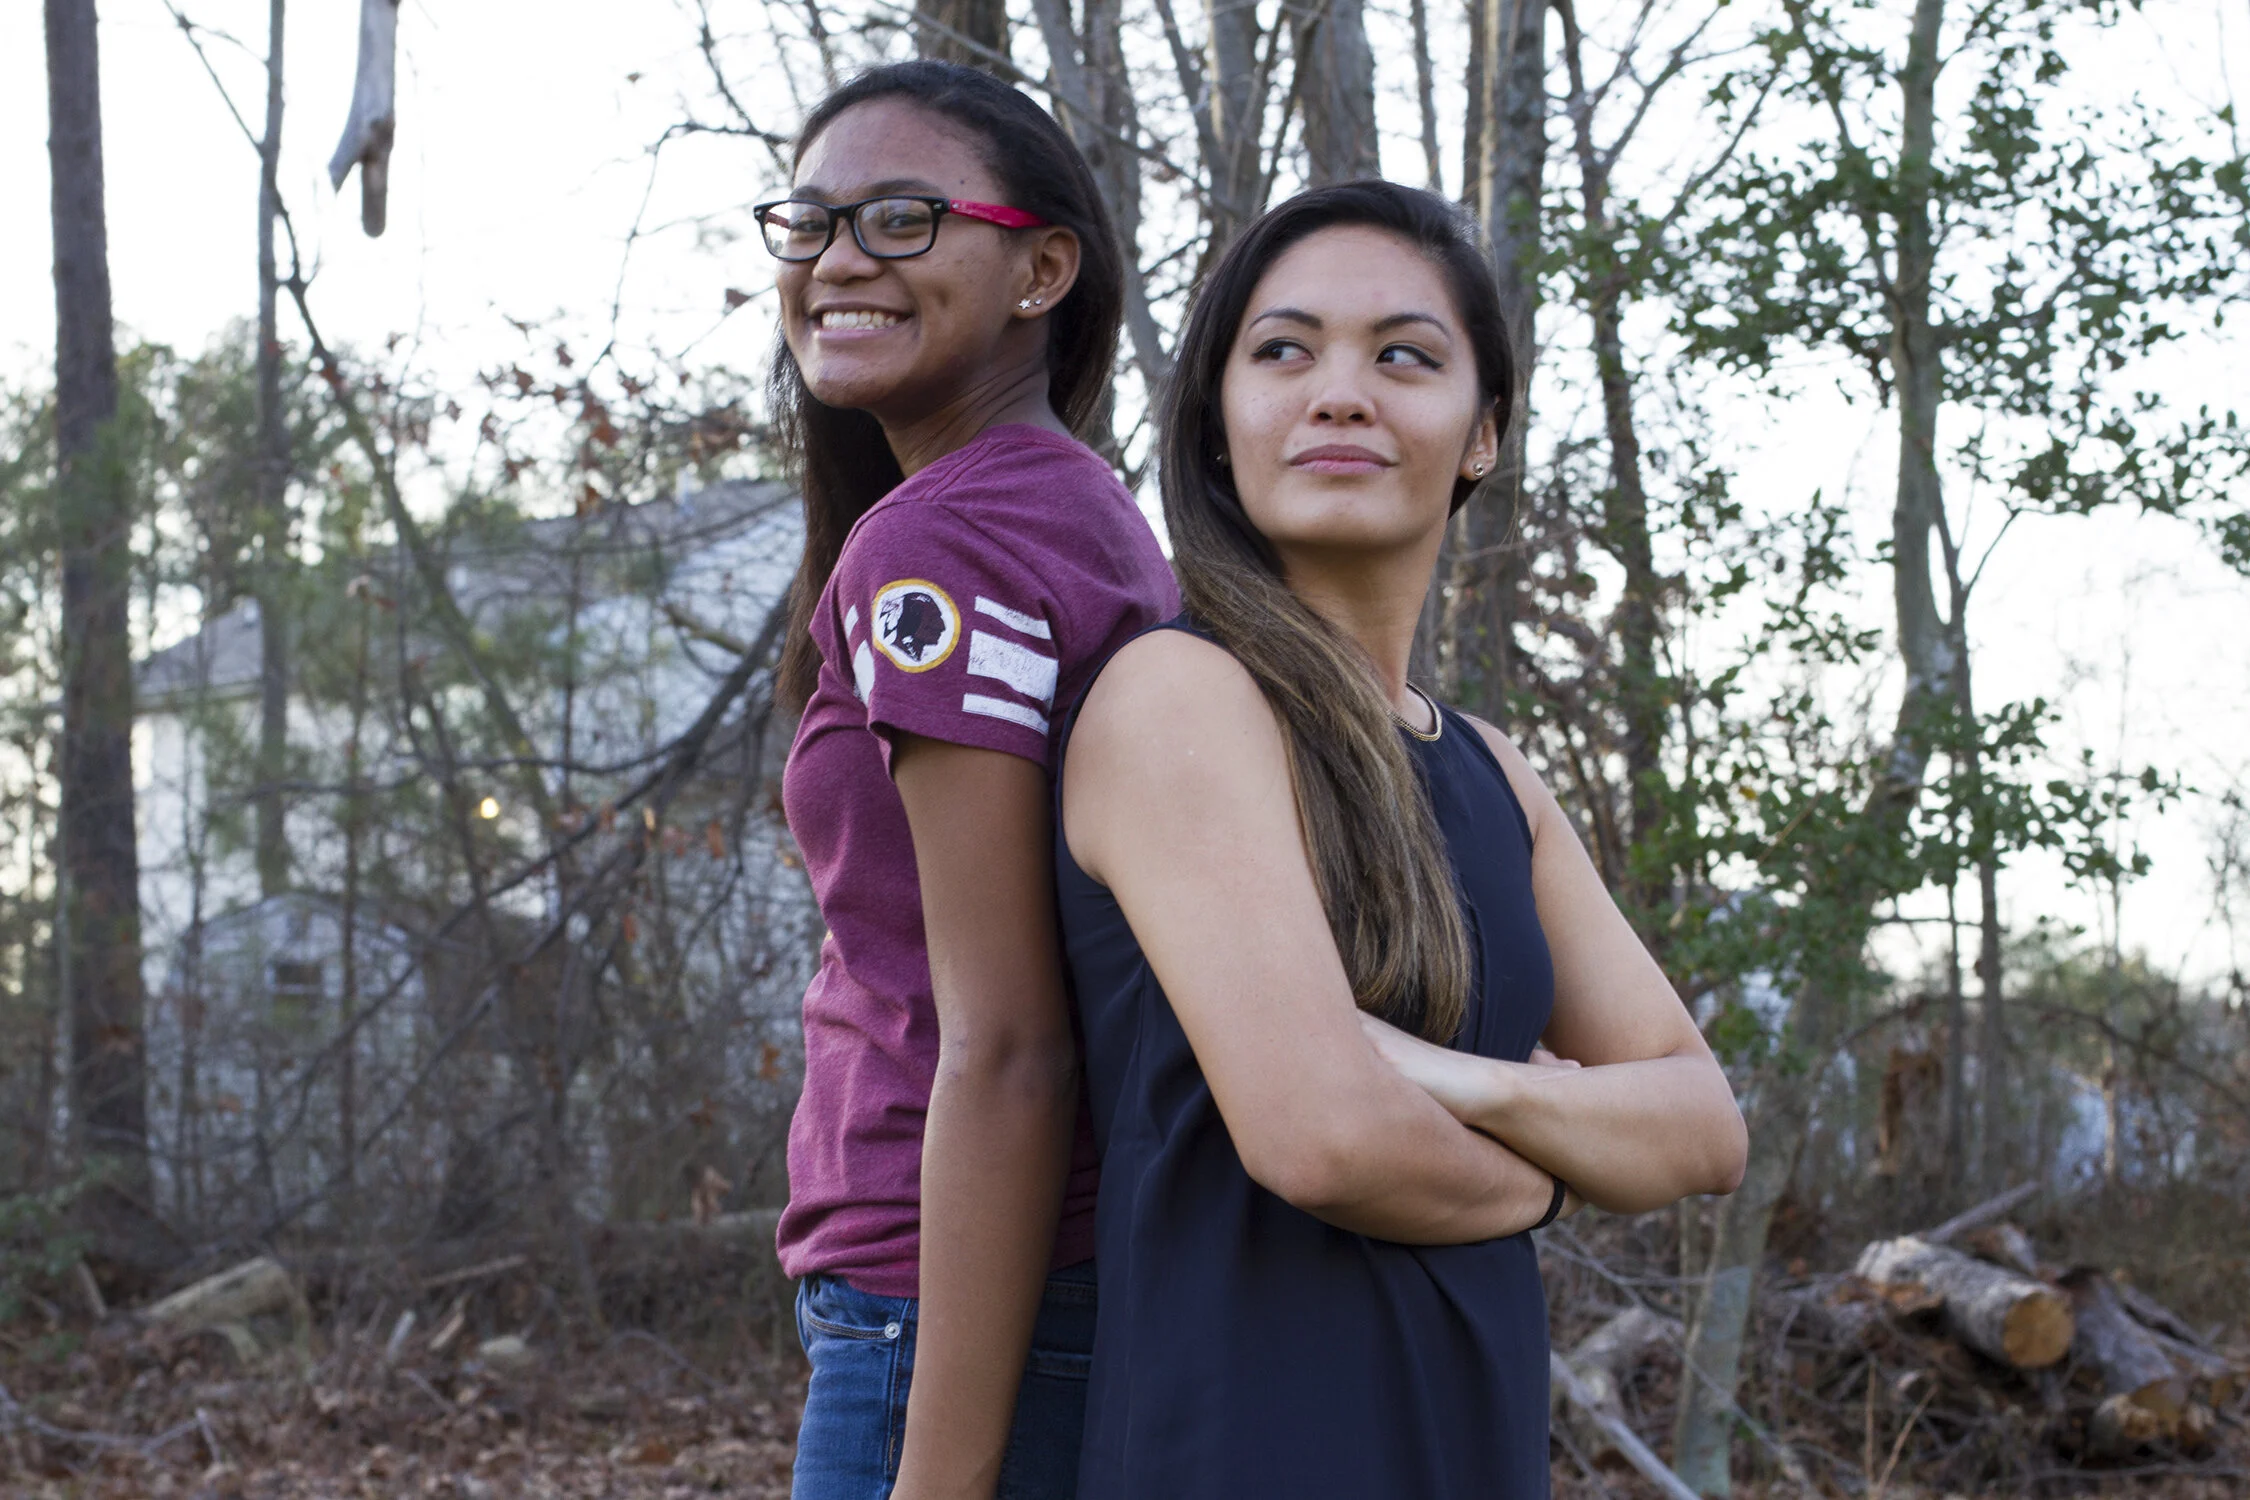
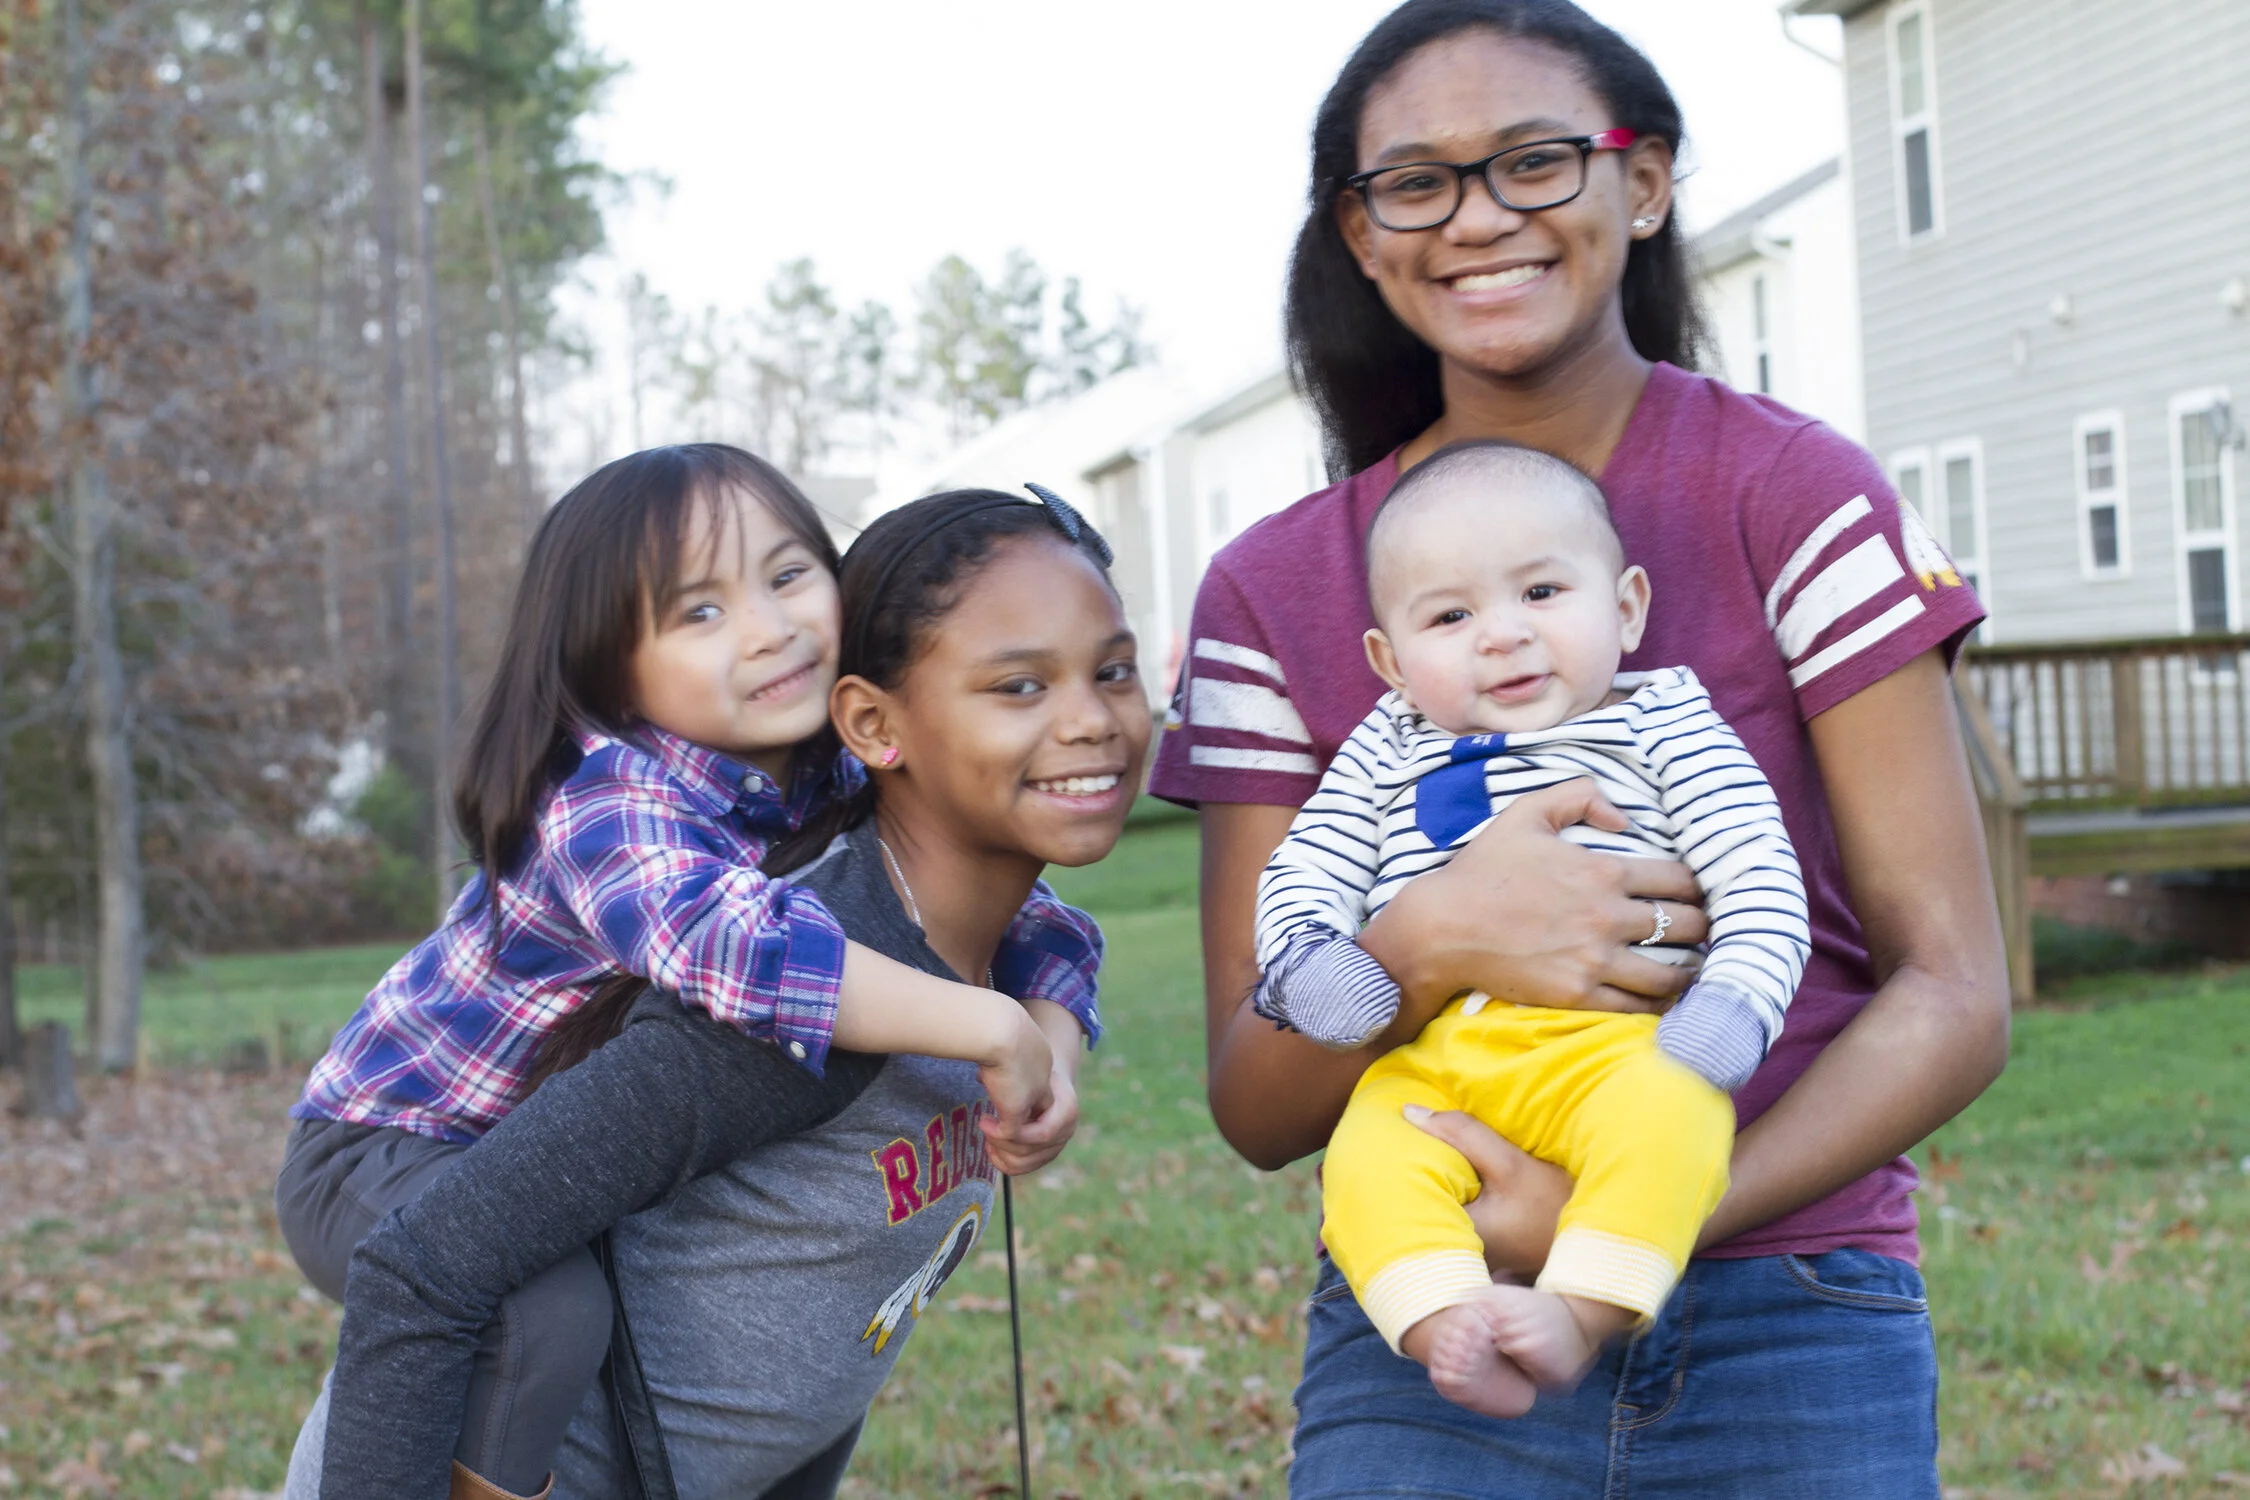
The side of this internal dilemma fighting to keep the pregnancy was feeling pressure from not only my own biological clock, but the thought of time Joe and I have left with our parents. My dad passed away in 2014. At that time, he only had 3 grandchildren with the first born in 2001. From the time of his passing up until today, there has been nearly 1 new grandchild born per a year giving us a total of 12 grandchildren (not including our pregnancy). I’ve often thought about how happy my dad would have been to meet everyone and how I want our kids to have a chance to get to know their grandparents.

Although we found out about this pregnancy on November 15, 2024, we limited how many people we shared the news with because we knew it wouldn’t be long before an influx of questions, requests, and advice started flooding in. Everyone would tell us how great of parents were were going to be and couldn’t wait for us to have kids. So the last thing I wanted to do was attend to other people’s questions and comments while we were still trying to figure out if we wanted to keep it or not. Admittedly even now, I sometimes find it hard to fantasize about life with kids in the future while not mourning the additional childless years I had imagined for myself.

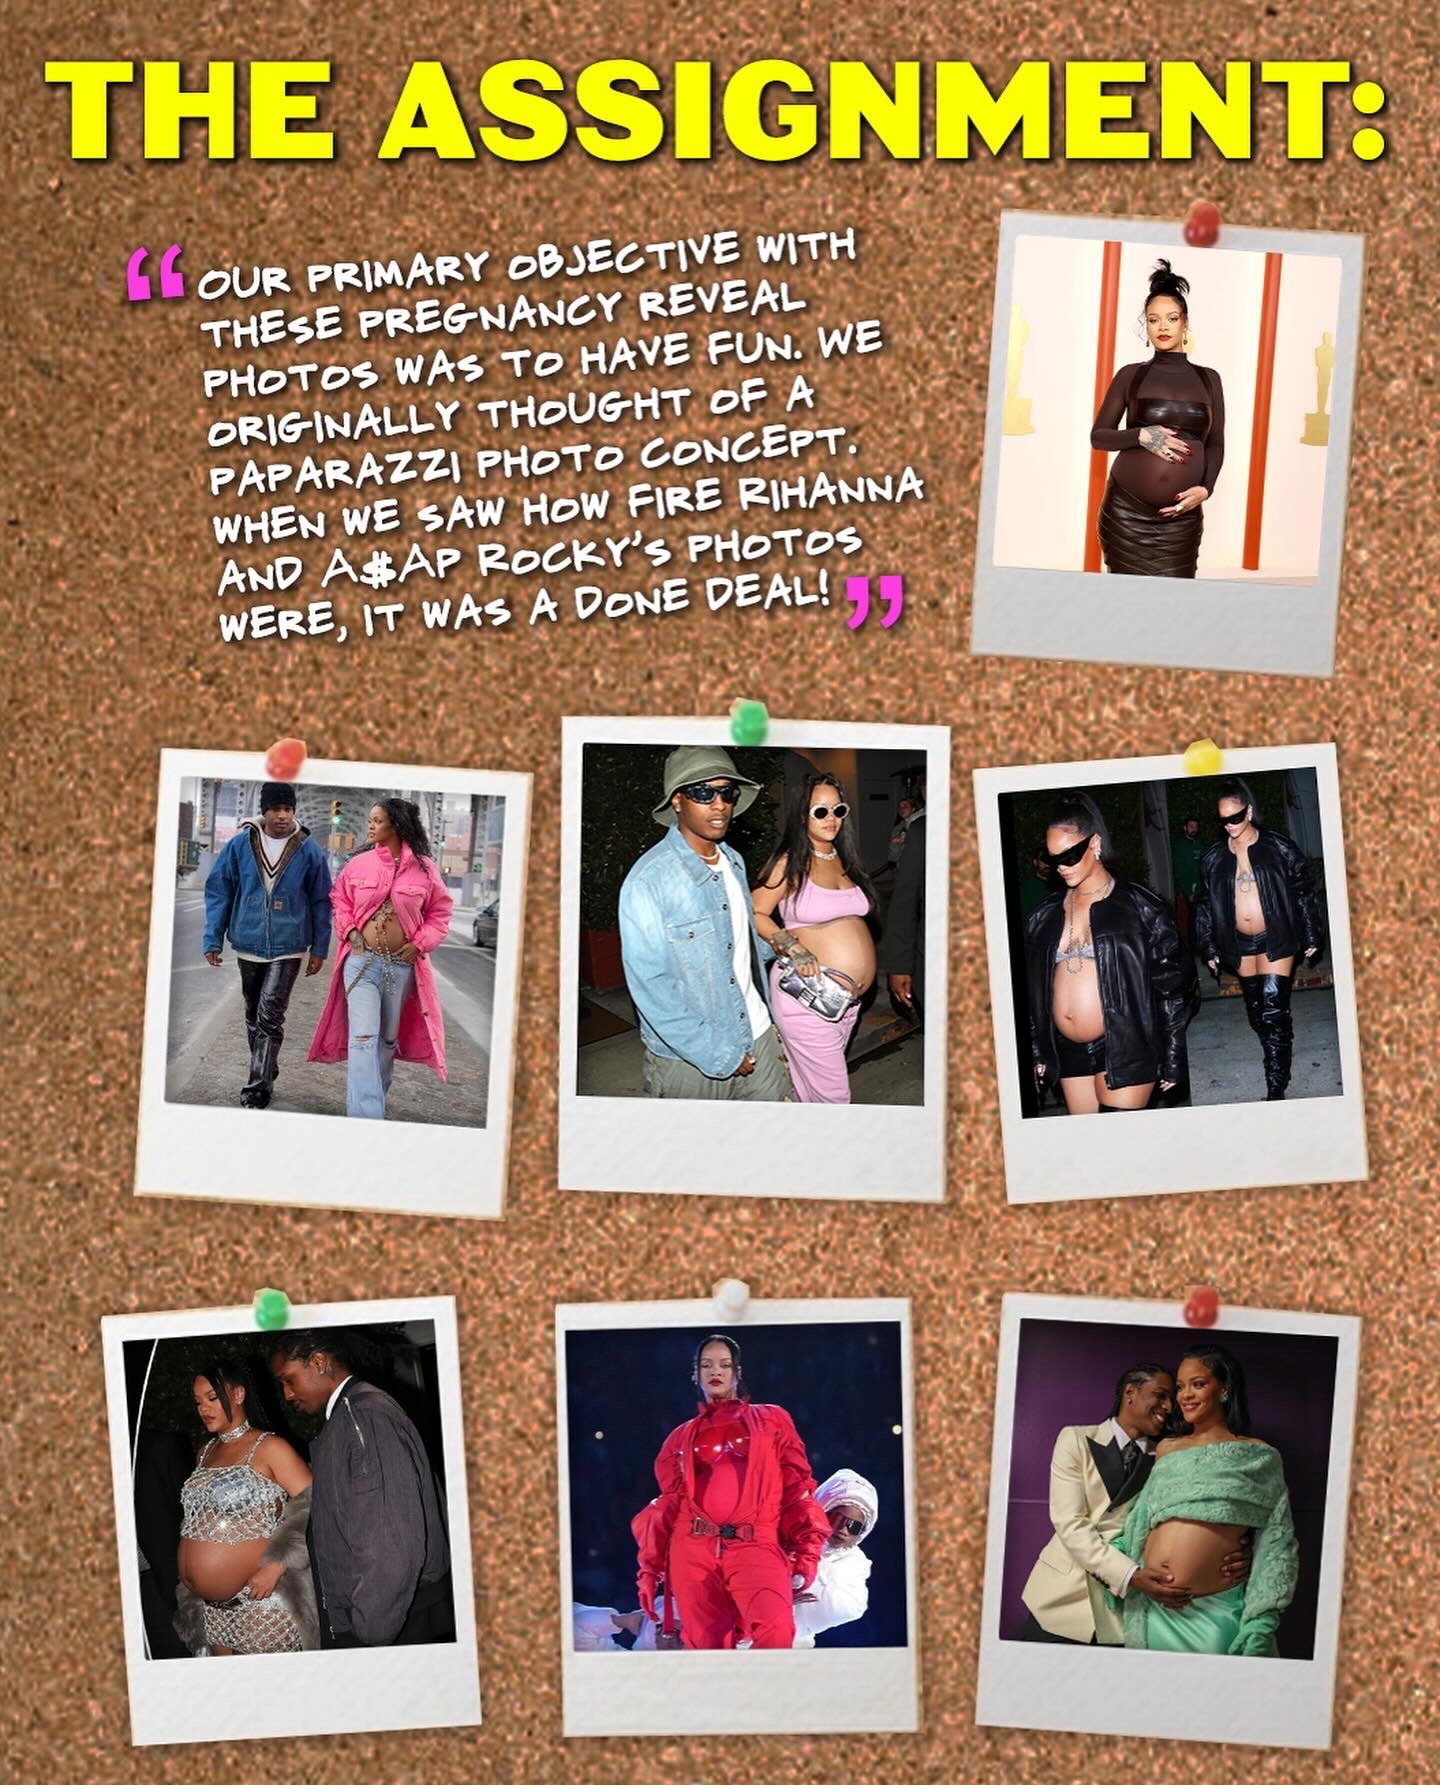
As we started sharing the news, the commentary, touching of my belly, requests for photos of my belly started pouring in as expected and it all felt so suffocating. Everyone was ecstatic, curious, and celebrating and I was doing my best to join the party. Thus the paparazzi reveal concept was born…

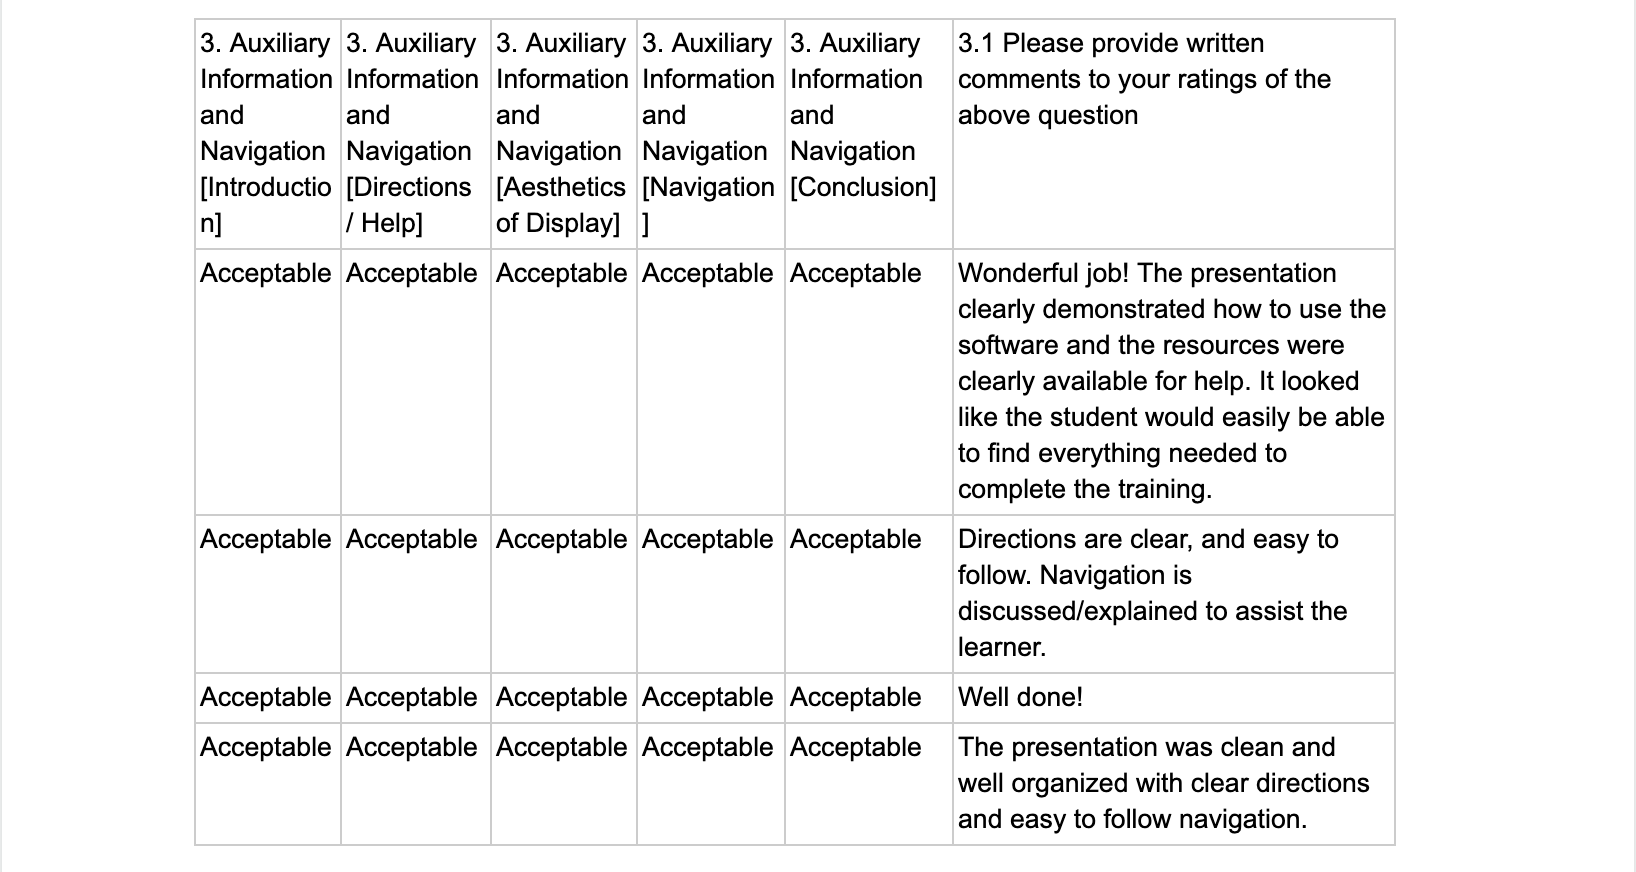
The Paparazzi Concept

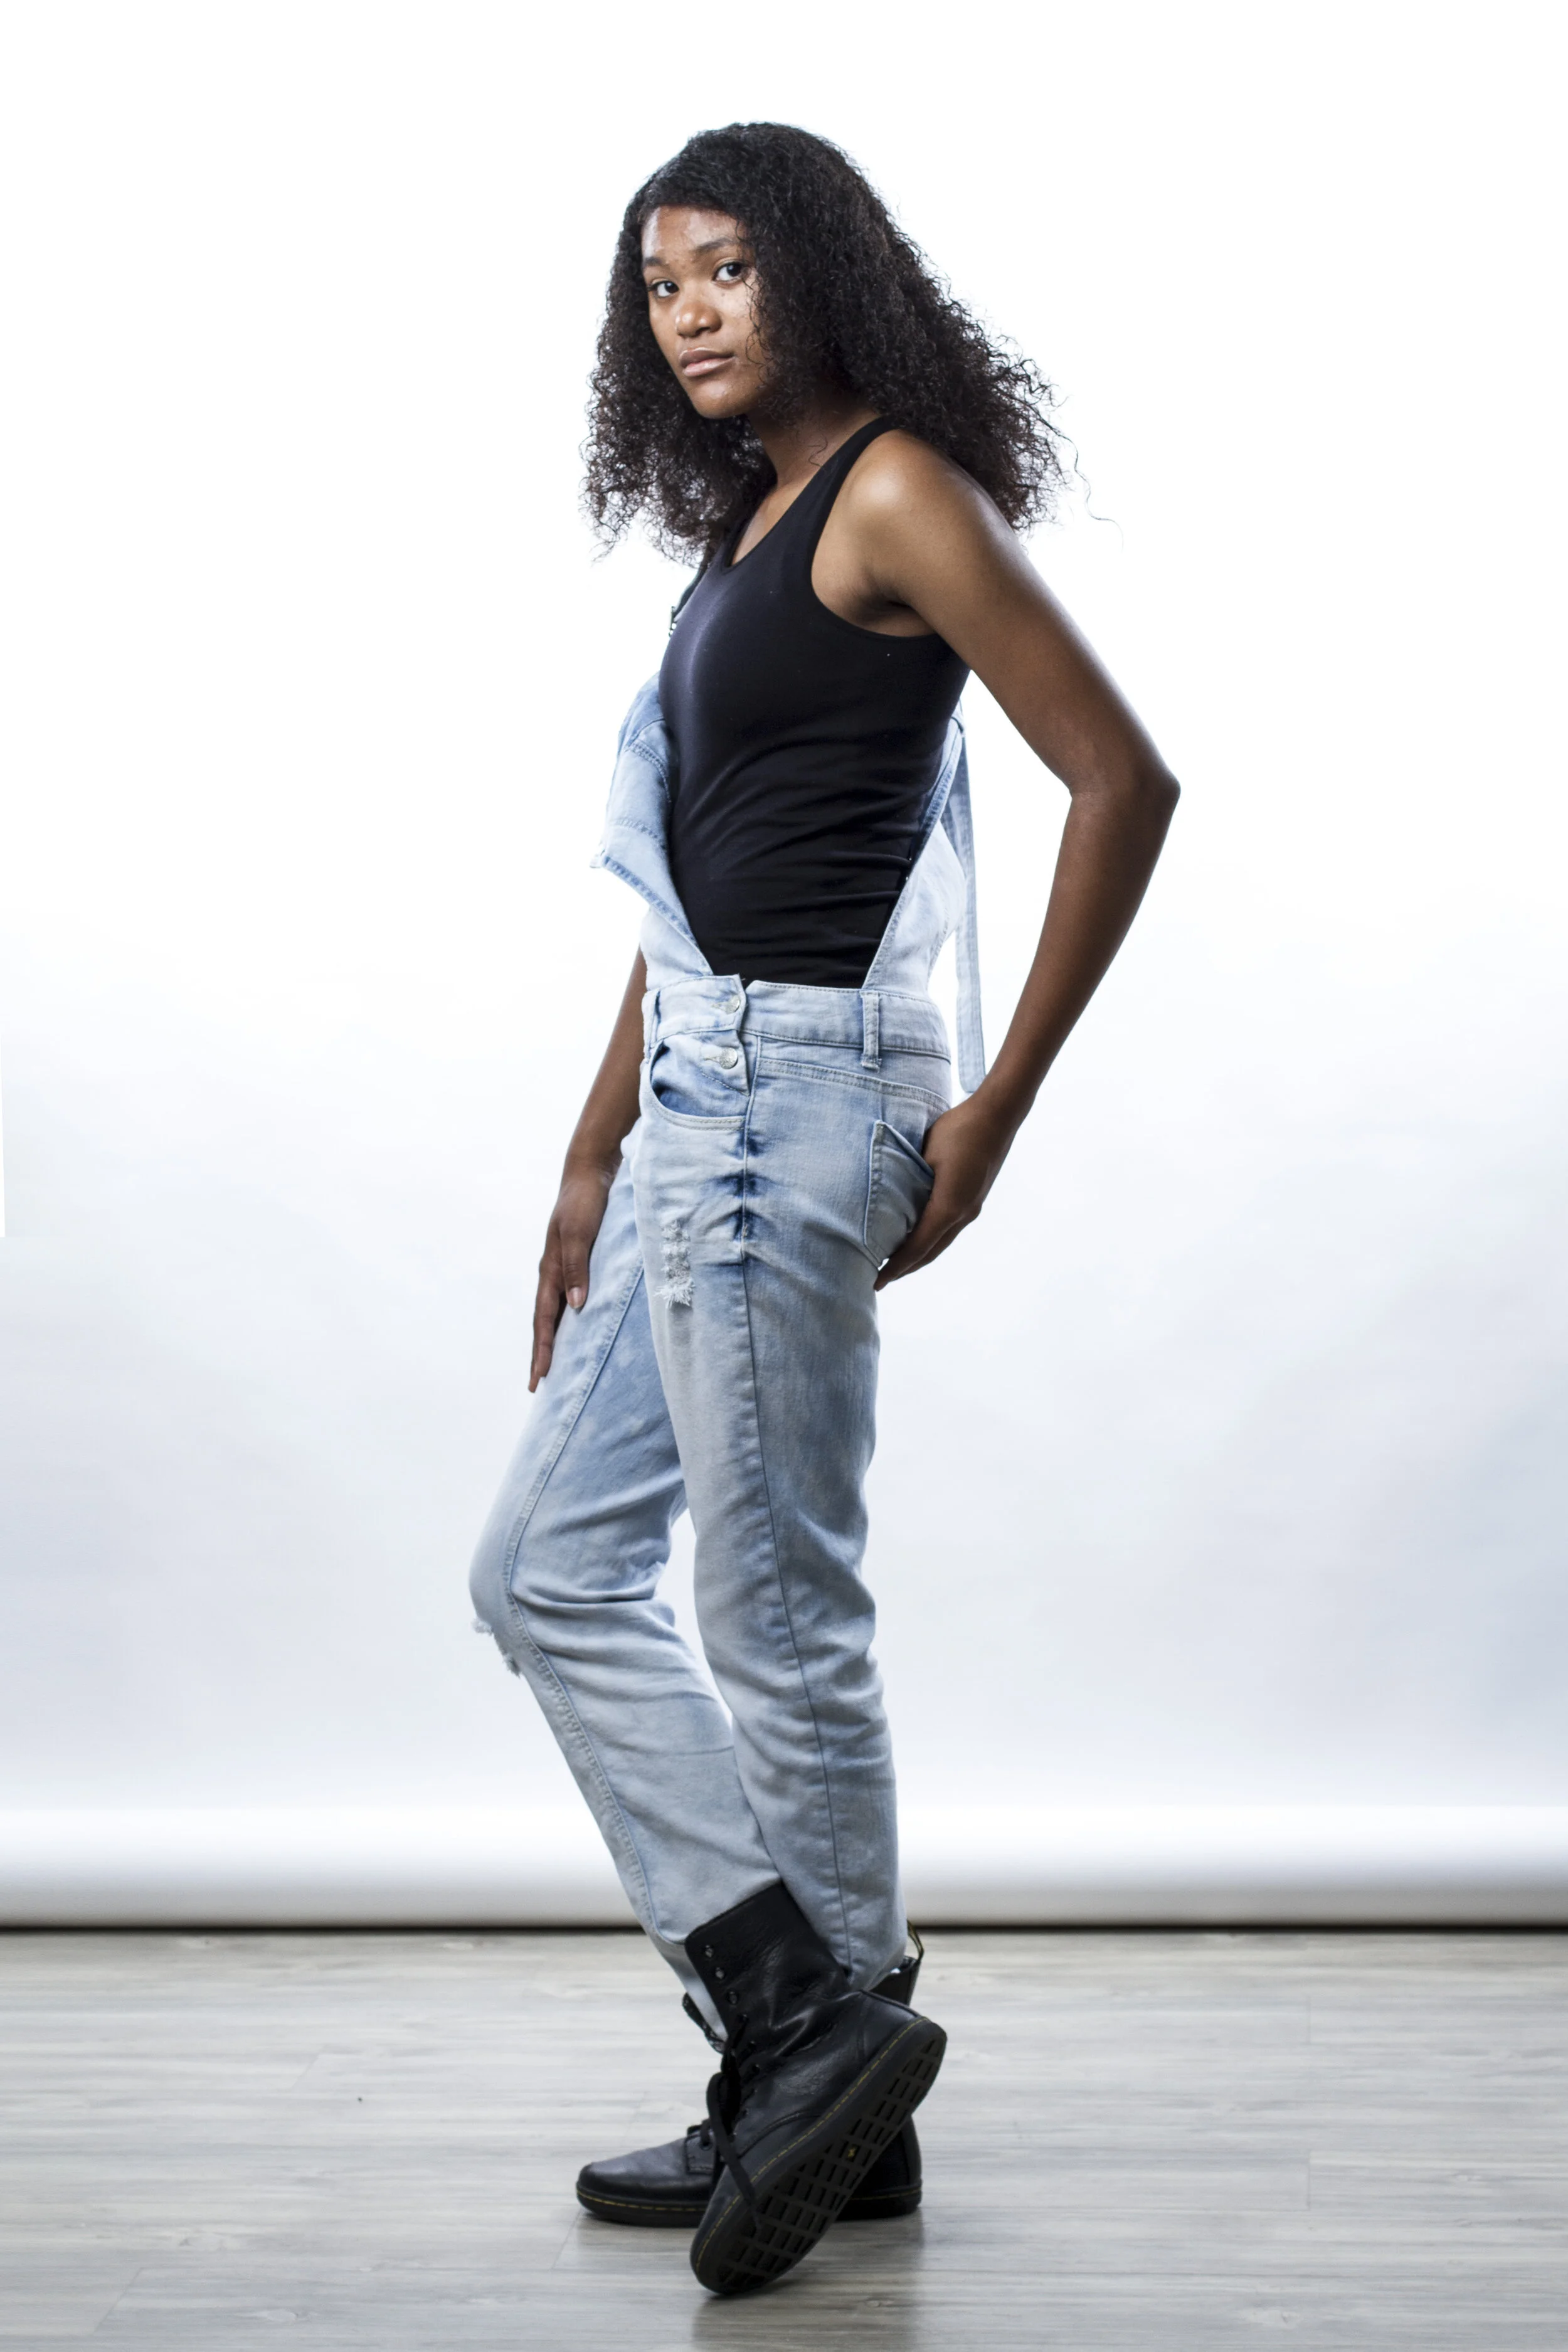
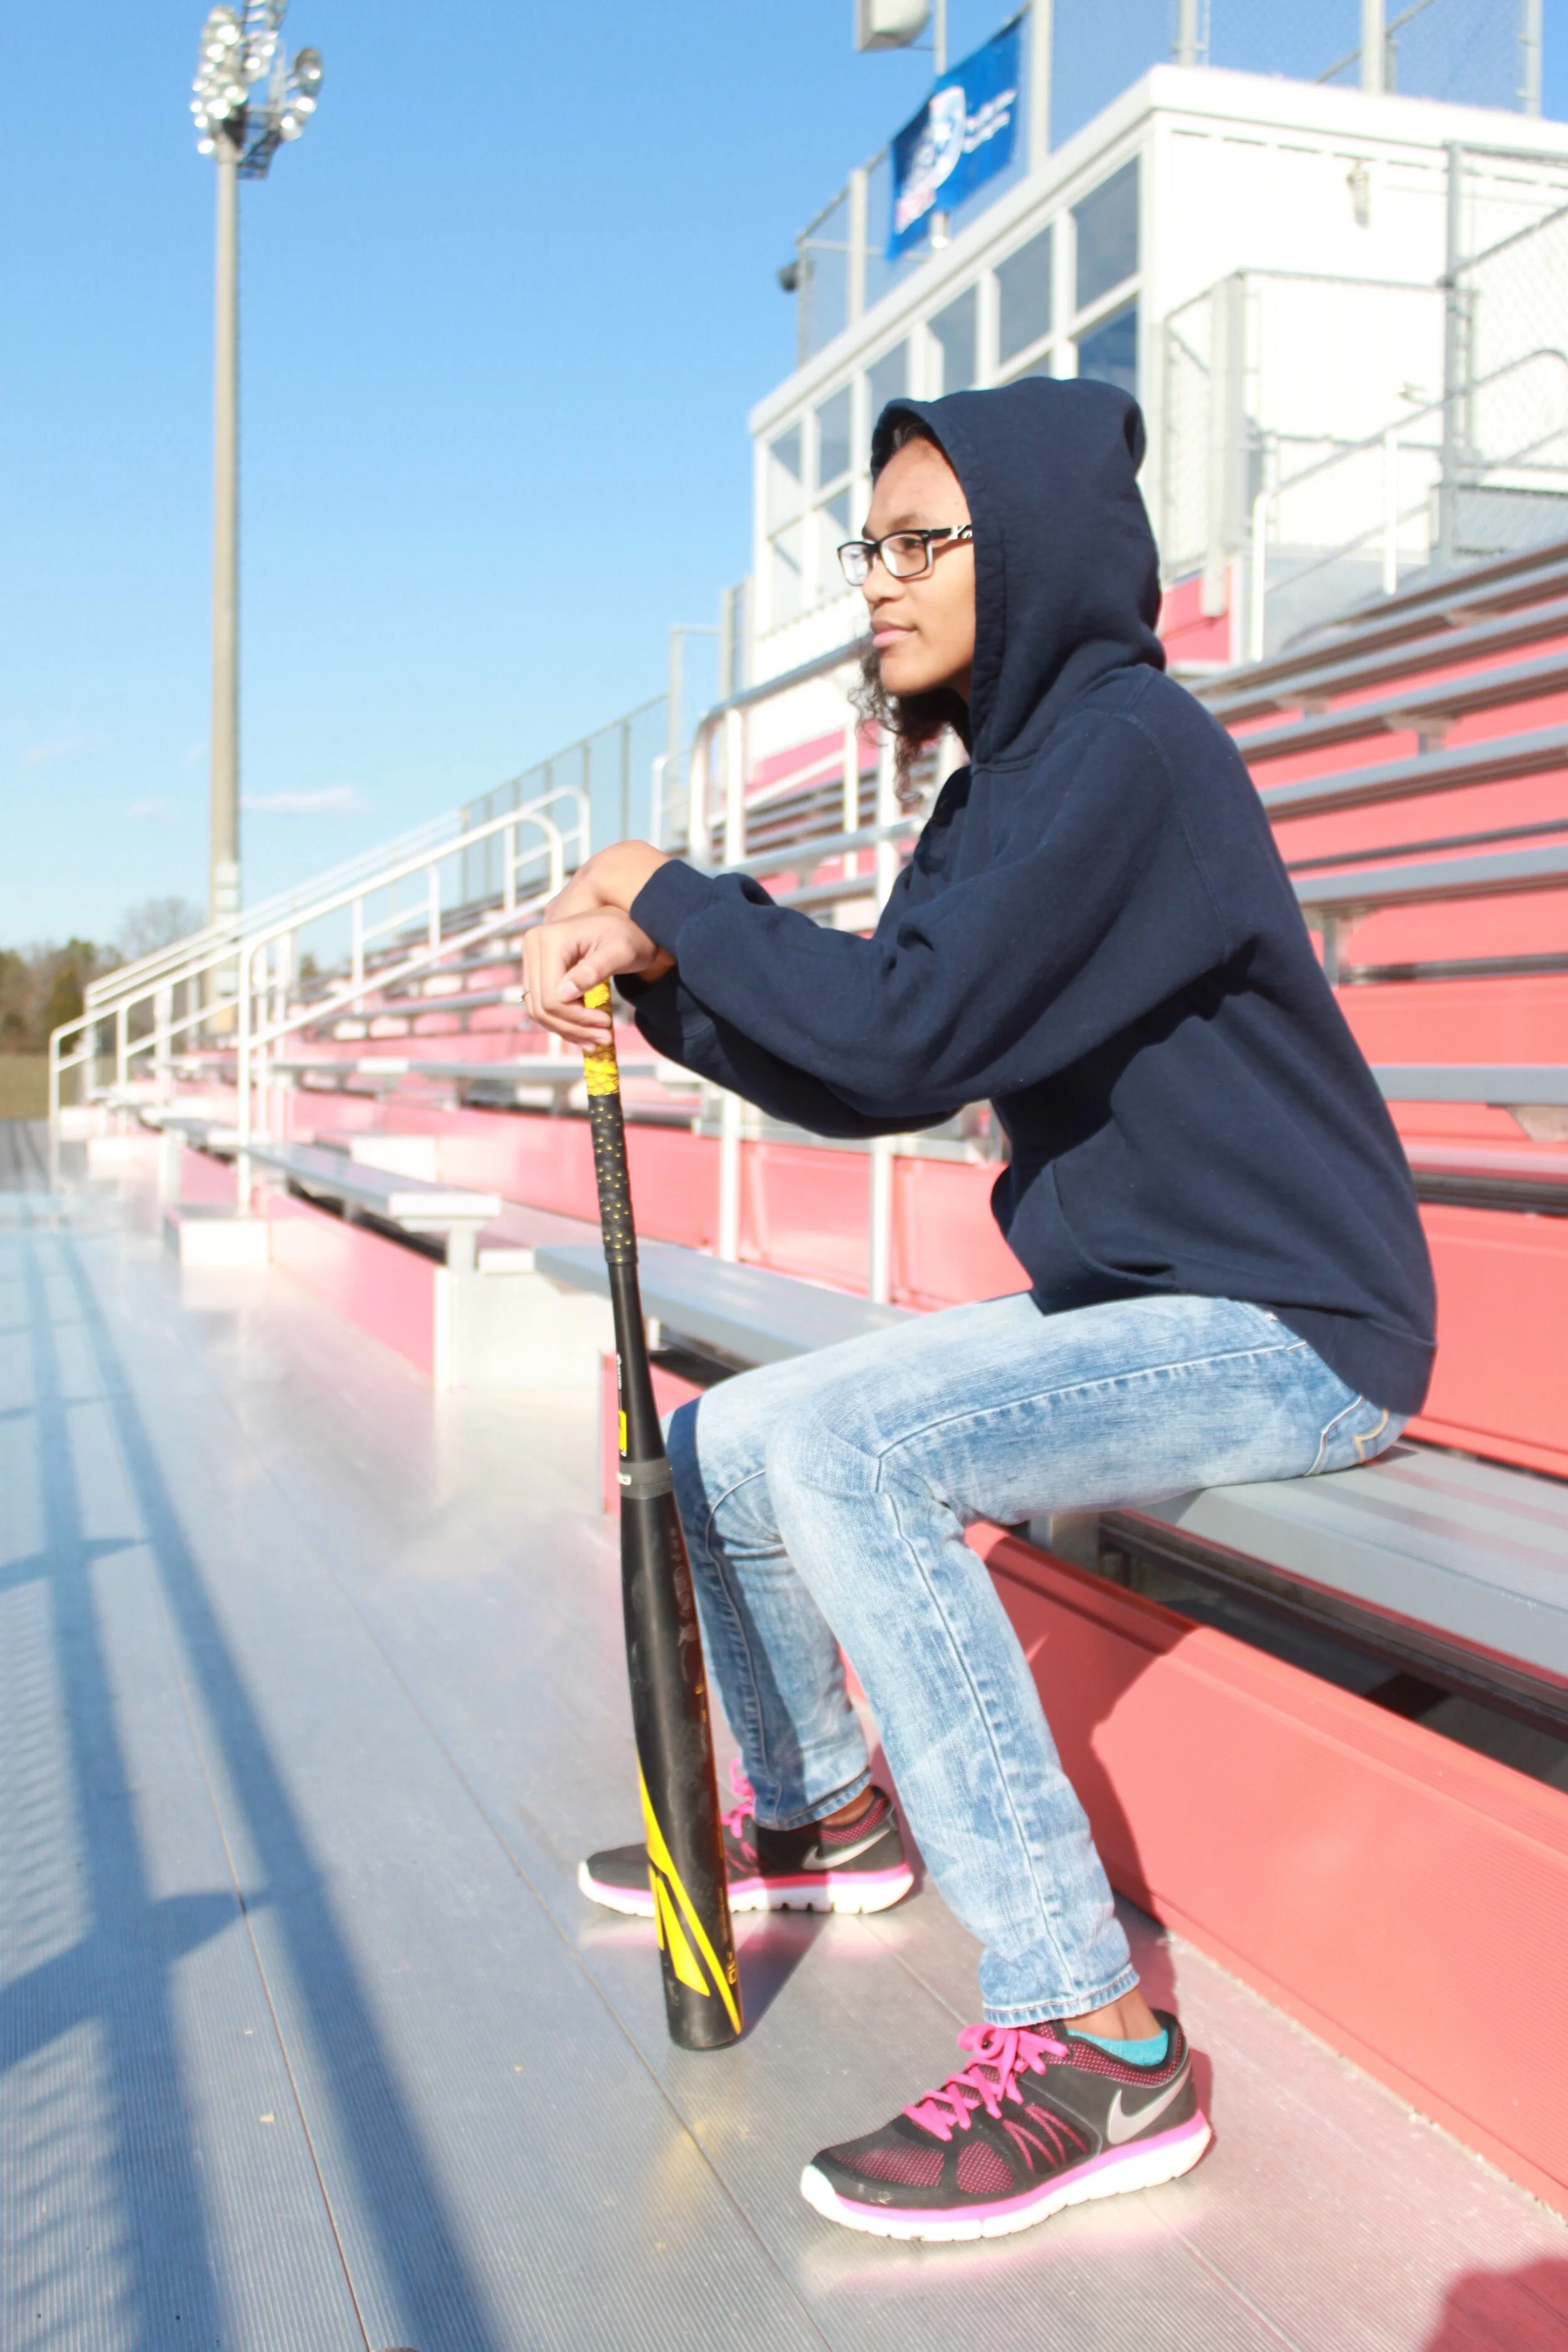
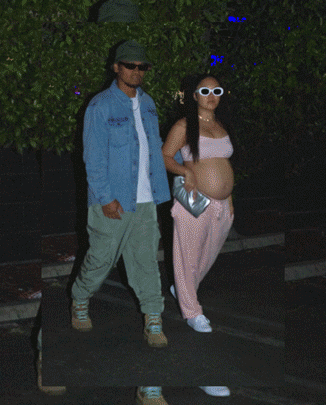
Living in Los Angeles and working in entertainment, coupled with the fact that everyone kept asking me for belly photos, led us to the idea of doing paparazzi style photos. So I googled pregnant paparazzi photos and came across a spread of Rihanna and A$AP Rocky. Per usual, they were dressed so fly and from then on it was a wrap. Here are the photos we initially drew inspiration from:

Sourcing Outfits

I would have done all those outfits if we had the budget. I don’t shop for clothes that often anymore so sourcing the outfits was probably one of my favorite parts of this project.

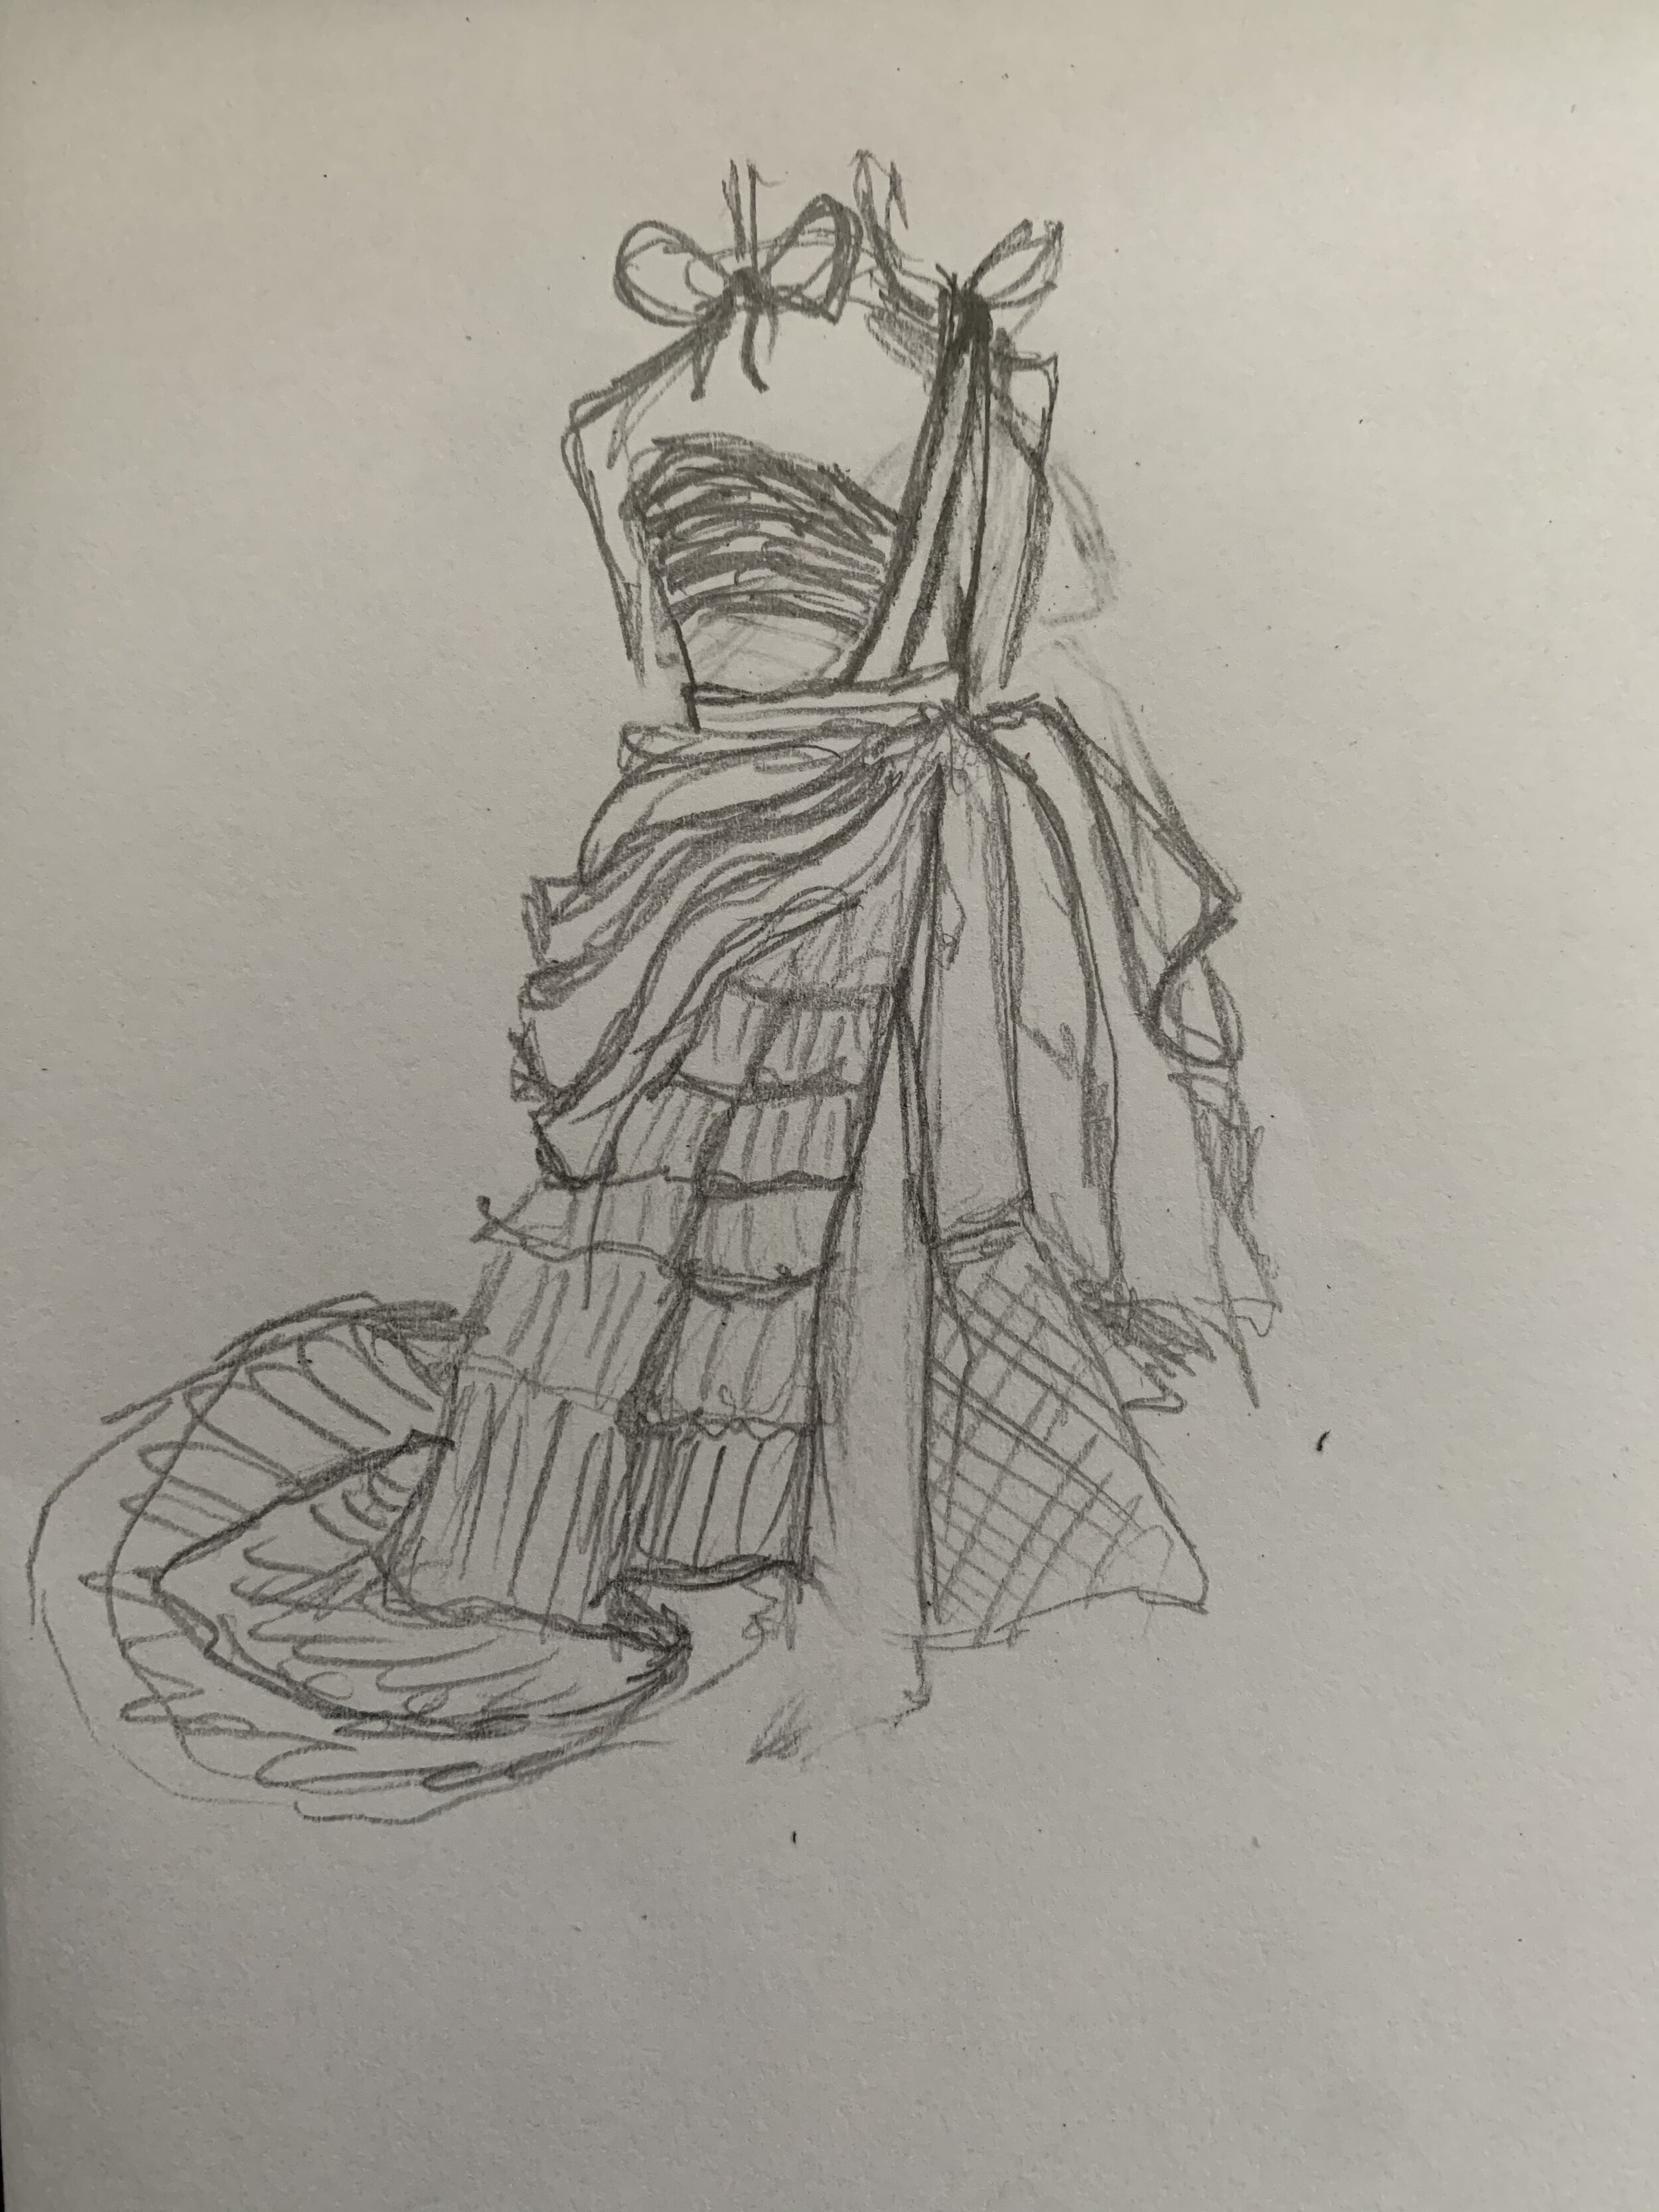
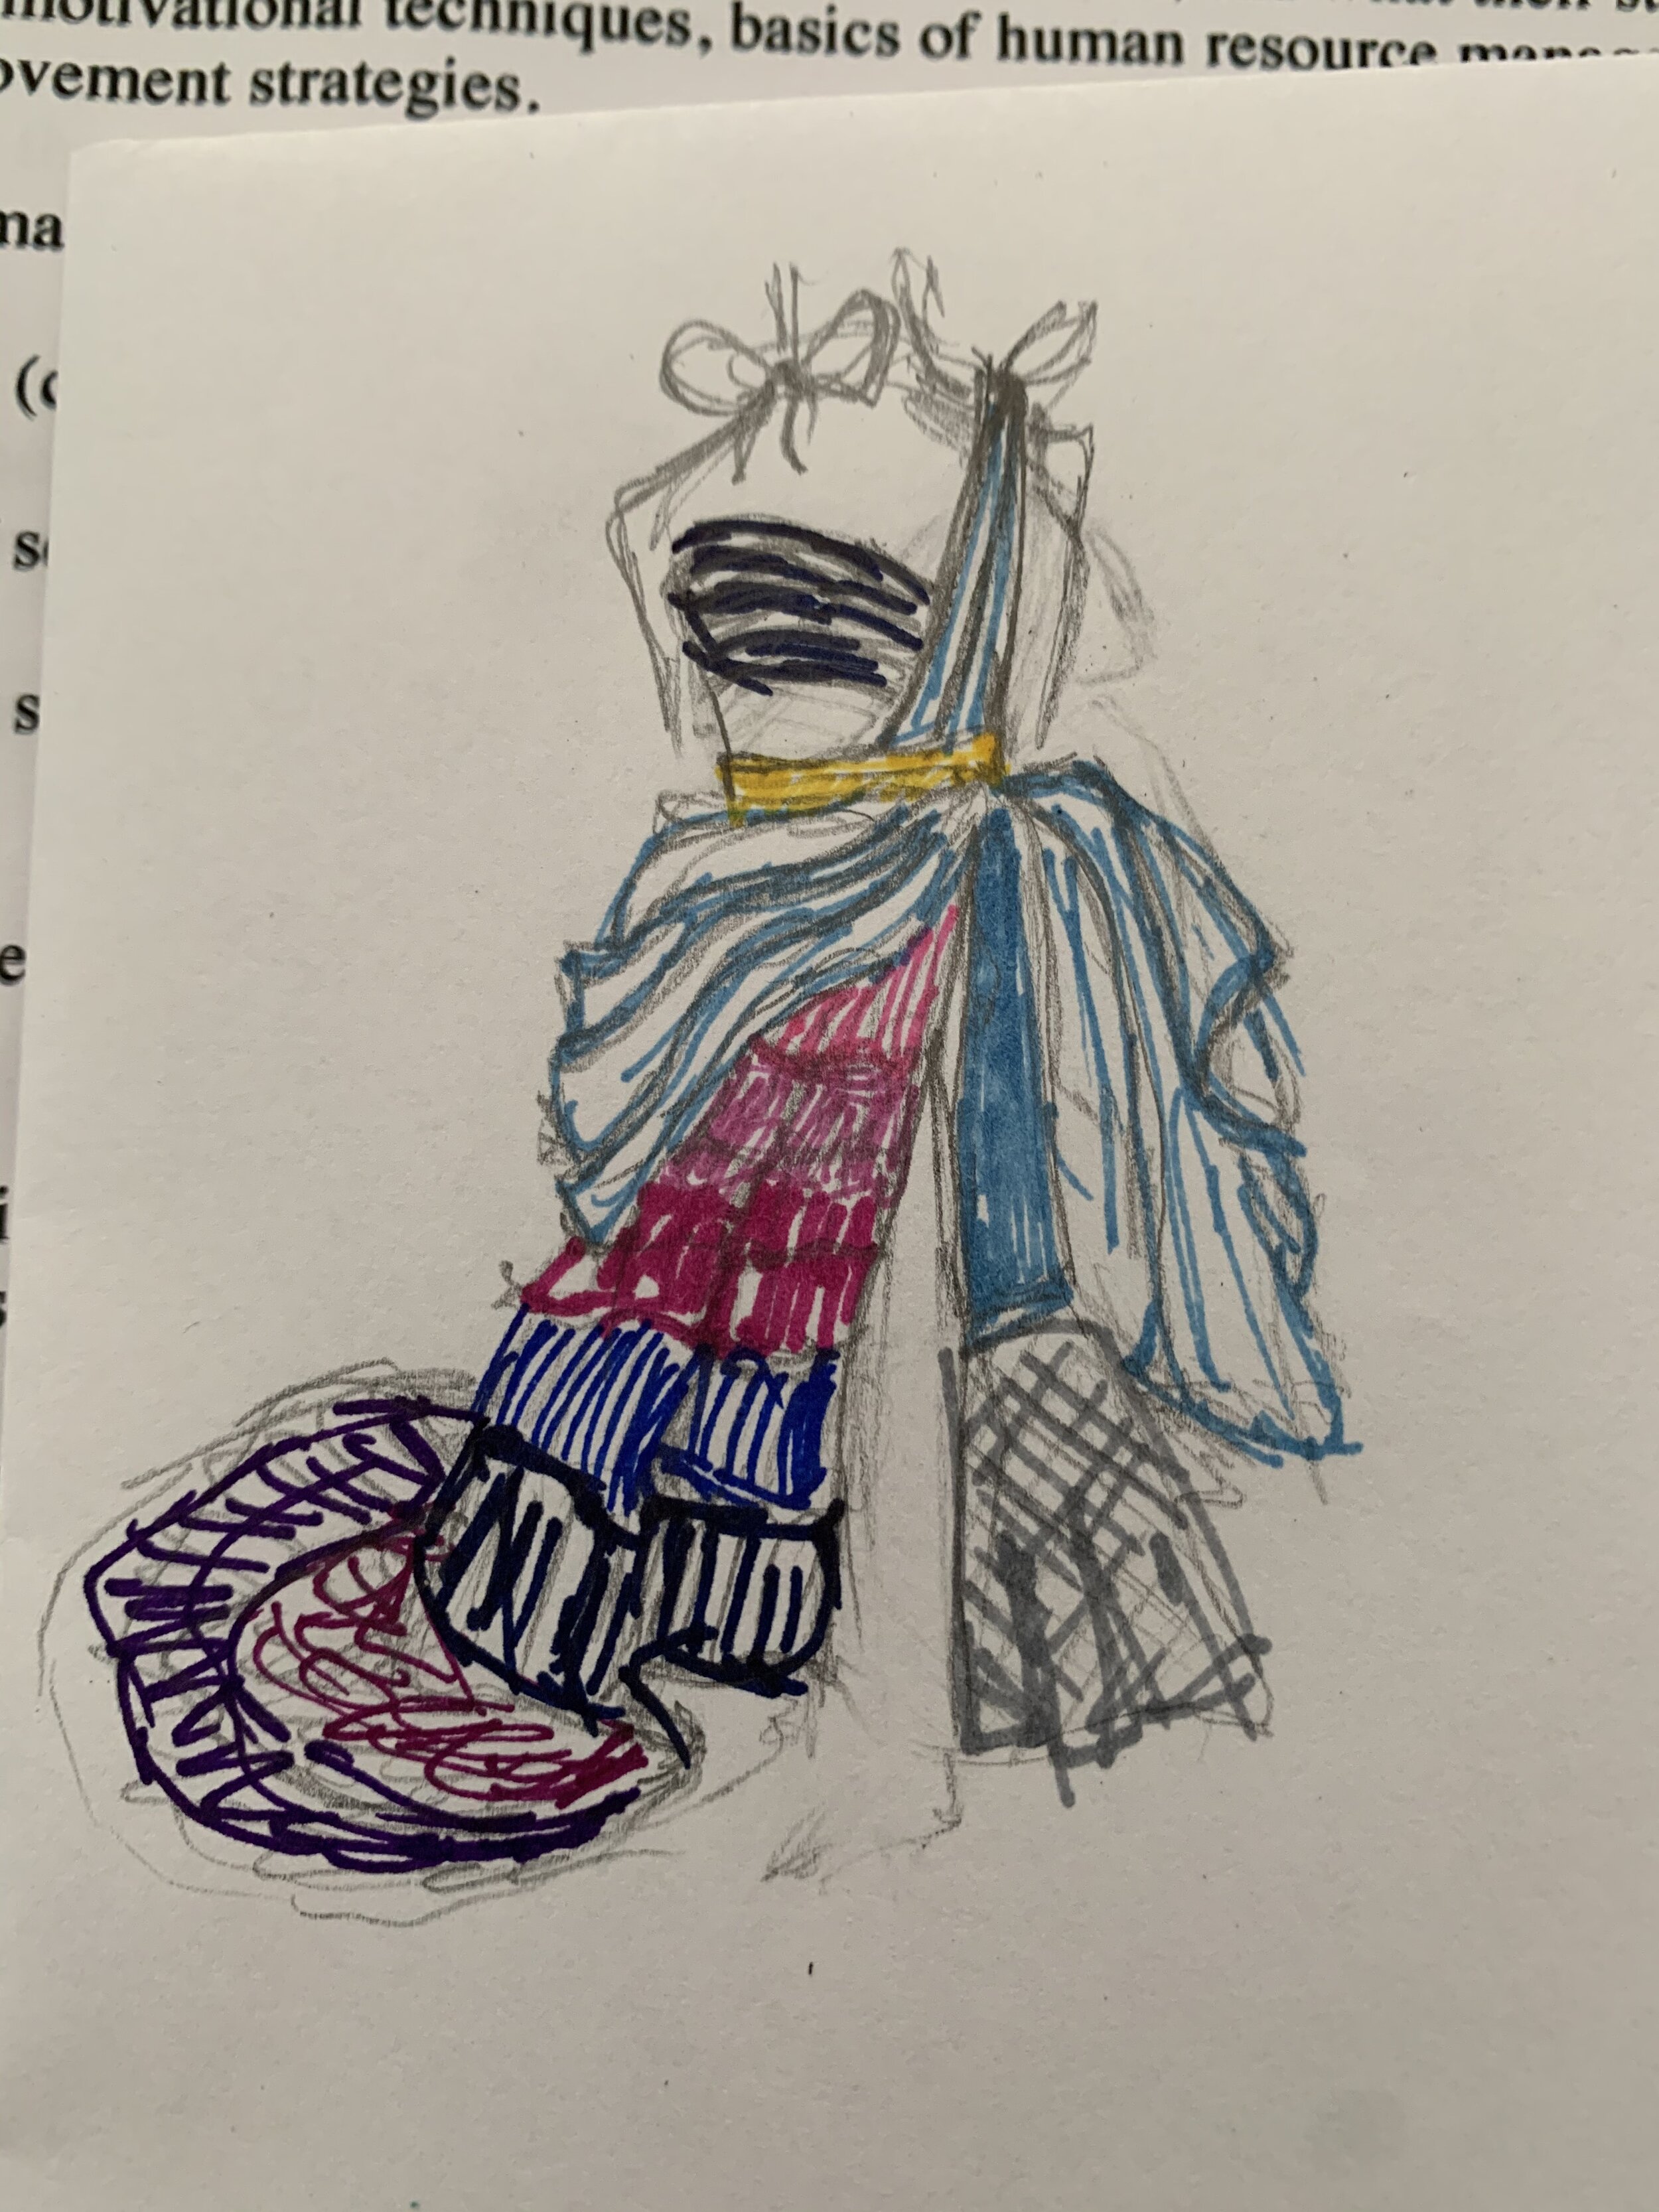
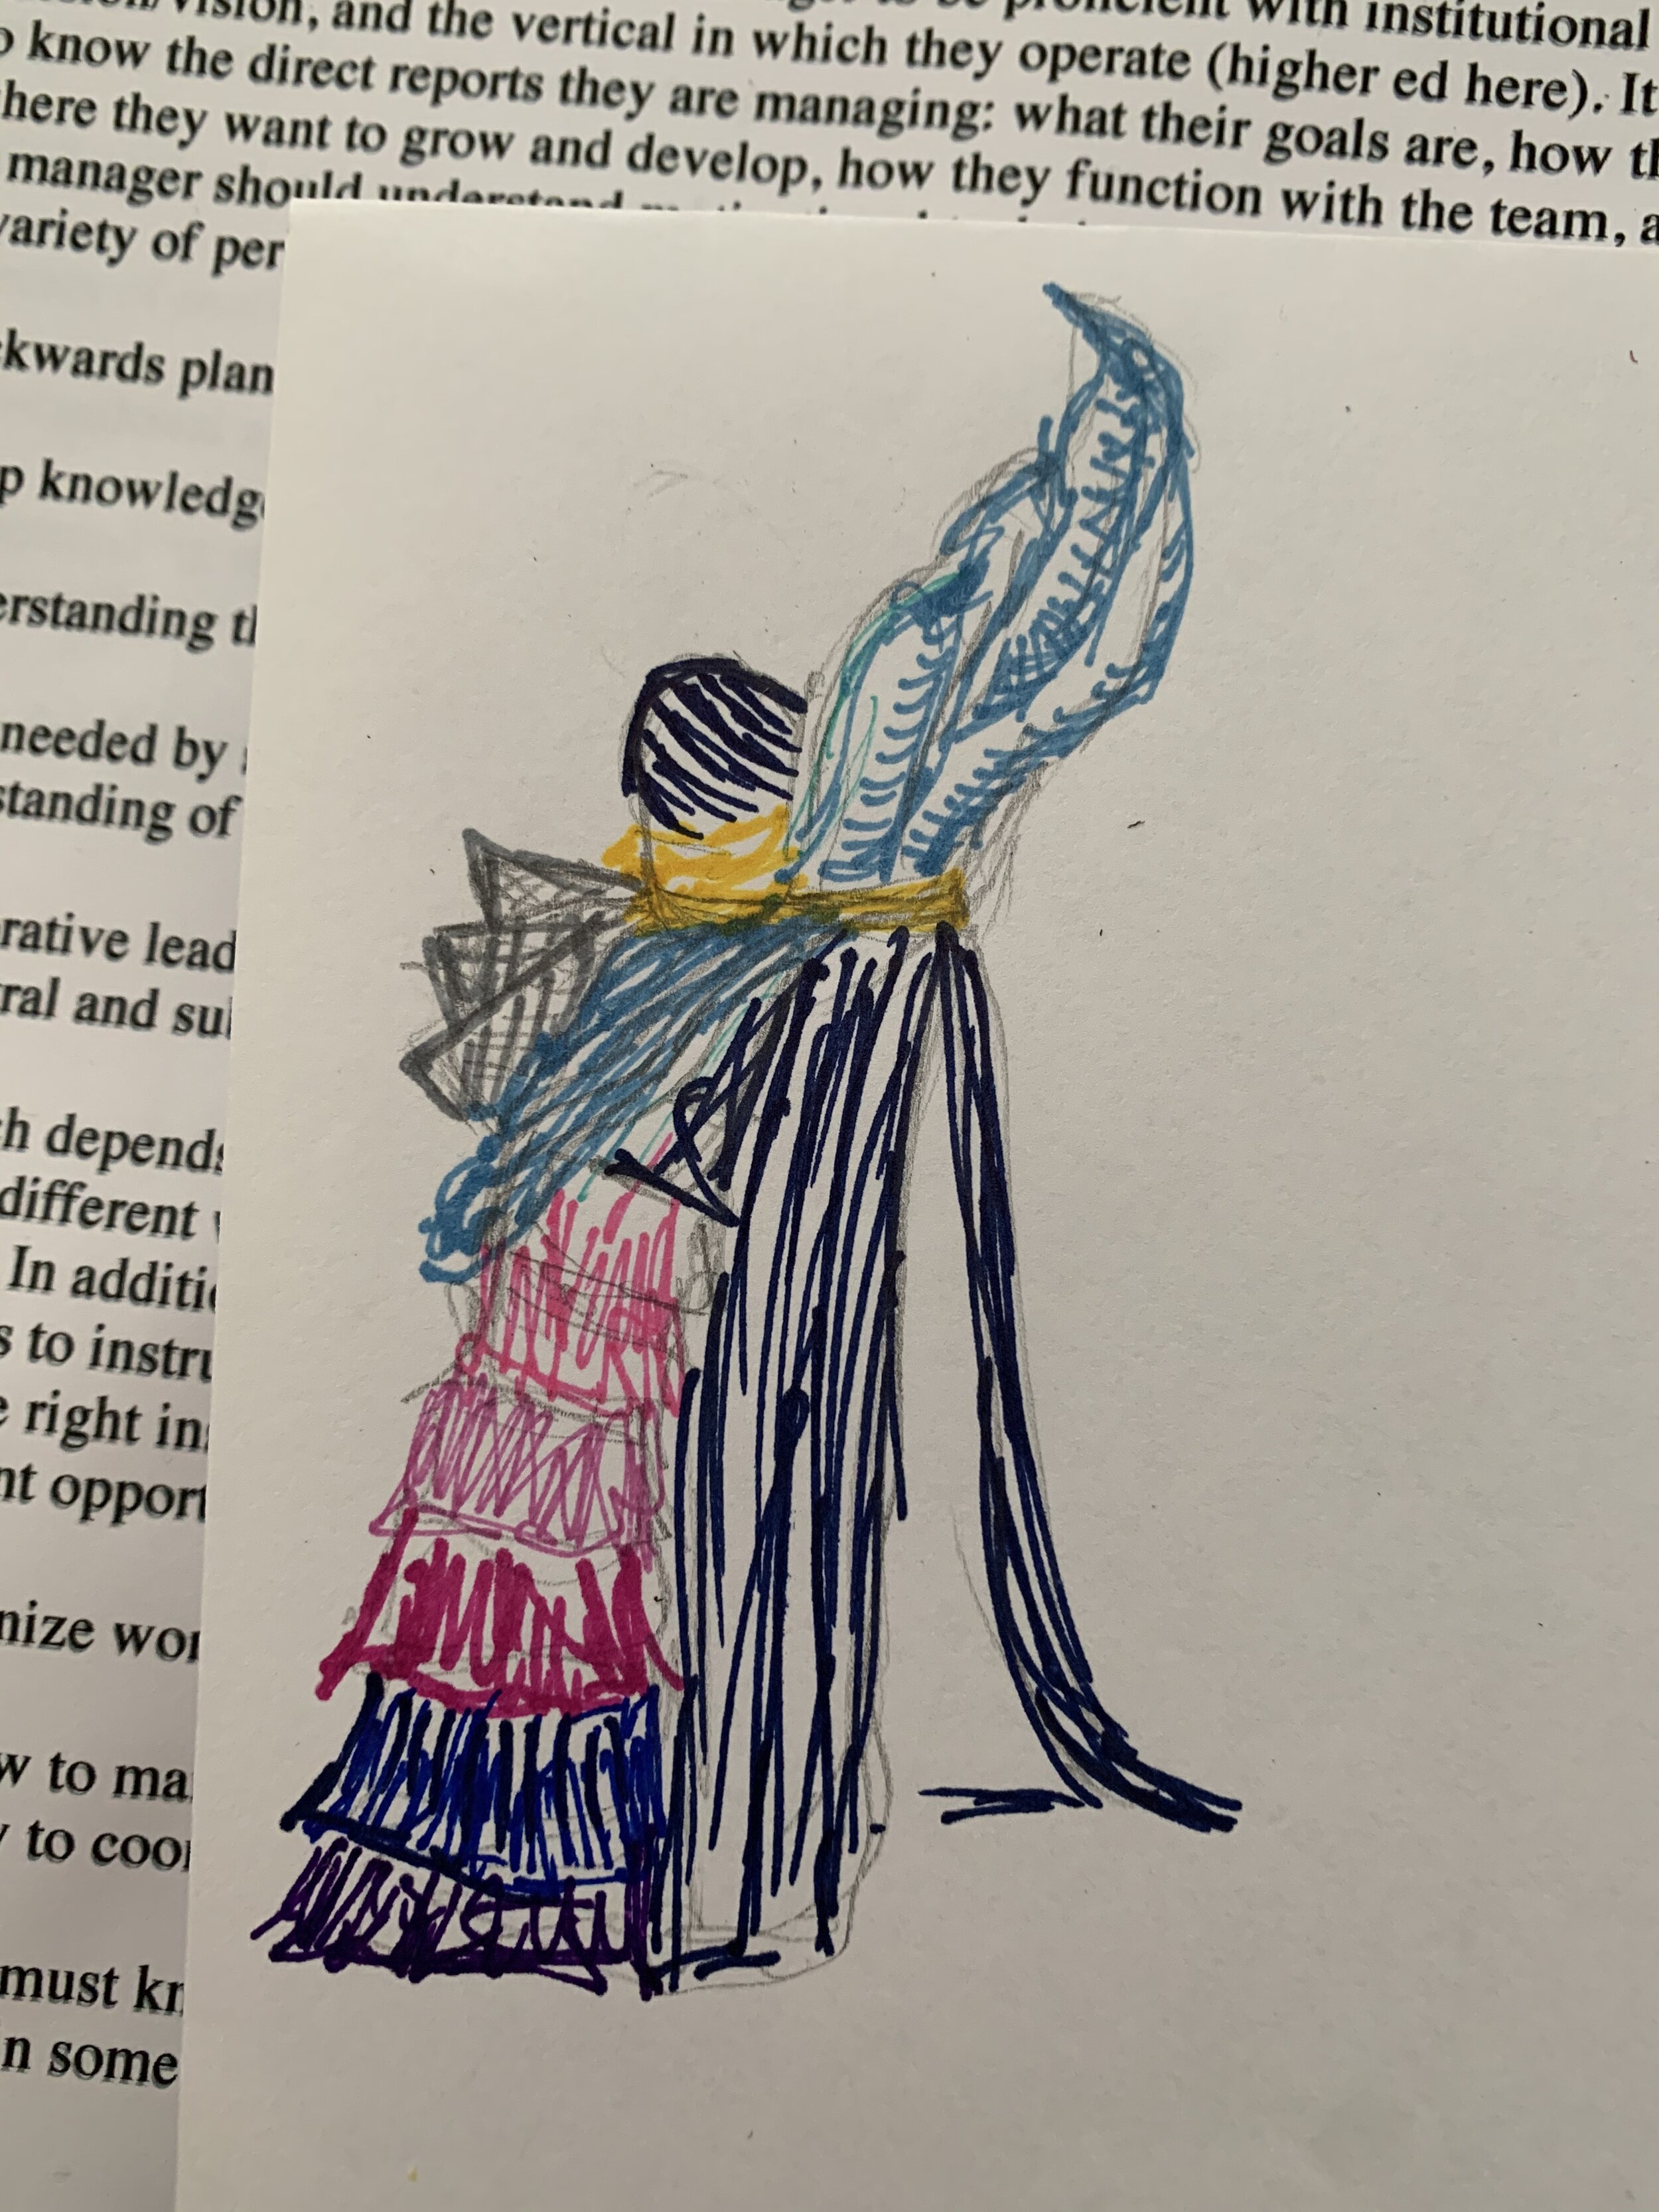
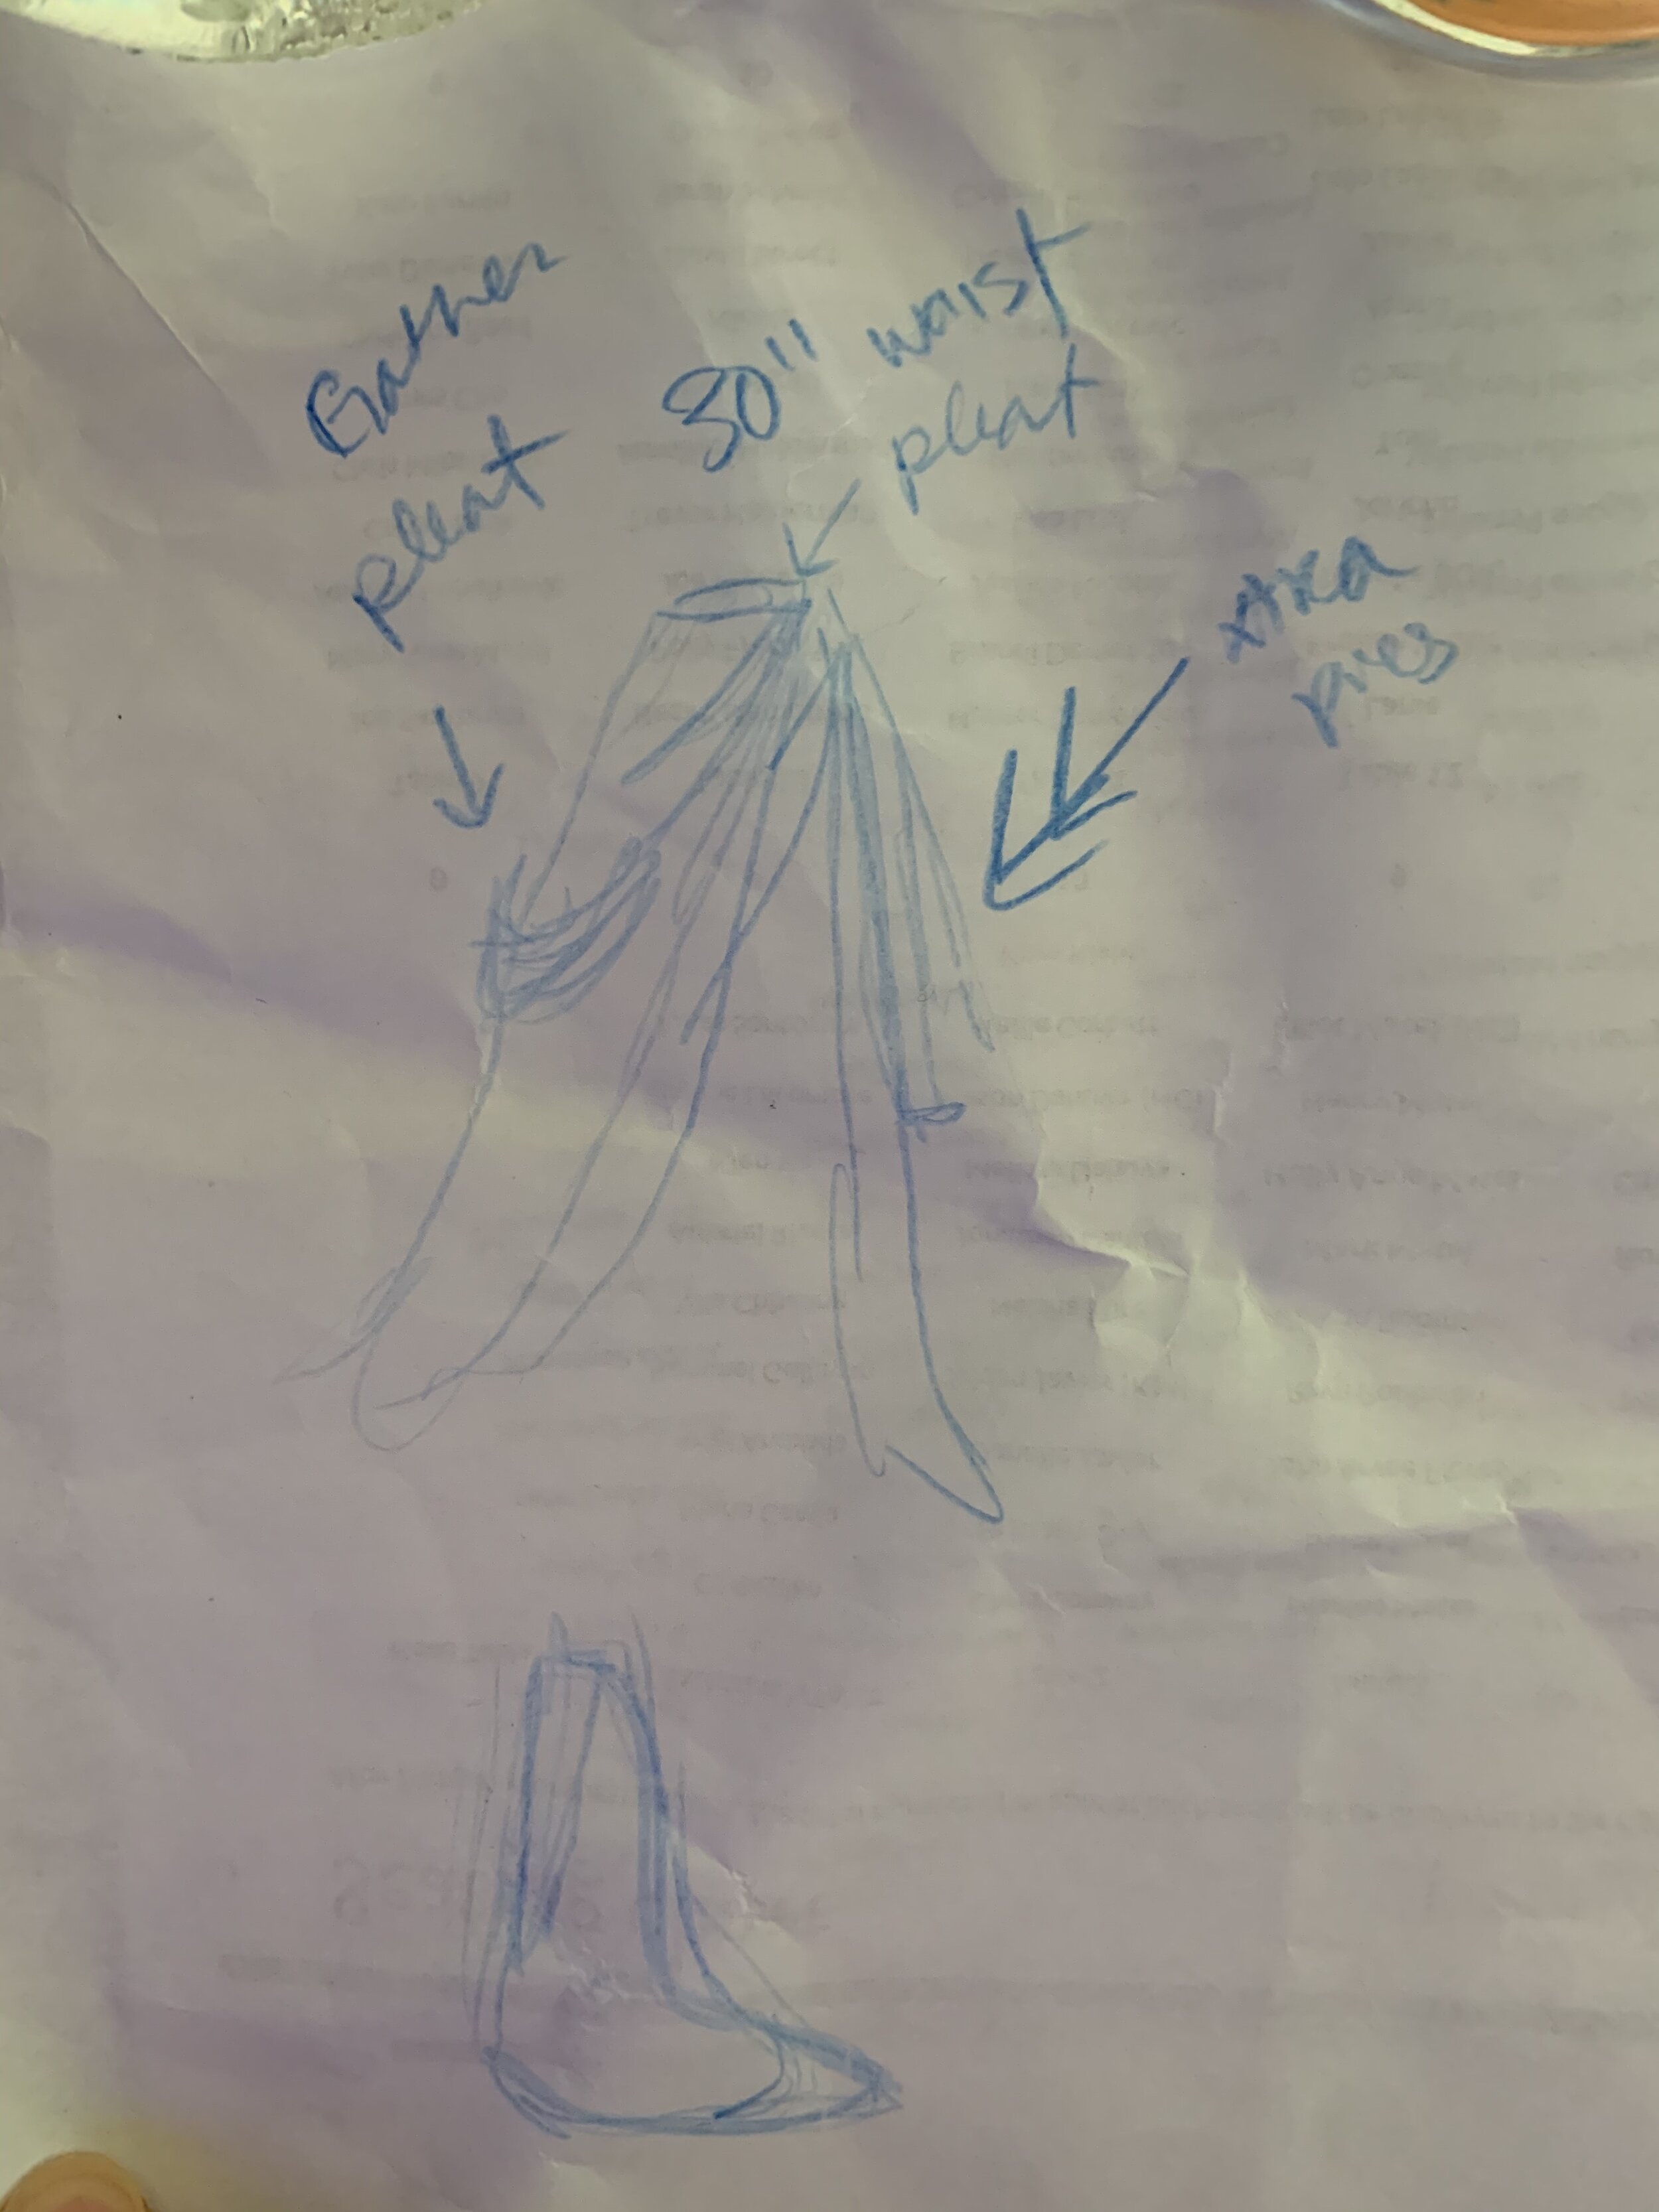
We were originally just going to do the superbowl photo, but they had so many great outfits we couldn’t just do one. My next choice was the silver lattice patterned one because I instantly thought… I can make that with foil!

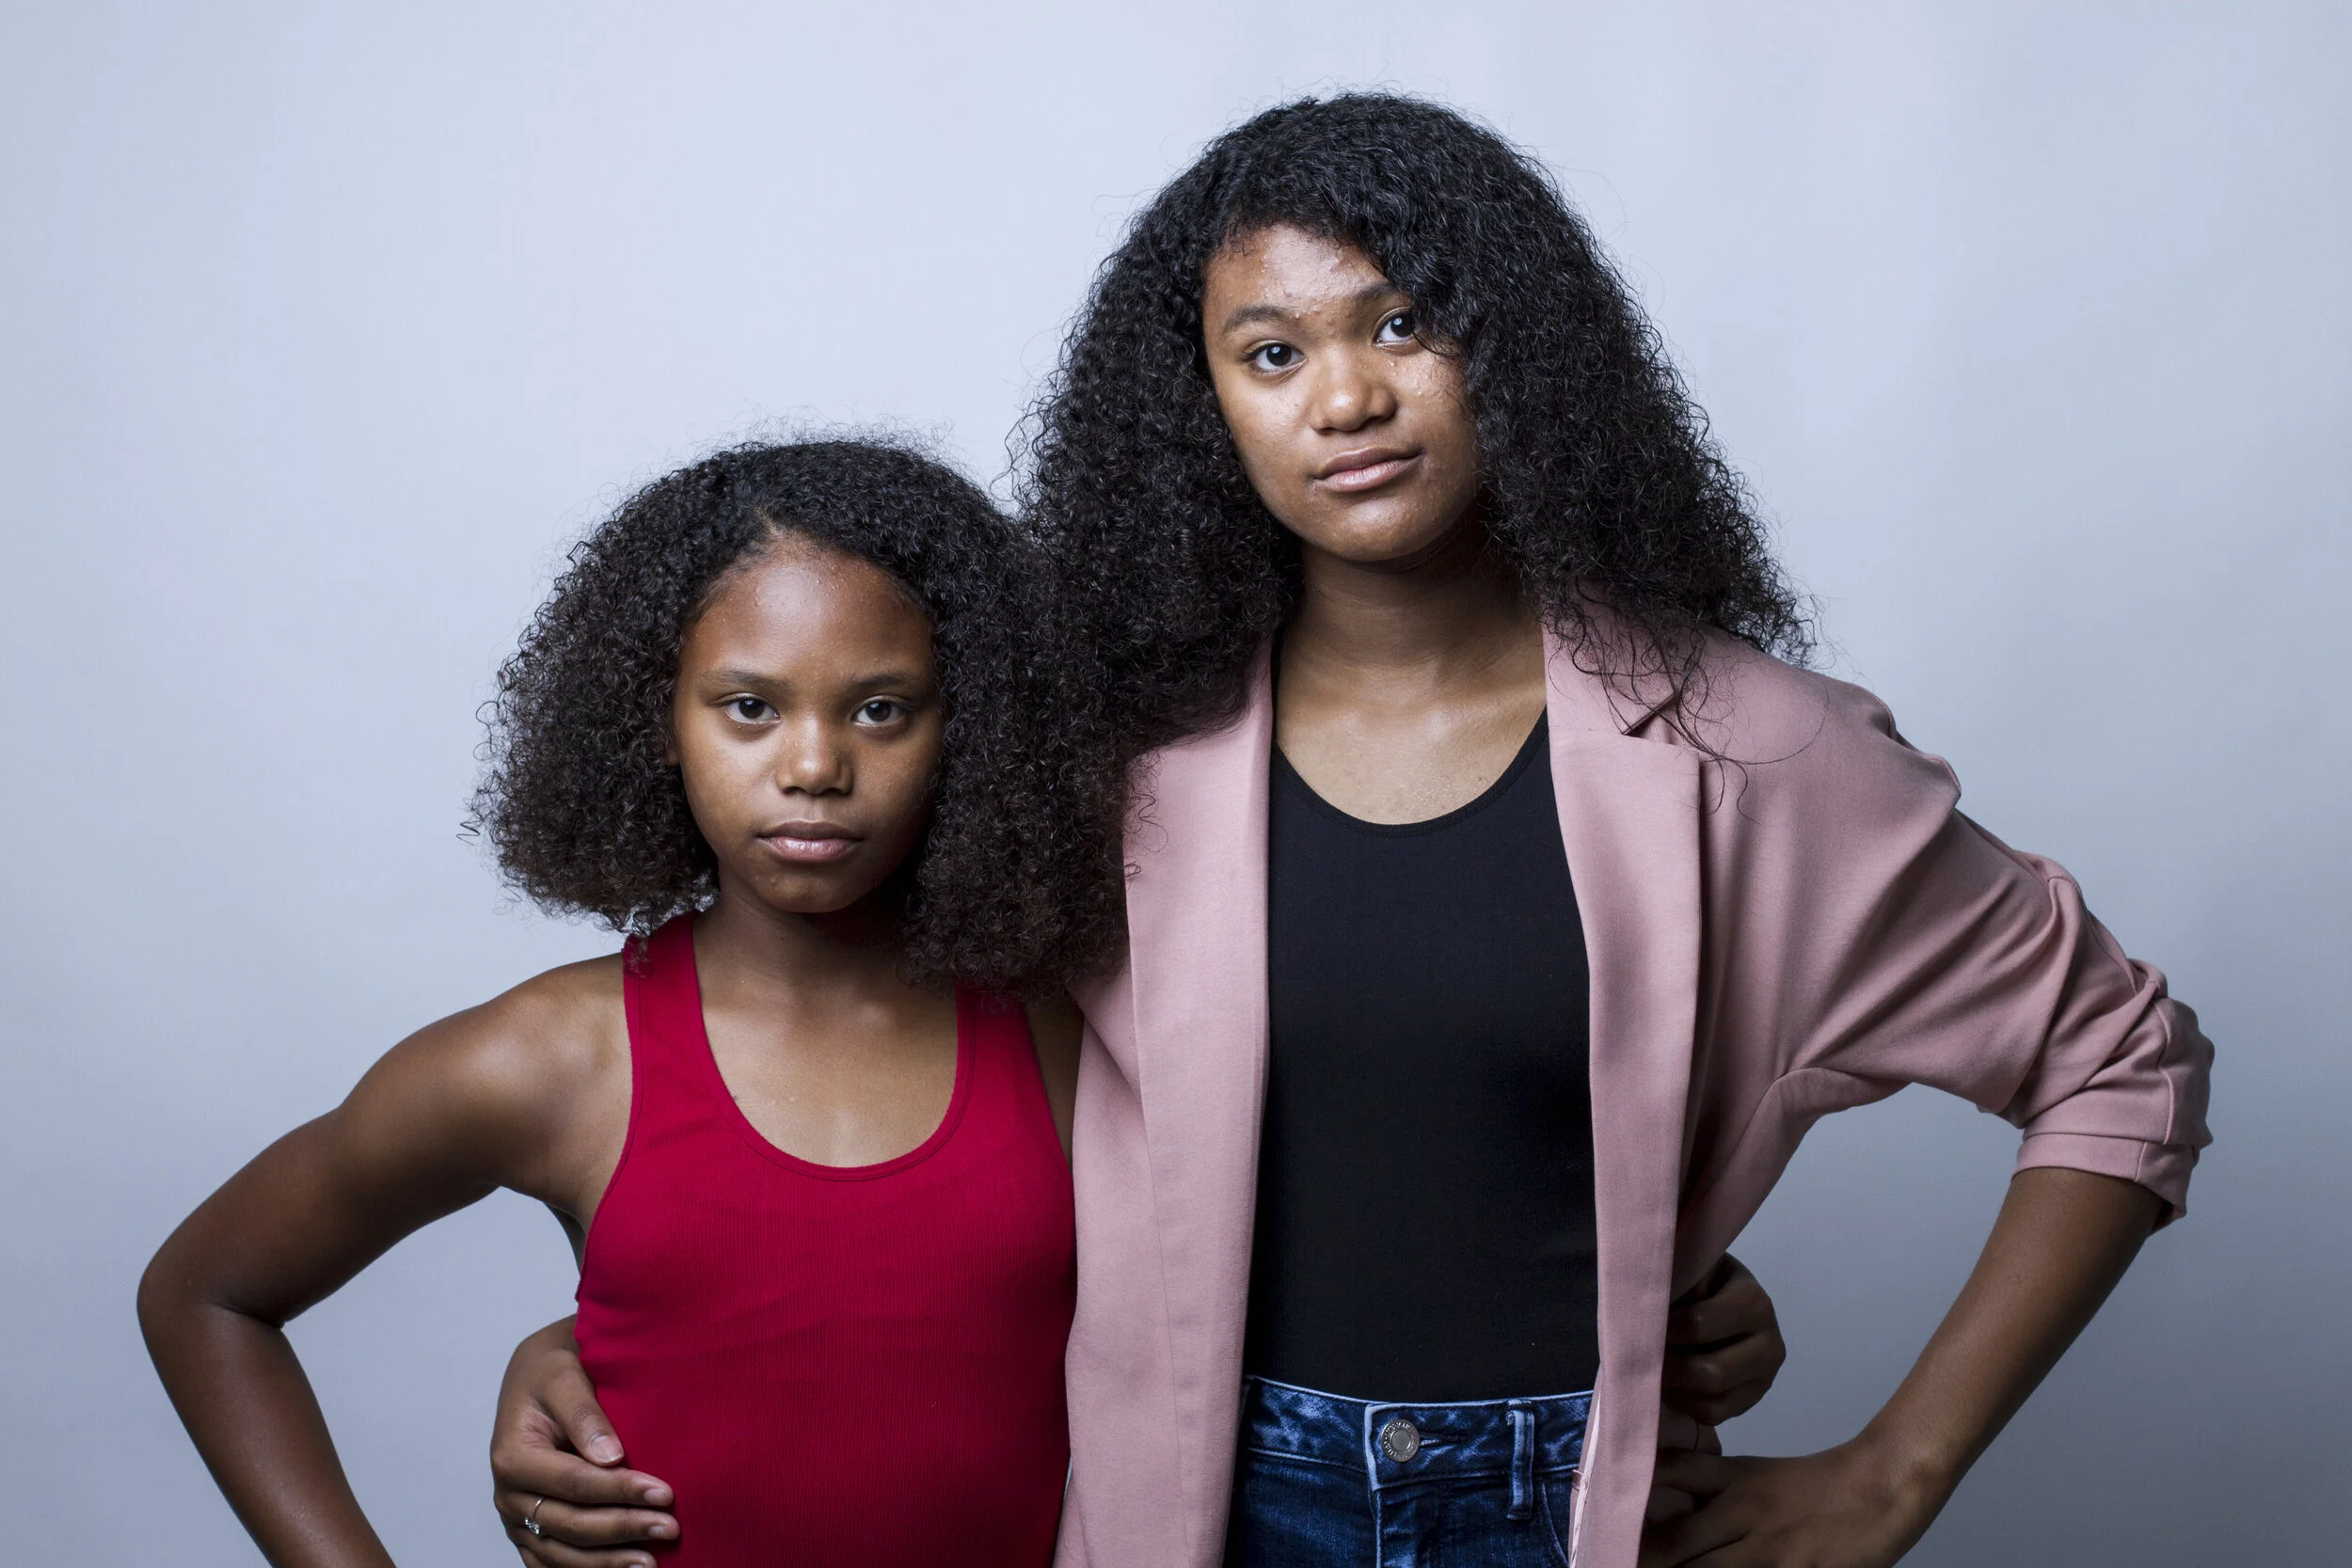
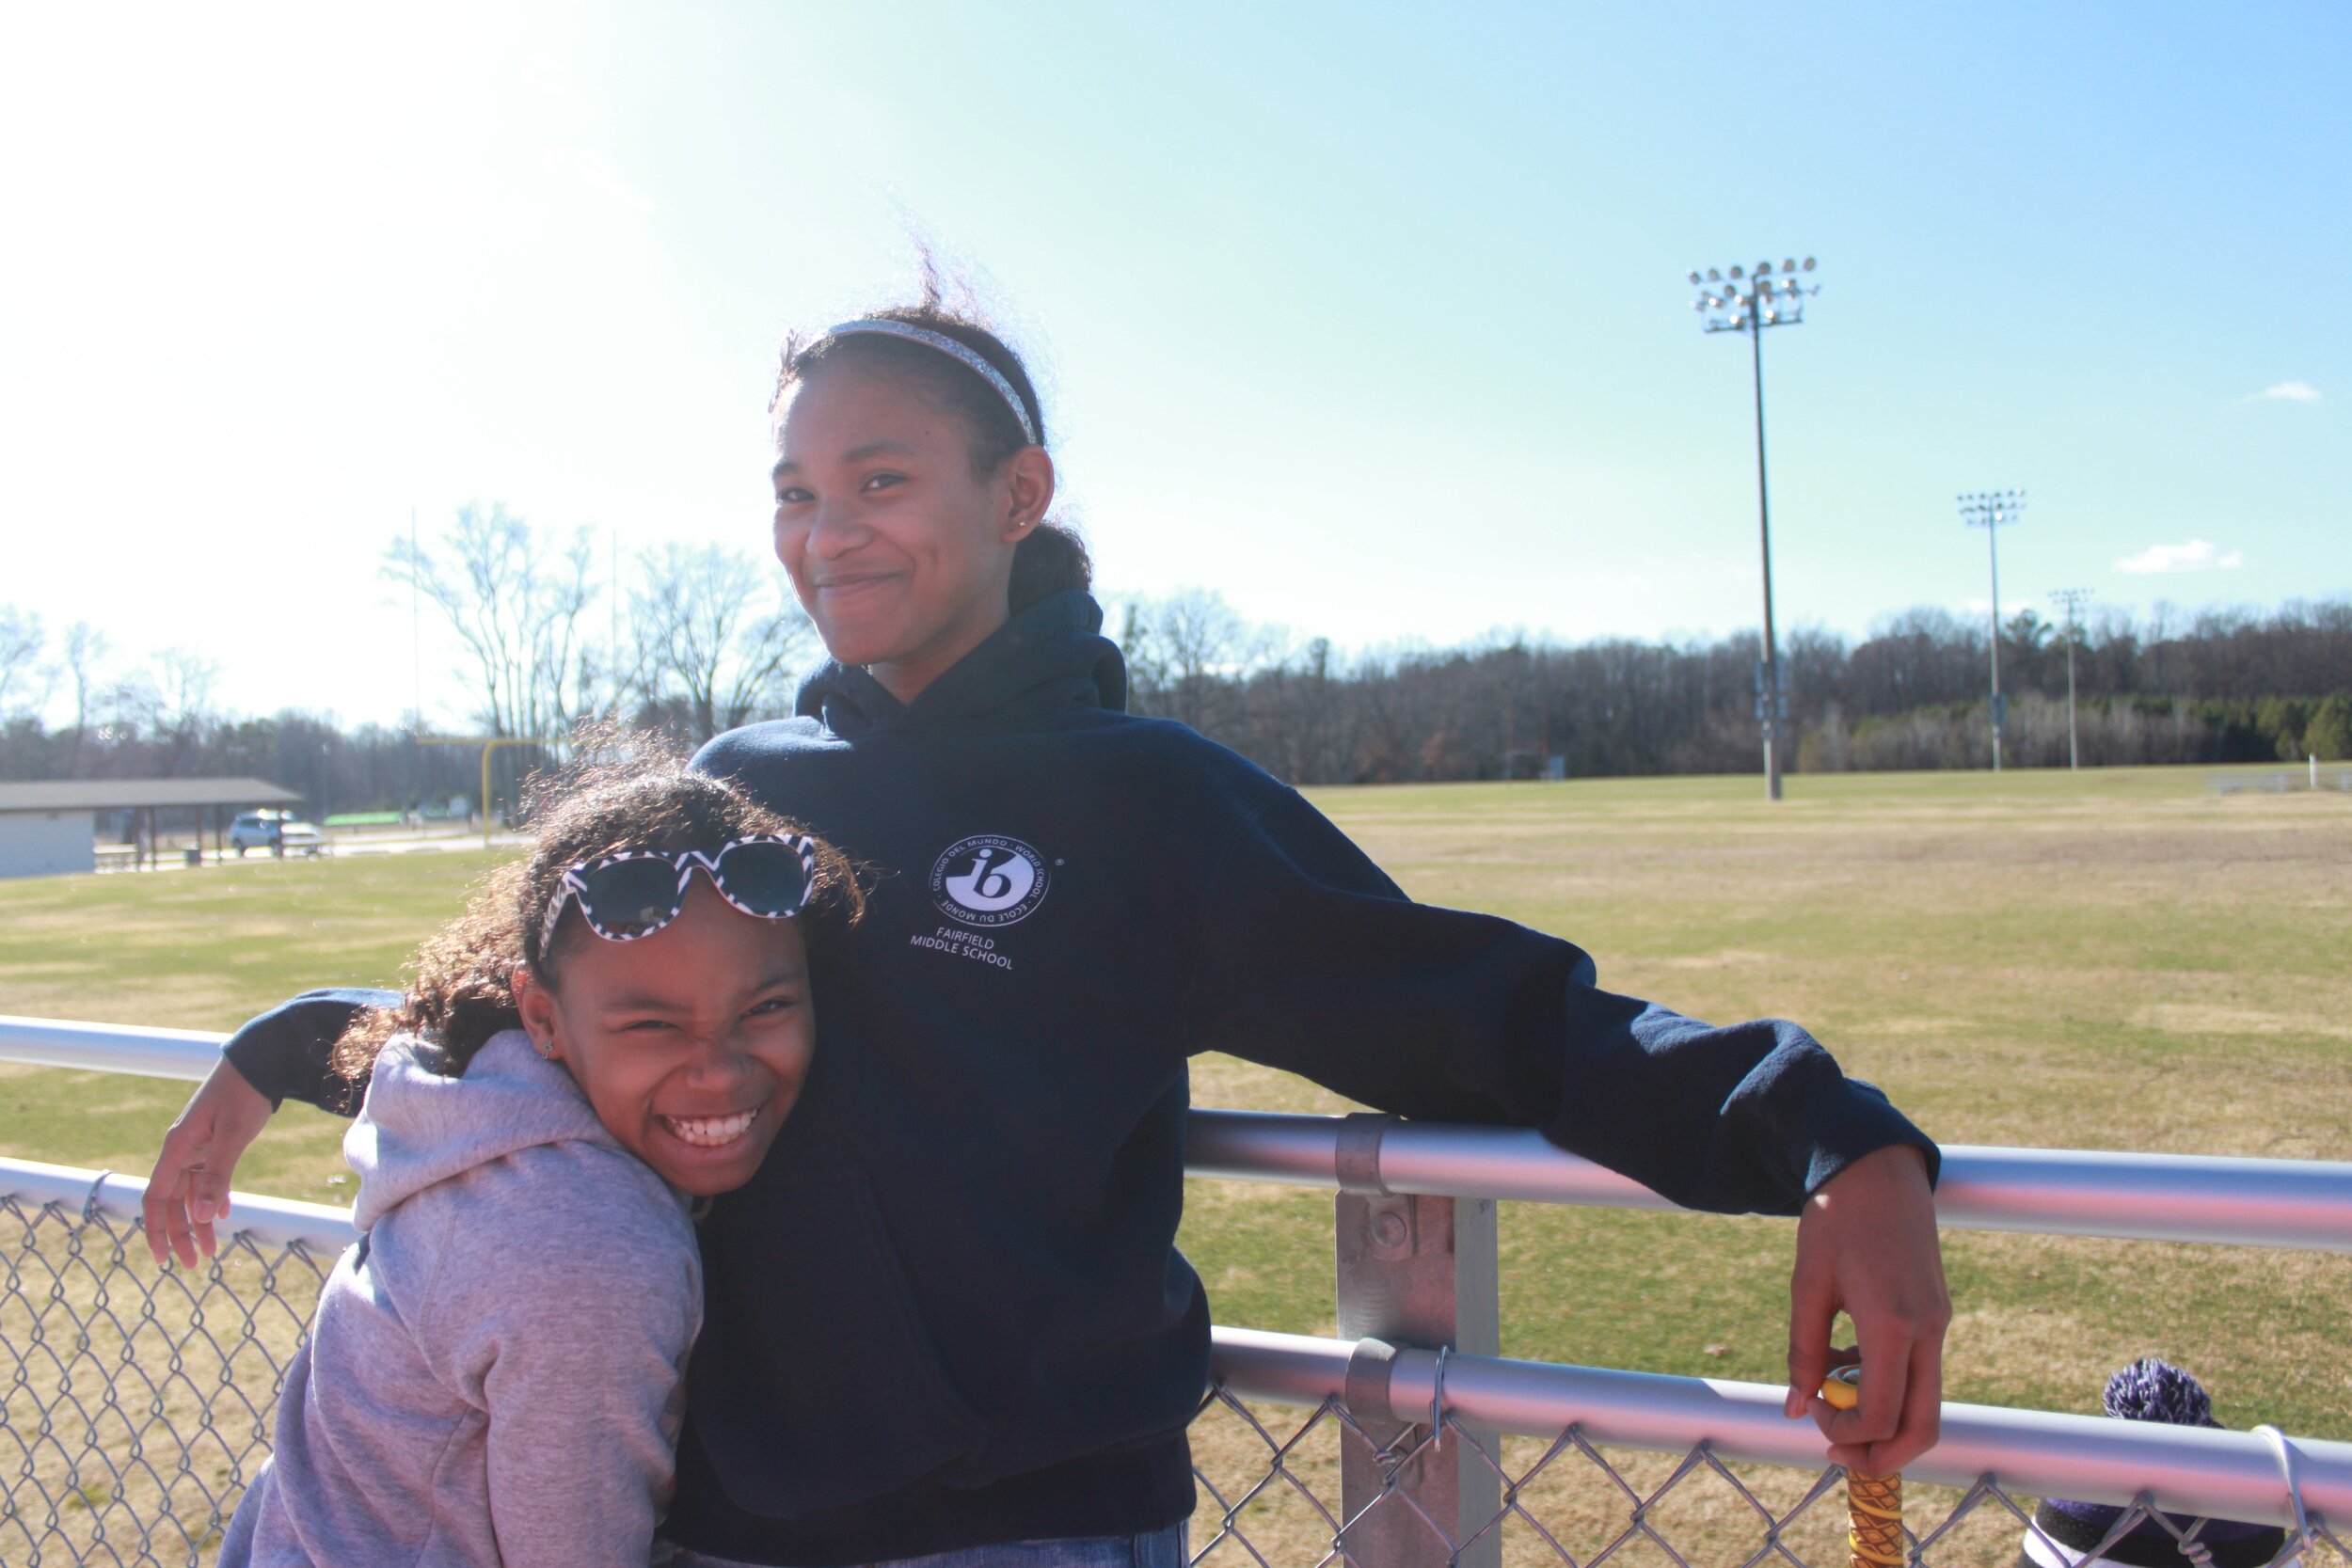
I also knew I wanted to do more paired photos with Joe rather than solo ones of my own.

Shamefully, we ended up doing what quite a few people do in the fashion and photography industry, which is buying and returning clothes. I also sourced a lot of my outfits from fast fashion stores however, which don’t always have forgiving refund policies, so most of our returns were for Amazon products. We did end up investing and keeping a few quality pieces like Joe’s denim Carhartt jacket though.

Production

We originally collected quotes from a professional photographer, makeup artist, stylist, etc. The project was estimated to cost around $3k plus. I thoroughly believe in supporting artists and didn’t want to ask anyone for a discount, but I also had to come to terms with the fact that we couldn’t afford to spend that much on something that was ultimately going to live on social media alone. So we decided to attempt the hefty task of doing it ourselves.

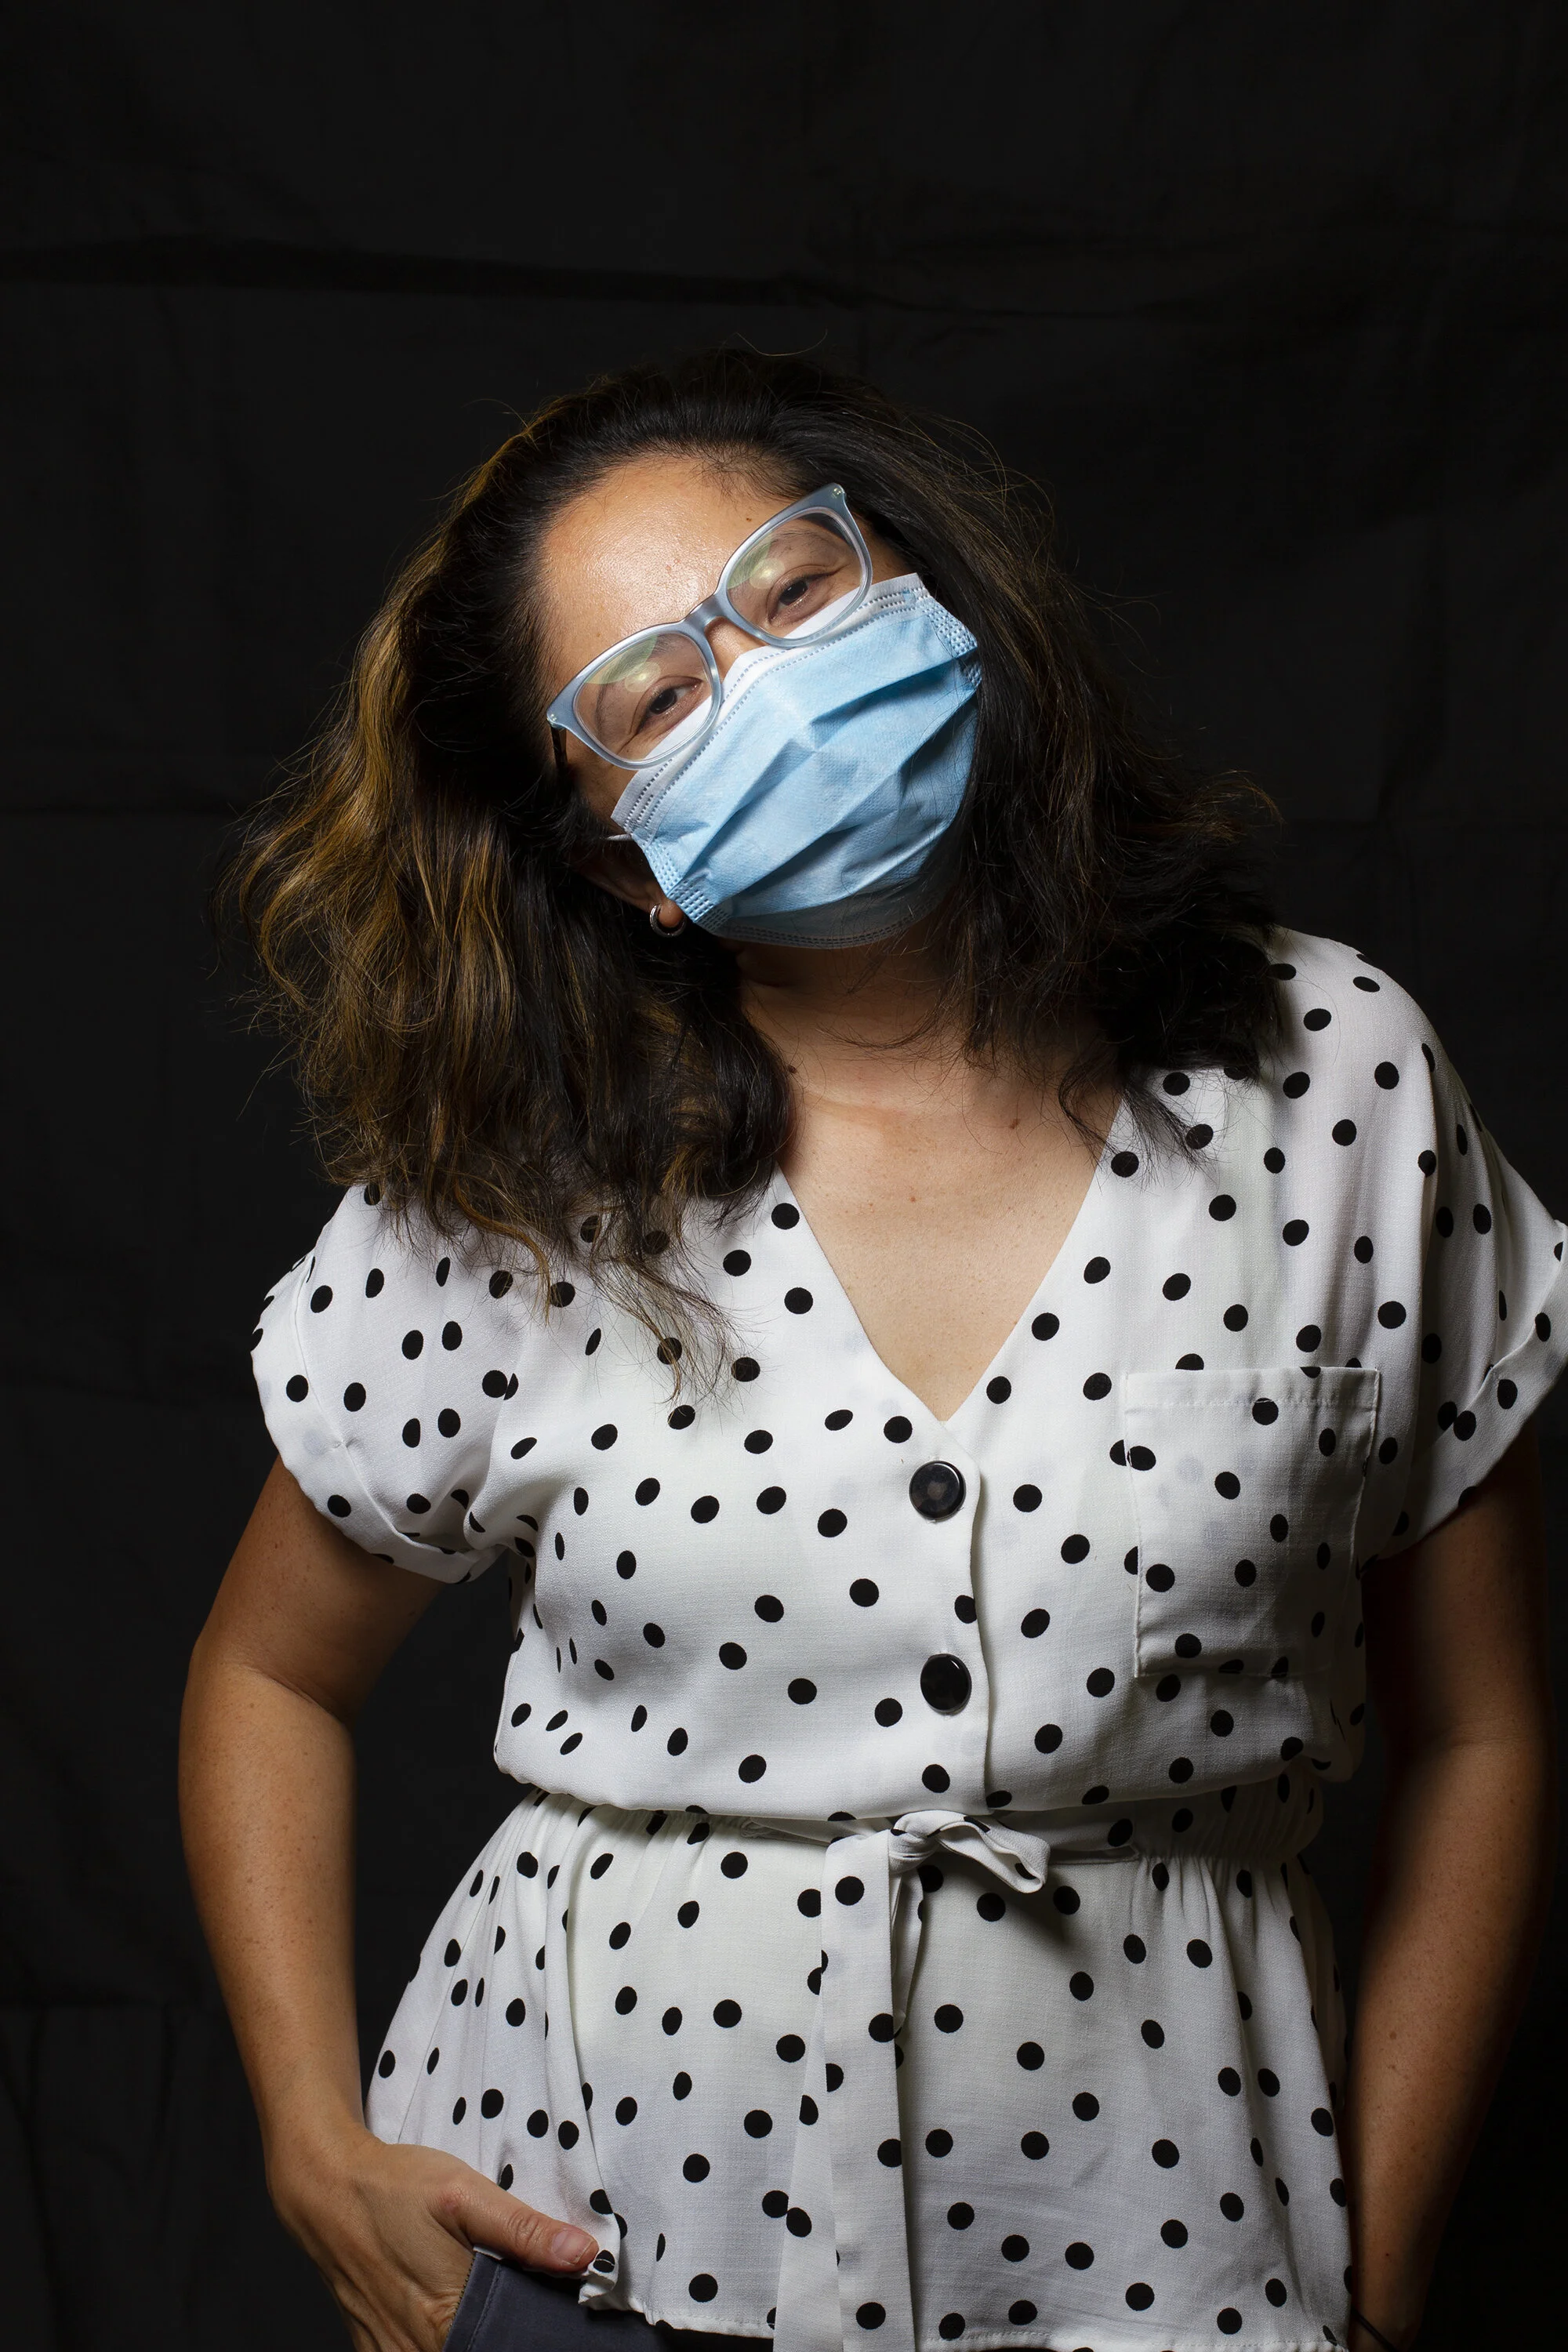
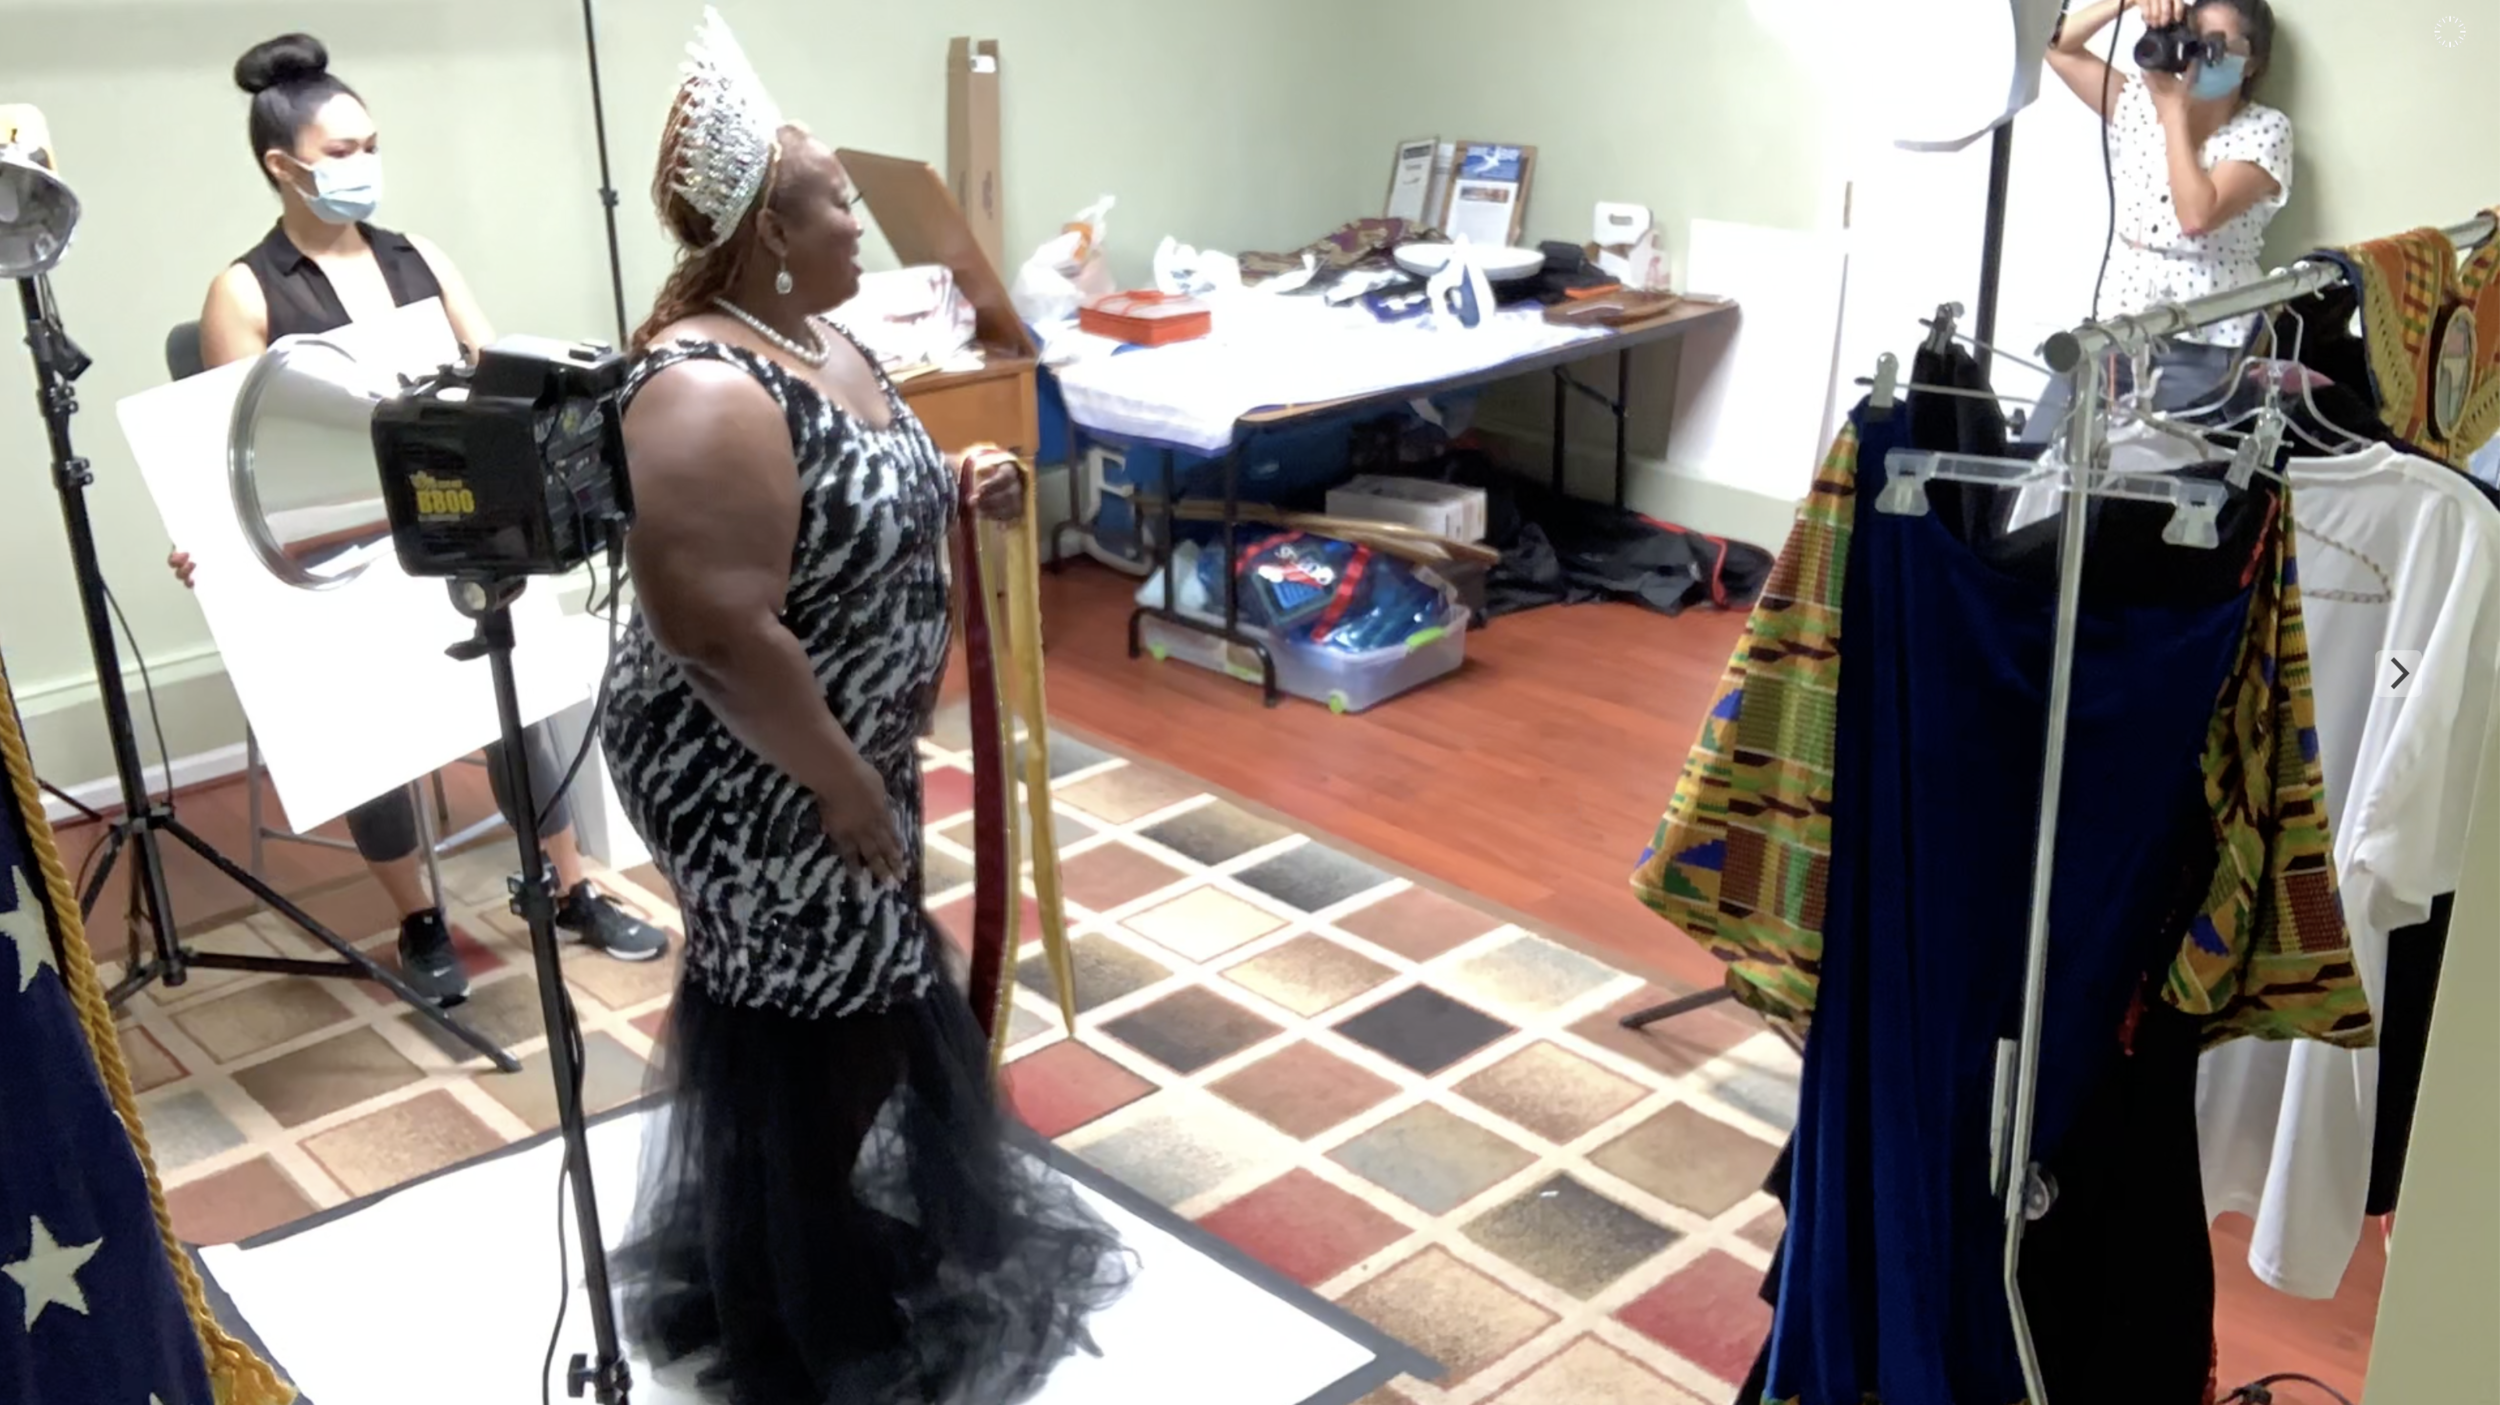
The team included myself, Joe, and our dear friend Kellie Corbett. Kellie is a makeup artist, a service I was set on having. She’s also great with styling and details so I figured if I was able to source the clothes myself I could count on her to help make sure it was replicated well in the shot. One of the biggest sacrifices was attempting to shoot it without a professional photographer.

We have a DSLR camera of our own and have shot our own photos before. Joe was confident about shooting the solo ones of me and the paparazzi ones were going to be a breeze lighting wise. We got some decent shots to get the job done, but we made a huge ask in requesting Kellie to shoot for us. We made sure to get some on both our phones and the DSLR just in case.

Schedule

Being that we were working with a skeleton crew, 2 of whom were subjects in the photos lol, I wanted to do a brain dump of all the tasks we would each need to be performing and when. Especially since I knew I was inevitably going to to forget things in the moment. I created several iterations of the schedule starting with piling everything into 1 long day. We had a 2 day version, but eventually had to go with a 3 day version due to locations and schedules for both crew and the arrival of the products.

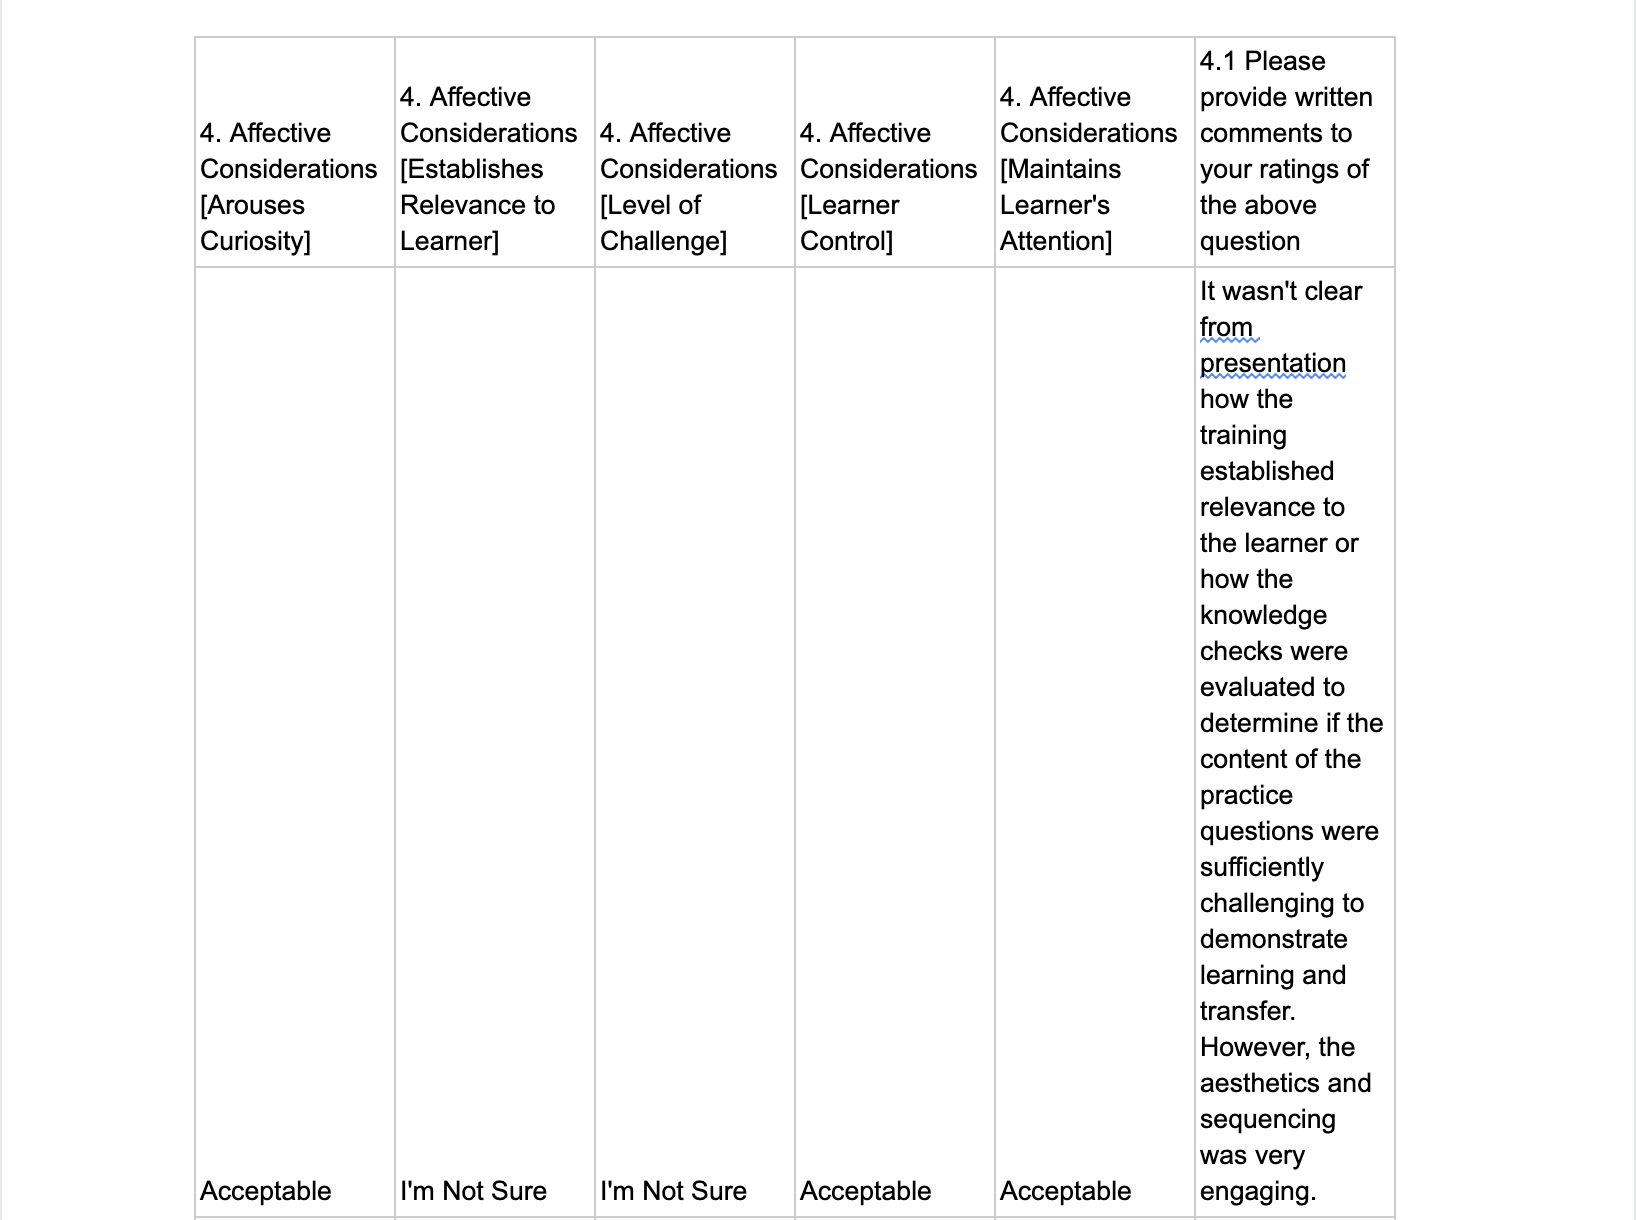
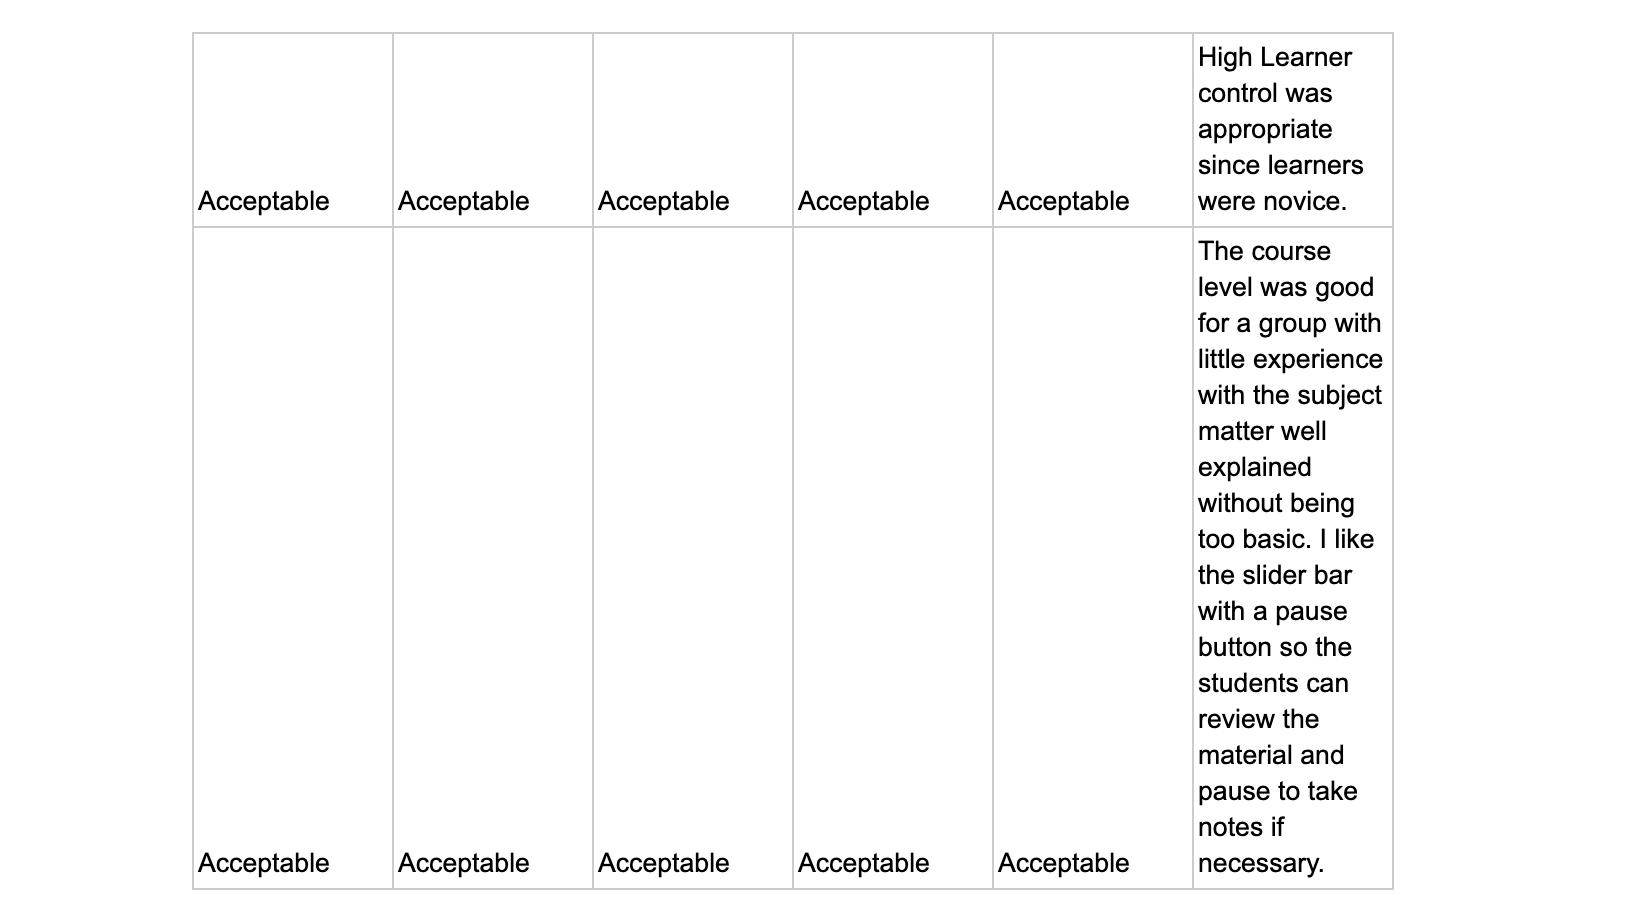
Day 1: 1st Paparazzi style photo

We were supposed to do both night paparazzi shots, but I didn’t have the foil outfit completed.

Day 2: LA River

This location was nearby, but we had to go early in the morning to get the right lighting.

Day 3: Studio lighting shots + the foil outfit paparazzi shot

Leadership in a Team-Based Approach

A Needs Assessment For The Leadership Role Of An Instructional Designer In A Team-Based Approach To Online Course Development

This study is currently in progress. Therefore, sections of the research provided are still being drafted.

Introduction

Instruction design is a systematic approach, partly science and partly art, to designing, developing, and facilitating efficient and effective learning and teaching experiences (2011). Instructional design services are offered in a variety of settings, with the two most common settings being in the business and education fields.

+ Instructional Design Settings

In the business field, instructional design is predominantly used to produce training that aims to improve employee performance with the hopes of generating revenue or reducing operation costs (Morrison et. al 2013). These trainings often attempt to either correct risk-oriented behaviors or introduce new equipment or protocol to employees. A business may decide to consult an independent instructional design company for a one-time service or they may have a dedicated instructional design department in-house.

In the education field, instructional design focuses on the design and production of online courses, either synchronous or asynchronous, to facilitate student-centered, academic learning. Similar to the business field, some universities have dedicated instructional designers (IDs) within each academic department. Other institutions have centralized facilities with IDs who participate in university-wide distance learning and teach initiatives in addition to online course production. These instructional design centers provide services available for all faculty and staff who place a request with them.

+ Roles in Course Design & Development

In both the business and education fields, there is always the basic relationship of at least one Subject Matter Expert (SME) and at least one instructional designer. In every case, the SME is accountable for bringing their expertise about the learning content to the table and the ID brings their expertise of designing efficient and effective learning and teaching experiences (Morrison 2013). Though the roles and expectations may vary from one organization to another, collaboration is key in all of these partnerships.

In regards to course production and evaluation, these departments may be decentralized or centralized within the institution (Morrison et. al 2013). The course production groups may consist of project managers, media specialists, and instructional technologists. Evaluation groups may consist of quality assurance assessors, assessment specialists, and editors who review copy. Team sizes may vary and thus, so can the team-based approaches. In all cases, Morrisont et. al explain that these groups should have close ties with the IDs to ease the coordination and reduce duplication of effort (2013).

+ Multiple Instructional Design Roles in Education

In many universities, especially those which put research and innovation at the forefront, instructional designers (IDs) are heavily involved with distance learning and teaching initiatives and are positioned to represent higher education institutions on micro, macro, and mega levels. On the micro level, they provide services to faculty members directly aligned with online course development. On the macro level, instructional designers design, develop, and facilitate workshops sharing pedagogical and evidence-based learning and teaching practices. On a mega level, IDs participate in world-wide discussions of how online learning is evolving, especially with the ever scaling development of instructional technology. This presents multiple roles for IDs to juggle as a designer, project leader or manager, research, and educator (2019).

Statement of the Problem

This qualitative study investigated what factors affect an instructional designer’s role and ability, as a practitioner within a higher education centralized instructional design center, to effectively lead a team-based approach to fulfilling distance learning and teaching initiatives. The instructional design center in this study has declared a mission to “support, promote, and enhance teaching, learning, and research and to foster innovation.” The services provided by the center to fulfill distance education initiatives are instructional design and technology, course design and development, individual course management, one-on-one consultation, course website development, workshops, proctored testing, graphic design of posters and instructional aids, and demonstration and evaluation of tools and technologies. 

With multiple roles to juggle among these services, Drysdale reveals that IDs often get burnt out and are worn too thin by their workloads (2019). Bolman and Deal depict the myth of managers being “rational people who plan, organize, coordinates, and control the activities of subordinates… a pristine image of modern managers: unruffled and well organized, with clean desks, power suits, and sophisticated information systems” (2013). They go on to explain how “ led to believe that they should be rational and on top of things, managers may instead become bewildered and demoralized.”  In ___ study, only two out of six organizations positioned IDs to act as both the Instructional Designer and the Project Manager (). Morrison et al. notes that in scenarios where the ID also has to act as a project manager, “the burden of administrative responsibilities can reduce the time a designer can spend on the design role”  (2013). With instructional design being one of the fundamental processes of these distance education initiatives, this presents a potential threat to the quality of the products and services. () the results of their study “suggest that time commitment is one of the greatest challenges” and that instructional designers or project managers need to give careful examination to the planned timelines and strategically modify where needed to “accommodate both controlled and uncontrolled factors” ().  Their study indicated that IDs need to improve communications perhaps with “clearer communications on processes and timelines.” The problem investigated in this study is to identify what leadership approach is most effective for instructional designers, positioned as both instructional designers and project managers, in implementing an optimal team-based approach to fulfill distance education initiatives.

+ Purpose of the Study

In an effort to solve this problem, this qualitative study will examine the existing expectations and assumptions of the role of the IDs. The services provided by the instructional design center aim to enhance the learning experience of students in higher education and the IDs are positioned to spearhead these initiatives. Improving the leadership approach of the instructional designers may potentially increase the quality of the services provided and thus impact the student learning experience. Therefore, the purpose of this qualitative study is to identify the measurable gaps between the current and desired leadership approach of instructional designers in a centralized higher education instructional design center.

A needs assessment will be conducted on one centralized higher education instructional design center comprised of in-house instructional design and production teams. The data will uncover the opinions of IDs, who are positioned in the leadership role, the opinions of the non-instructional designers, the constituents who receive delegation from and the guidance of the IDs, and the performance evaluation instrument, which documents the expectations of the ID role. Though the administrative staff and production teams may have obligations outside of online course production, they are all accountable for fulfilling the distance education initiatives set forth by the institution at-large.

+ Research Questions

Qualitative studies provide rich and meaningful insight for research problems in specific contexts (2019). This study was best suited for a qualitative approach in order to gain the perspectives of both the service providers and recipients. The thorough investigation of multiple perspectives will provide clarification of the interconnectedness, or lack thereof, among the service teams. The main research question is supported by sub questions grounded in the multi-frame theoretical framework for reframing leadership roles within organizations. The question and sub questions this study aims to address are:

Q1. What factors, rooted in a multi-frame leadership approach, support an instructional designer’s role, both as an instructional designer and project manager, in effectively leading an optimal team-based approach to fulfill distance learning and teaching initiatives in higher education?

Q1a. What factors, centralized in a structural frame, enhance an instructional designer’s ability to lead and manage a team-based approach effectively?

Q1b. What factors, centralized in a human resource frame, enhance an instructional designer’s ability to lead and manage a team-based approach effectively?

Q1c. What factors, centralized in a political frame, enhance an instructional designer’s ability to lead and manage a team-based approach effectively?

Q1d. What factors, centralized in a symbolic frame, enhance an instructional designer’s ability to lead and manage a team-based approach effectively?

Literature Review

Multi-framed Leadership Approach

This action research study is grounded in the four-frame theoretical framework of reframing leadership in organizations. The structural frame, the human resource frame, the political frame, and the symbolic frame each act as a lens for which to evaluate the conditions of leadership roles through. The literature begins by differentiating leadership and management, both of which Bolman and Deal believe require an amount of artistry (2013). They explain that although an individual may have the authority to manage a project, that does not ensure that they have the proper skills in place to lead and inspire real change (2013). They further explain how the challenges of today’s organizations require a combination of the “objective perspective of managers and the creativity of wise leadership” (2013). They conclude that managers bring order and leaders bring artistic analysis to reframe experiences and that both should “appreciate management as a moral and ethical undertaking” (2013).  

The structural frame examines how social architecture affects how an organization functions in regards to its goals, tasks, and context. The human resource frame is used to understand the relationships between people and organizations, specifically in comparison to how human nature works. The political frame investigates how scarcity and diversity stir up conflict. Lastly, the symbolic frame identifies the components within an organizational culture and other significant elements affect performance.

+ Structural Leadership

Structural leaders are grounded in the ___ of social architecture. They examine multiple perspectives of a structure strategy and environment (2013). They focus on implementation and experiment with different solutions. They are resilient and creative.

+ Human Resource Leadership

Human resources leaders are guided by compassion and utilize emotional intelligence and social skills to motivate their subordinates (2013). They put people first with communication as their super tool. They are consistently accessible and approachable because they want the ear of their people. They believe in fostering ownership among their teammates and often turn to horizontal hierarchies in an effort to prompt autonomy.

+ Political Leadership

Political leaders use perspective and position to guide their decisions. They constantly assess the alignment of ambitions and power to lead them to success. They network with appropriate stakeholders to gain favor among key parties. They use the powers of persuasion, negotiation, and coercion to navigate murky waters of politics.

+ Symbolic Leadership

Symbolic leaders aim to inspire their subordinates with grand gestures of leading by example. They arm themselves with a strong vision to frame their actions. They utilize story telling to depict visions and guidance.

Needs Assessment

When a needs assessment is being considered, the perceived issue, usually a matter of unsatisfying outcomes, has been made note of. Noting the term “perceived” is key here as a needs assessment is an investigation to discover a true and thorough depiction of a scenario and the accurate causes of the unwanted results. Needs assessments work to identify discrepancies between the states of “what is” and “what should be”(source). Often times, the individuals who initially identify the perceived issue already have ideas in mind of possible solutions they are favoring causing clouded judgement. A Needs Assessor is tasked with differentiating a clients needs from their wants. To do this, they must first define what a need is. Altschuld and Kumar suggest to emphasize that need in this case is utilized as a noun and not a verb (YYYY). They clarify that a need is a measurable gap that requires a solution. At the end of a needs assessment, a Needs Assessor should have the following items outlined:

  • What are the gaps in results?

  • In what order should the needs be addressed?

  • What are the most effective interventions to close this gap?

  • How can the client implement this intervention?

+ More on Needs Assessment

Altshuld and Kumar present a three phases needs assessment model. The first stage is called the Preassessment in which a committee is formed to determine the focus of the study. Existing information to evaluate the depth of the scenario. In some cases, the committee may discover that a needs assessment does not need to take place at all. The second stage is called the Assessment which takes a deeper dive into examining the needs through data collection, understanding the needs on different levels by analyzing the findings and most importantly, gaining a clear picture of where discrepancies exist and their potential causes. Recommendations are given to the client at the end of this phase.

The final phase is called the post assessment in which the Needs Assessor creates an action plan for carrying out the recommended interventions. The action plan should give a thorough overview for how the organization can implement the intervention, in some cases this action plan would exclude the involvement of the original Needs Assessor, and it is essential that the Needs Assessor consider the issue of sustainability. Without doing so, a Needs Assessor could put an organization in even more danger than they began with. In this action plan, the needs are prioritized based on the level of urgency for addressing each need. These levels are identified by evaluating how severe the outcomes would be affected if the need is not addressed within an appropriate timeframe or at all. Lastly a summative evaluation should be conducted of the entire needs assessment for future use.

There are a number of issues that could possibly lead a needs assessment to fail. Should an organization decide a needs assessment is necessary, they most likely have an issue in mind that they would like to treat. At times, needs assessors might not collect sufficient data and fail to recognize the existence of other, potentially more significant, issues which could be the real source of the performance problem. It is important for Needs Assessors to examine multiple data sources in order to gain a holistic perspective on the situation. On the other hand, a needs assessor could collect an abundance of data and instead send the client into “analysis paralysis” because they fail to provide an informative and concise summary of the data to show the client the value of the results (YYYY). One common scenario is that the needs assessor might not receive the full support or resources necessary to conduct a thorough investigation. Without doing so, the needs assessor could overlook necessary factors, address the wrong need, and instead present completely misguided recommendations. Should this be the case, the individuals experiencing the instructional intervention may respond negatively to it, causing more issues to generate, and thus increasing the rate of performance problems for the organization.

+ Role Ambiguity and Role Conflict

Yousefi and Abdullah identify role ambiguity as a lack of clarity of one’s role in an organization or the knowledge of how to perform their role (2019). They define role conflict as a confrontation of expectations from two different roles and when required to perform them simultaneously, one will often prevent efficient performance of the other. In a study focusing on organizational stressors on job performance of academic staff, Yousefi and Abdullah concluded that both role ambiguity and role conflict contribute to a decrease in job performance.

+ Design Leadership

In terms of leading a design team, Sherwin encourages an approach that promotes the growth of new leaders rather than a team following the direction of one leader. He explained that a team should work for the idea and that the leader’s purpose is to identify and foster the team’s connection with the vision for the idea in order to create a meaningful and holistic product. He identifies six skills and behaviors that allow design leaders to promote growth within their team members (2010). First, they should conjure meaningful (compelling) unique and original products. Second, they should communicate across all planes with rational and emotional intelligence in order to promote effective communication. Third, they should provide an environment that promotes creativity, unaffected by politics either originating from within the organization or from the clients. Fourth, they align the direction of the project with a solid vision. Fifth, they encourage their team members to take ownership over making informed design decisions with guidance from the provided vision. Lastly, they foster high morale with endless “enthusiasm and engagement” (2012).

+ Working Section

The cover page of this chapter includes an image that illustrates the comparison of the models of “Following the leader” and “Creating more leaders.” Sherwin builds on the idea that good leaders should aim to create more leaders. “Design leaders make awesome shit happen.” The following traits are identified for successful design leaders

  • Having a vision to proved overall strategic direction for the firm and clients
  • Connecting the vision with ideas from the team “No one works for a creative director. Everyone works for the idea. The idea hires us and we go to work.”
  • Builds effective relationships with clients and design team
  • Acts a a Behavioral Psychologist and appropriately interprets and adjusts to different personalities and behaviors
  • Understands the creative disposition of their teammates (left or right brain)
  • Anticipates needs and preferences of clients and how it will inform their design decisions
  • Exerts creativity in developing “sound business strategies”
  • Communicates with transparency in every direction
  • Fosters project ownership among peers and clients
  • Facilitates efficiency and effective workflow
  • Bravely takes risks to inspire innovation Hixon identifies that project leaders to have sufficient time to dedicate to the project.

Methodology

Action research aims to solve real-world problems of practitioners. 

+ Research Design and Method

This needs assessment has utilized qualitative data collection methods to reveal the gaps in results between the existing and the desired position description of instructional designers. The data collected from this investigation will be used to present recommendations for the revision of the current instructional designer position description and has revealed additional opportunities for further research. Online questionnaires were distributed to survey two groups of stakeholders and an analysis was conducted on the performance evaluation form to identify where potential discrepancies existed.

Each group of stakeholders received questionnaires unique to their groups in order to gain an accurate portrayal of the perceived gaps and potential needs. Each group was emailed a cover letter describing the purpose of this needs assessment, the procedures of the investigation, and instructions for completing the online questionnaires. The items on the questionnaire encouraged the participants to reflect on their past experiences with the instructional designer role within the organization. These reflections were compared against the performance evaluation form goals and objectives.

The performance evaluation form was analyzed using a document analysis matrix. The form identified that the goals and objectives were constructed with the themes of leadership, support, and production in mind.The matrix evaluates the alignment of these themes within the list of goals and objectives while also making note of those that don’t fall into a category. The comparison of the data collected identified where the gaps in alignment exist with the current and desired goals and objectives of the instructional design role.

To prescribe practical interventions upon data analysis, multiple perspectives were assessed.

Participants

Purposive maximal variation sampling was used to survey two groups of stakeholders from the same organization. One group was made up of instructional designers, are responsible for leading the organization in fulfilling distance learning and teaching initiatives, and the second group included non-instructional designers, who are delegated tasks with guidance directly from the instructional designers to complete these missions. This included the production staff which is made up of the graphic design, instructional technology, web developer, and multimedia departments. Surveying these different groups provided multiple perspectives on the instructional design role. Instructional Designers reflected on their first-hand experiences of fulfilling their documented goals and objectives. The non-instructional design staff were questioned about their interactions with the instructional designers in a highly demanding and collaborative environment. All of the participants have worked with the organization for a minimum of 12 months to ensure that they have had the opportunity to develop a thorough experience of working with the instructional design role as well as gain a grasp of the organization’s culture. Collecting data from both of these sources supported the triangulation of data from both the provider and recipient of the project management and instructional service.

+ Instructional Designers

The eight prospective instructional designers hold multiple roles within the organization as instructional designers, instructors and facilitator, and project managers. They educate university faculty members on principles of learning and teaching, provide instructional design services to faculty developers, and they delegate tasks directly to the non-instructional design staff to develop high quality online courses. In doing so, they inherently act as a liaison between the faculty developers, administrative staff, and production teams. Their practice is fundamentally informed by instructional design theory and evidence-based research. The instructional designers varied in experience levels in designing and developing online courses with some participants having less than five years of experience and others having over ten years of experience. A former instructional designer, who left the organization one month prior to this study, was also included in this sample group. Some instructional designers were involved in designing and developing the current production processes and procedures of the organization while others were still learning the protocol for themselves. Typically, an instructional designer works with a minimum of three faculty developers at a time, but some may end up working with as many as six or eight at a time if courses are not completed within their initial development cycle. Of the eight instructional designers (insert amount) responded to the online questionnaire.

+ Non-Instructional Designers

The non-instructional design staff are the primary recipients of the project management services being assessed. The instructors ranged from a variety of experience levels. Some of these staff members have little experience working in the higher education environment while others have vast experience and have held multiple roles within the organization. Until recently, many or the staff members worked on small segments of different courses at one time causing the departments to operate as silos rather than cohesively. The organization is beginning to move towards a more commonly accepted collaboration model in which one staff member from each department is designated as a team lead for each course. (insert amount) of the twenty prospective participants responded to the questionnaire.

Instrumentation

Analyzed with consideration to the four-frame model for reframing leadership. 

The NAC, composed of the assistant director, the lead instructional designer, and an additional experienced instructional designer, reviewed the instruments as a measure to improve content validity. Their feedback was implemented into the revised version of both questionnaires. The online instructional designer questionnaire included items about design experience within the organization, the instructional designer goals and objectives, and their experience collaborating with the remaining stakeholders.

+ Instructional Designer Questionnaire

The items inquiring about their design experience gathered demographic information about the participants, specifically regarding the timeframe in which they have worked for the organization. Items regarding their roles and responsibilities included the following topics:

  • Satisfaction with the goals and objectives for the instructional designer role
  • Satisfaction with the selection and alignment of the goal themes
  • Satisfaction with their organizational structure
  • Satisfaction with their processes and procedures
  • Job performance in instructional design
  • Job performance in instructing and facilitating
  • Job performance in project management

+ Non-Instructional Designer Questionnaire

The non-instructional design questionnaire also began with items identifying their work experience with the organization. The remainder of the questionnaire included the following topics: Perceptions of the role and responsibilities of the instructional designers

Satisfaction with collaboration with the instructional designers Satisfaction with communication with the instructional designers Overall satisfaction with the project management performance of the instructional designers

+ Question Structure

The items were provided in a variety of styles including likert scale questions, yes or no questions, and open-ended questions. The most significant items were presented as open-ended questions to allow the participants to provide rich and thorough answers without bias from the needs assessor. The questions were designed to explore areas of the instructional designers’ job performance where issues might exist. Both questionnaires are featured in the appendix section in this paper. The document analysis form reviewed the alignment of the goals and objectives of the instructional design role and additional evaluation items. Items on this questionnaire include the following topics:

  • The purpose of the material
  • The tools, resources, or competencies required for fulfilling the goals and objectives
  • Coding of the goals and objectives with the following labels
    • Instructional design role
    • Instructor and facilitator role
    • Project manager role
  • Identification of additional assessment items

The topics listed above were evaluated against the themes of leadership, support, and production to identify how each theme was distributed throughout the aspects of their role. This data was collected to validate the significance of the goals and objectives and identify whether revisions were needed. The document analysis form can also be found in the appendix section of this paper.

+ Procedures

The needs assessment was conducted over a six-week period during the summer semester. Once the research proposal and instruments were drafted, a copy of each item was emailed to the NAC members for review. Both verbal and written feedback was provided and implemented into multiple revisions of the research instruments.

Due to the shortened time constraint provided for this needs assessment, online questionnaires were utilized for the convenience of the participants and to increase the turnaround time of the data. The prospective participants were selected based on the access that the needs assessor had to the target population of instructional designers and non-instructional design staff within the organization. The questionnaires were distributed by individually sending the participants two e-mail messages. The first email included a cover letter that presented information about the needs assessment, instructions for completing the instructional designer questionnaire, and a hyperlink to access the instrument. The second email presented the same information as a reminder of the remaining time left to complete the questionnaire. All participants were notified that their participation was on a volunteer basis and that they would be allowed to quit participating at any time with no consequence. All incomplete questionnaires were excluded from the results of this pilot needs assessment.

The questionnaires were created using the Qualtrics survey software and were distributed to each participant’s organization email. All participants were provided with a hyperlink to direct them to the Qualtrics website to access the questionnaires. Participants were not restricted to using their organization computers and as a result may have ended up using their personal computers to access the survey material. However, no personal information about the participants was obtained through the Qualtrics system. The survey questionnaire was made available to the participants for a total of fifteen days. Any participants who missed this presented deadline, but wished to participate were notified that they would be allowed to access the results of this needs assessment and would be eligible to participate in future extensions of the study.

The instructional designer performance evaluation was examined in two phases. In the first phase the material was reviewed straight through in its entirety. The document analysis form was filled out during the second phase of review.

Data Collection

The questionnaires were collected using the Qualtrics survey software. The data was downloaded onto the need assessors personal computer in two formats and saved onto a private Google Drive folder. Individual questionnaires were downloaded as PDF files once the needs assessor received email notifications of their completion and a summary of the group results was downloaded in CSV format. A hard copy of the instructional design format was printed and digital copies were emailed to the needs assessors personal email address. The needs assessor created a google drive spreadsheet to create a document itemizing and categorizing all of the completed items as they were received.

Data Analysis

The following process was conducted for each questionnaire received. First, a preliminary exploratory analysis was performed on the online PDF version of the questionnaire to gain a general sense of the response. The questionnaire was then printed and coded. Significant text segments were outlined with a rectangle shape. Potential labels were noted in the left-hand margin and potential themes were noted in the right-hand margin. The labels were then organized into an excel sheet with their corresponding themes. The codes were reviewed and reduced to a total of 10 labels and 5 themes by collapsing any redundant concepts. Exact or similar word matches to the 10 selected labels were highlighted in yellow on each questionnaire. The occurrences were totaled and noted on a second tab of the excel document. An additional review was taken to narrow down the codes an themes resulting in:

A comparison table was created to identify interconnecting themes and display the relationships of the labels and themes.

The NA used the comparison table to identify (insert number) needs. The needs were itemized in a PDF each with a list, as preliminary perceived by the NA, of risks for not addressing each need. A summary of the data and the identified needs were emailed to the NAC prior their review meeting. The NA facilitated the discussion to prioritize the needs.

Evaluating the notes from the need prioritization meeting, the NA presented a final recommendation to the NAC.

Findings

Results

Design Implications


Conclusion and Recommendations

Discussion

Design Implications

Limitations of Study and Recommendations

Future Research

Further research would clarify the importance and impact of these competencies in other settings

Onboarding Design: Workshop Moderators

Moderator Training for the
Filipino American Culture Society Lock-In Alumni Workshop

Screen+Shot+2021-02-02+at+7.10.02+PM.jpg

Purpose

Every fall season, the Filipino American Culture Society (FACS) hosts an overnight lock-in event to serve as a bonding activity for its current members. The alumni members of the organization take this opportunity to meet and facilitate identity-based workshops for the current members. The organization can range from 60 to 100 members each year. There are often a total of close to ten alumni members who attend this event and take on the role of workshop moderators. When moderators are able to successfully foster meaningful and thought-provoking discussions, strong relationships are built between the alumni and current members. Being that the organization was created in 1994, the group of alumni is made up of a variety of ages, genders, occupations and moderator experience levels. 

This lesson is designed to offer training for lower-level experienced moderators or serve as a refresher course for highly experienced moderators, who may be stepping back into the scene after taking a long break. The learners will be informed of various strategies and guidelines that will pave the way for successful workshops. The participant instruction guide will provide clear and detailed instruction that can be easily comprehended with a limited given amount of time. Everyone has a unique story to bring to the table and often end up walking away with a greater sense of community and self-awareness. This training session will prepare the learners to reach those goals in an efficient and effective manner.

Aim

Train workshop moderators to successfully explore ideas of social justice and foster a collective consciousness of inclusion, tolerance, and strength through meaningful and thought-provoking discussions with current organization members.

+ Goal Analysis

  1. Accurately comprehend the themes of inclusion, tolerance, and strength.
  1. Demonstrate how to execute the workshop activities assigned in the moderator instruction guide within the given time constraints.
  1. Identify strategies of how to present a low-pressure environment to encourage participation.
  1. Demonstrate how to facilitate meaningful discussions by asking thought-provoking questions while providing an unbiased perspective.
  1. Demonstrate how to resolve obstacles and redirect the focus of the workshop back to the themes of inclusion, tolerance, and strength.
  1. Identify the significance of providing feedback to the moderator coordinator and completing the evaluation worksheet during the workshop.

Learner Analysis

72447_449986972308_2026643_n.jpg

+ General Characteristics

Learners will be of all genders including male, female or transgender and will be of a wide range of ages starting from 18 years old. In regards to work and education experience, the learners may have little to none or a vast amount of years of experience under their belt. The same range of experience will be present regarding the involvement these moderators have had during their time with FACS. With that said, a portion of these learners will have previously played the role of a moderator while some have only acted as participants. The organization is open and welcoming to all ethnicities, however a majority of the members may be Filipino American.

+ Specific Characteristics

As a prerequisite, each learner must currently be an alumni member of FACS. There is no minimum requirement for the physical capability of a learner. However, it is preferred that the learner is willing and able to verbally communicate with others as this will determine the success of the workshop they are moderating.

+ Motivation and Attitude

In FACS, the members are always encouraged to give back. This could mean giving back to their community, loved ones, or the organization itself. The majority of the learners are taking on this task to reconnect with old classmates or meet new members of the organization. Sometimes learners attend the event because they are at a crossroads in their lives and are looking to gain inspiration for a fresh perspective. Others may be attending because they have something they would like to share with the new members or simply miss the endearing environment. There are learners who take the task more seriously than others. Those who take it seriously, naturally end up stepping up to the role of the primary moderators. Those who wish to take on less responsibility often end up having more internal experiences while they observe the interactions that take place during the workshop.

+ Expectations and Vocational Aspirations

The learners can expect to hold a leadership role in one form or fashion. Regardless of whether the learner wants to take on a position with less responsibility, they must recognize that they are being presented as leaders and must conduct themselves in a respectable manner.

In these leadership roles, learners must be outgoing and willing to break the ice. They will be responsible for facilitating conversations and should feel comfortable with giving direction when necessary. The level of confidence they have in the message they are delivering will be easily reflected to the participants. The impressions the workshop moderators leave on the workshop participants can serve as a powerful influence for how the participants will perceive the organization after the workshop.

As long as a learner is an alumni member of the organization they are welcome to attend the lesson. Those who will not be present for the annual event itself are allowed to attend the lesson as they may offer insightful perspectives.

As the learners are recruited on a volunteer basis, this will show the instructor that the learners are willingly participating. The learners have chosen to be there regardless of their desired level of involvement. The fact that the moderators are volunteers can be inspiring and motivational for the workshop participants as they are witnessing the alumni members’ putting into action their vow to give back.

Contextual Analysis

+ Delivery Setting

  1. The instruction will be performed in classroom 232 at Salem High School. There will be 12 desks lined up in a grid format for learners who are able to be physically present. The room will have standard fluorescent ceiling lighting and adequate HVAC services. The desk of the workshop facilitator will be located to the right side of where the students are facing. An electronic smart board device will displayed at the front of the classroom and the facilitator will have a laptop connected to the smart board to display the instructional material. Printed copies of the moderator instruction guide will be provided in the classroom as well as a digital copy online for remote learners to download and reference.

    An online videoconference application will be used to present the instruction and be accessible to remote learners who would like to attend the lesson via an online platform. The facilitator will use the microphone installed on the laptop. An additional camera and microphone facing the students will be in place. The session will be recorded through the online videoconference application for learners who were not able to attend the lesson due to scheduling constraints.

  1. The learner will have a high level of involvement during the lesson. The facilitator will frequently request the learners to participate verbally so they can become more comfortable with speaking in front of others. This immediate feedback will also inform the facilitator of whether they need to change to a different teaching technique or take a brief detour to clarify the lesson material.
  1. Nearly all of the learners will have previously attended this annual event as a participant themselves. However, it is possible that they may have never played the role of a moderator. Although the learner may be familiar with the content being delivered in the workshop, they will still need to be guided on how to facilitate the workshop successfully.
  1. There will be a low level of competition during the lesson. The facilitator should ensure that all of the learners are on the same page and are working together.
  1. There will be a high level of task orientation during the lesson. With a limited amount of time, the facilitator should not move on to the next task until they are reassured that the learners are on the same page. Once the lesson is over, it is very likely that the facilitator will not be available to answer any of their questions during the application of their task.
  1. The facilitator will be dealing with learners of a wide range of experience levels. The facilitator needs to deliver the lesson material in a format that can be easily comprehended by novice learners, yet still enticing for experienced learners. The facilitator also needs to ensure that the moderator instruction guides are clear and concise in case there are moderators who need to utilize it, but were unable to attend the lessons prior to the event.

+ Application Setting

  1. The annual lock-in event takes place throughout various areas of a Salem High School. The workshops often take place in a section of the hallway that are chosen to be at distance where they are unable to hear or see other discussion groups. The hallways have standard fluorescent lighting and poor acoustic design. The workshops are to be completed within a total of 45 minutes. This includes the time it takes to travel from the original meeting place to their discussion location and back.
  1. The Moderators have little to no level of supervision during their workshops. The ratios of participants to moderators can range from one moderator for every fifteen participants to two moderators for every eight participants. It varies, as the final headcount for the workshops cannot be determined until the day of the event. As a result, the moderator coordinator often has to play the role of a workshop moderator himself or herself. Thus making them unable to offer supervision support of the other moderators.
  1. The Moderators are highly involved throughout the entire process as they are facilitating the assigned workshop activities and discussion prompts.
  1. The degree of peer cohesion can vary as this depends on the number of moderators present at the event. If the moderators are working in pairs, one moderator is designated a primary role and the other a secondary role. They each have their assigned duties, however they should be fully knowledgeable and capable of carrying out the duties of their partner.
  1. There are certain portions of the workshop agenda where the moderator will have flexibility on how they would like to direct the activities. Therefore, there is a medium level of autonomy in the application setting. There are specific activities like the final poster product that should be completed exactly as instructed, as the product will be presented alongside the other discussion groups’ products.
  1. There is a medium level of task orientation as the moderators are given a time limit of 45 minutes and must create a poster product. If a moderator is too focused on completing the task exactly how it is written in the moderator instruction guide, there is a chance they will miss an opportunity to further expand upon a stimulating thought raised by a participant. This could potentially be discouraging to the participant if they feel they have not been acknowledged and prevent them from participating any further. Working in small groups, this could easily influence the mood of the remainder of the workshop if not handled appropriately.
  1. The clarity of job expectations varies as a portion of the task deals with cognitive learning theory. The moderators will be given a detailed set of instructions that will clearly outline the activities and goals of the workshop. Results of certain activities are more easily measured than others. For example, you can evaluate whether the poster product was completed correctly through visual inspection, but evaluating the quality of a discussion may be more difficult to do.
  1. There is a low level of management control as the moderator coordinator will serve as the facilitator during the lesson, but will most likely not be present during the application setting. After the lesson, the task is solely left in the hands of the workshop moderator.
  1. Innovation is highly encouraged, as the moderators should feel a sense of ownership over their workshop. They are given detailed guidelines should they need assistance getting back on track, but are welcome to mold the workshop so long as it doesn’t lose focus of the workshop themes of inclusion, tolerance, and strength and the poster product is completed correctly.
  1. The application setting is highly appropriate as the organization was created and built at Salem High School. This event is designed to create relationships between the alumni and newer members of the organization. Salem High School is commonly the first degree of similarity that the moderator and participant will have.
  1. Having the event at Salem High School not only brings the moderators back to their roots, but it often draws up new perspectives of the venue for the participants. The intellectual discussions that occur during these workshops tend to leave deeper impressions on the participants that contrast with the daily hallway social interactions they may be used to.

Task Analysis

Learning Objectives and Instructional Strategies

+ Objective 1: By the conclusion of the training lesson, the moderator will demonstrate an acceptable comprehension of the themes of inclusion, tolerance, and strength for the discussion groups and the overall goals of the workshop.

(Concept/Recall)

Initial Presentation:

Announce the three themes and discover how each learner defines each term. Read a formal definition of each term. Ask the learners to write down possible scenarios that identify with each concept and may relate to the participants. Discuss the difference scenarios.

Generative Strategy:

The learners will write a definition for each term in their own words. They will be given the opportunity to share their definition. The learners will then write an example of a scenario of where each theme could relate to the participants. Learners will volunteer to read their scenarios.

+ Objective 2: Given a detailed instruction guide, the moderator will administer the workshop activities in their entirety within the given time constraints.

(Procedure/Application)

Initial Presentation:

Display an abbreviated agenda for the alumni workshop and review it by reading it aloud. Review and display a detailed breakdown of the agenda. Perform the icebreaker with all of the learners. Discuss the icebreaker. Describe the goals of the group discussion section and how the moderators can approach the activity. Ask the learners to write down two examples to use. Display an example of the sticky note poster and how the posters will look once they are displayed together.

Generative Strategy:

The learners will listen to the review of the agenda and write down notes. They will have a first-hand experience of participating in the icebreaker and take note of the different things they observed or thought about during the activity. The learners will discuss their experiences aloud and take down any notes necessary. Lastly, they will review the sticky note activity and how it should be displayed.

+ Objective 3: The moderator will present a low-pressure environment to encourage participation while actively observing participant behavior.

(Concept/Recall)

Initial Presentation:

Ask the learners to alternate counting off as the letters A or B so they will be split into 2 groups. Next, ask the learners to think about whether they are for or against abortion and why it’s necessary to discuss it with the FACS members. Announce that each learner will be asked to share their opinion aloud one by one and we will begin with group A. Play the one minute timer video (https://www.youtube.com/watch?v=sA0-QXbLnaE) and announce when the time is up. Mention that for the sake of time, only three volunteers will have to share their opinions from group B once you have gone through all of the members in group A. The facilitator will then call on the first person in group A and ask them how they felt about group B being given the option to share their opinion. Call on another learner of group A to share how they felt. After, ask a learner of group B how they felt once it was announced that they had the option of volunteering. Call on one more learner from group B. Ask the learners to raise their hand if they would have volunteered to share their opinion if given an open floor. Discuss the importance of providing a low-pressure environment and how it can affect the FACS members’ experiences. Specify how certain topics may be more sensitive to some than others. Display a list of the types of behavior to look out for and how these signals can tell a moderator how they may need to direct their discussion.

Generative Strategy:

Learners will be asked to mentally form an opinion about being for or against abortion and why it is important to discuss it with the FACS members. Once the learners are given the restrictions for sharing their opinions, they will be randomly selected to share their opinions about the given sharing restrictions. The learners will write down notes about behavior and signals to observe.

+ Objective 4: Given a suggestion list of discussion questions, the moderator will drive a thought-provoking conversation while providing an unbiased perspective.

(Procedure/Application)

Initial Presentation:

Display the slide for active listening and have the learners write down a few signals that confirm that someone is practicing active listening. Open the floor for 3 learners to share their list. Type the list on the slide and display your list after from source (https://www.skillsyouneed.com/ips/active-listening.html). Ask the learners why it is important for a moderator to practice active listening. After the discussion, ask 6 learners to select an index card from your stack of moderator practice cards. Give 2 online learners roles by typing into private chat messages with them. Tell the class that each of the cards list a role and line that they will read aloud. There will be a Moderator A, Participant A1, Participant A2, Participant A3, Moderator B, Participant B1, Participant B2, Participant B3. Announce that Moderator A will read the first question on their card first and Participant A1 will read a response. Moderator A will need to reply to that statement and carry on the discussion eventually getting through 3 questions listed on their card. Read your assigned response that will serve as an obstacle taking the conversation on a possible tangent. Open the floor for discussion about strategies that worked in that scenario and where improvements could have been made. Discuss the purpose of holding an unbiased perspective and revealing this technique to your participants. Proceed with practicing the same exercise with Group B and briefly discuss the exercise in the same way the first scenario was discussed. Give the learners 1 minute to reflect and write down notes about the activity.

Generative Strategy:

Learners will be asked to write down different ways to practice active listening and will have a group discussion about why it is important for moderators to practice it. By randomly selecting cards, 8 learners will be assigned cards that list a role and a line to read aloud. Group A will act out a brief discussion acting as either the moderator or participants. The learners will have an open-floor discussion about strategies that worked and improvements that could be made to the scenario. Group B will act out the second scenario. The learners will be given time to reflect on the activity and write down notes.

+ Objective 5: During the workshop, the moderator will resolve distracting obstacles presented by the participants and redirect the focus towards the themes of inclusion, tolerance, and strength.

(Procedure/Application)

Initial Presentation:

During the discussion exercises, you will present responses that will present obstacles for the assigned moderator. Identify the obstacle presented and how it was handled during the discussion portion. Ask the learners if they have experienced having to deal with any unusual obstacles during their previous experiences or witnessed any. Try to encourage a minimum of 3 learners to share.

Generative Strategy:

The assigned moderator during the discussion exercise will receive a response from the facilitator that reveals an obstacle. The group will discuss how the moderator handled the obstacle and other options of handling it. They will be asked to share any previous experiences they have had dealing with unusual obstacles.

+ Objective 6: By the conclusion of the workshops, the moderator will be confident in their ability to facilitate activities and discussions with current FACS members.

(Concept/Application)

Initial Presentation:

In the beginning of the course, ask learners to write down 3 challenges they have witnessed or experienced themselves as moderators in the past. Pass out a survey asking the learners about their experience with moderating. At end of the workshop, ask the learners which challenges that they listed on their surveys were successfully addressed during the lesson. Ask the learners which challenges listed their surveys were not addressed during the lesson and have an open floor discussion to brainstorm how they could be addressed. Ask the learners to fill out a survey asking how they feel about moderating and what their favorite activity during the lesson was.

Generative Strategy:

The learners will be evaluated at the beginning and the end of the workshop on how confident they feel about moderating. At the beginning of the lesson, they will be asked to list challenges they have faced in the past and they will be asked whether these challenges were addressed in the lesson or not.

Workshop Material

Moderator Handout

This handout was created for moderators who received training is meant for quick reference only. Therefore, the hand out could not include include too much information. Graphics were used to help communicate ideas and jog the users’ memory. The ice breaker section had the most information, but each of the prompts needed to be listed since we couldn’t expect the users to memorize the activity prompts.

What was especially great about this handout was that there was a digital format available. Users could send the handout to other moderators who may have misplaced their copies and they could zoom into sections if needed on their phones. Looking back on this now, the very first thing I would change is the color scheme of the guide itself. I would use a background color that is more compliant with accessibility standards so that it is easier to read.

171130_IDT749_Matel_ModeratorQuickReference.jpg

Workshop Presentation Deck

Facilitator Guide

Instructional Designers work with Faculty Developers to help create a course. However, the Faculty Developer does not always become the instructor for the course. For this purpose, instructor guides must be created and must comprehensive enough that anyone off the street could come in and teach the course if need be.

I had experience making similar instructional deliverables, but have never made one quite this detailed. This was my first experience making a professional facilitator’s guide. One essential thing I learned was the significance of visual cues. I used visual cues to:

  • Identify which slides to display

  • Cue actions such as dialogue, slide changes, and other action items

  • Provide classroom seating layouts

  • Identify handouts

If I had known ahead of time how much time I needed to allot for the development of these packets, I would have definitely set aside some extra time to design a style guide to enhance the packet.

Participant Guide

The participant guide was essential a workbook. I added questions and fields to provide answers, checklists, and empty lined pages for personal notes. Examples of each of the handouts that were going to be used in the workshops they were going to facilitate were also included.

Evaluation

Moderator Evaluation Worksheet

Moderator Evaluation Worksheet

Evaluative Instruments

A written prompt will be given during the lesson requesting for the learner to describe their definitions of inclusion, tolerance and strength. Once everyone’s personal definitions are discussed, the moderators will be asked to write down their refined definitions. The moderators will keep these prompts for their own reference.

The poster product will be serve as a motivational and collaborative creation displaying how the participants practice inclusion by displaying tolerance and promoting strength. The posters will be turned into the moderator coordinator who will give them to the FACS sponsor.

The evaluation worksheet will be started during the workshop itself and completed during the moderator feedback session. This worksheet will record details about the demographic such as age, gender and grade. Moderators will record a tally mark each time a participant voluntarily contributes to the conversation and note any obstacles that arose in the discussion. These worksheets will be turned into the moderator coordinator who will review them with the FACS sponsor and FACS president.

The moderator feedback session will serve as a platform where moderators will be able to verbally share their thoughts and workshop experiences with one another. The moderator coordinator will ask moderators about the areas they felt they excelled in and what processes or activities that they would like more training on. The written notes and video recorded during this session will be key resources for the FACS sponsor and FACS president to review for possible future improvements.

Evaluation Plan

+ Formative Evaluation

One of the main duties of a workshop moderator is for them to foster thought-provoking discussions with their participants. They must do so while not veering too far off from the overall workshop themes of inclusion, tolerance and strength.

During the lesson, learners will be asked to verbally provide examples of how they may handle various obstacles during these discussions. This could include a role-play activity where the learners take turns being a participant presenting an obstacle and a moderator providing a solution. This activity will allow the facilitator to observe the learners’ abilities to remain flexible and adapt the discussion. It is important to conduct the majority of the evaluations verbally so the learners are comfortable speaking up and leading their own discussion groups. With a limited given amount of time to prepare the learners, conducting this immediate evaluation will allow the facilitator to adapt the lessons accordingly if needed.

Lastly, an Instructional Designer will be reviewing the material from an Instructional Design lens. This will ensure that the over lesson is effectively and efficiently working to improve learning for the moderators through achieving the chosen objectives.

+ Summative Evaluation

Following the workshops, a feedback session will be held for the moderators and the FACS sponsor. The moderators discuss new experiences, observations or difficult situations they may not have been able to overcome. The moderator coordinator will take written notes and record a video of this session. These notes will be referenced for improvements that need to be made for the next annual workshop.

With the possibility that many learners will be traveling a long distance to attend and participant in this event, it is imperative that the evaluations be conducted immediately after the workshops. Otherwise, there is no guarantee that the moderators will take the time to complete them in a timely fashion, if at all. It is beneficial for the learners to complete this written evaluation while the experience is fresh in their minds.

In addition to the feedback session, a written questionnaire will be included for the learners to rate their experience. This will also allow them to share any unique situations that they were unable to discuss due to the time limit or that they were not comfortable with sharing with the entire group.

+ Confirmative Evaluation

I will be incorporating an evaluation worksheet to be completed during the workshop itself. Initially, the worksheet will gather basic details about the participants such as age and gender. There will also be an open section where the moderators will be able to record any interesting observations they have made.

As this is will be the first year these evaluation worksheets will be incorporated in the workshops, only preliminary assumptions will be gathered. One of the most difficult variables of this activity is that the individual participants and the moderators are always changing.

The group of moderators will always be compiled of individuals ranging from a variety of ages and experience levels. There is rarely ever consistency with the demographics of the moderators as it is a volunteer position with the only prerequisite of having been a member of FACS. The participants often tend to fall into to trending behaviors, but major changes can be observed with different waves of generations. Therefore, the annual events could generate similar results over a four-year period or produce entirely different results every year.

Incorporating these evaluation sheets is a great first step towards improving the annual events to follow. A digital archive of these evaluations will be created for future generations of FACS to reference along with the written notes and video recordings of the moderator feedback session.

Additional Handouts

Tongue Twister Audio Tester

Sound Transformation Test

In 2010 I had this idea for a poem I wanted to write from a child’s perspective. I can’t quite recall what compelled me to write this piece, which I have now decided to call Unsung Hero. However, I found a few materials on my old tumblr that I created as test pieces to for the sound transformation I wanted to create.

Screenshot of Intro to Original Tumblr Entry for Unsung Hero

Screenshot of Intro to Original Tumblr Entry for Unsung Hero

Yesterday, I decided to rerecord the piece, but leave my voice unfiltered. It was tough to read through at first and I didn’t quite nail the articulation I had in mind. So I decided to reformat the piece on a word doc and spaced out the words out in a new way and added a few edits because it didn’t make sense. However, all of this was before I actually read the intro to my original tumblr entry (featured in the image above) and realized that with the way it was constructed it wasn’t meant to make sense. I guess I was just thinking that I don’t always make sense in my free writes anyways, but found the turns I took with this one especially odd. It makes way more sense now that I know I took turns with someone to write it. Below are the audio tracks I recorded in 2010 and yesterday.

2010 Original Recording

2021 Interpretation

Unsung Hero Tongue Twister

Children born of the natural tongue
This song of this hero shall remain unsung
as we underestimate the pattern of this young son
he rises up from your striking down
of the sound of the very thought
that he shall one day begin preparing for your next feast
for at least he knows what it means to take the shoes of another
hanging on the line say a prayer for his brother
taken down by the big man walking in the streets
and against the shadows he follows
the fair bare skin of this young knights camo
may only protect you for so long
as the exposure melts through elapsing time
suppressing all kinds
of filth full proof faith produced purely
for this punk ass bitch laying underneath my barrel
and Now i'm in control and I hold the bow to the arrow
so when I say aim you say
apple?

Borderline Bondage

The piece that I created this test audio for was called Borderline Bondage. Here is the audio for that piece:

In present day, I like the piece as an audio piece alone. At first, when I would just even see a preview of the video I would cringe thinking about what an “amateur piece” it was given the imagery I recorded and the way I edited it. Sometimes video can hurt a piece more than help it, especially when it feels like you’re spoon feeding emotional drama to your viewer.

For example there are some pieces that are far better performed live rather than listened to as an audio recording. Sometimes recording can feel too staged, manipulated, or edited. When you’re at a venue with a performer the ambience, such as the size of the room or the lighting, can help setup the mood. Overall, it’s the rawness in the deliver of the performance that moves you in that moment. You can’t always get that across in a recording even if it’s a recording of the performance. It sounds obvious, but everything about being there in that moment is part of the experience.

Though I’m not the biggest fan of the video I created for this piece, granted it was over 10 years ago, I’d still like to share it with you. I created a puppet out of recycled fabric and recorded it and myself in similar positions. After watching it a few times through, it grew on me and I feel half way decent about it, but it still feels far too saturated in emotion when compared to the audio on its own.

Interviewing 1st Gen Immigrants of the 80s

The 1st Generation Filipino American Experience: Laying Down Roots in the United States

An Interview with Manuel and Marina Matel

This is a proof of concept video created in 2013 for a documentary I want to create about 1st Generation Filipino Americans and their immigration experience. To create this video I did the following:

  • Coordinated Interviews

    • Wrote questions and created slides with questions

    • Recorded interviews

    • Reviewed and culled footage

    • Recorded hand-written title slides

  • Scanned and Trimmed Source Material

  • Layered Audio

    • Dahil ‘Sa Yo spoken word recording

    • Music by the composer Chopin

    • Interview Audio

  • Animated Graphics

    • Created lower-thirds

    • Motion graphics

If I'm able to find the original source videos I would like to redo this video and perhaps remove the spoken word recording and focus more on the interviews.

Source Material

This was an indirect interview with my parents Manuel and Marina Matel. Meaning, I was not in front of them asking them questions, but rather I displayed the questions on my laptop and left them alone in a room with my laptop in hopes of giving them the space to be open and honest about their experience. This was indeed a success as I was hearing many of the stories for the first time when I reviewed the videos.

The photographs are image from my family archive and the additional images were sourced from a book called In Our Aunties' Words: The Filipino Spirit of Hampton Roads. The inserted audio recording is called “Dahil ‘So Yo” and was performed and written by members of a Youth Organization from Salem High School called Filipino American Culture Society (FACS).

Woven Words in Guatemala

We Are Woven Words

This experimental video and spoken word were inspired from the time I spent in Guatemala with the children and the Women’s Circle. Textiles were a large source of income for the organization and I was intrigued by the creation process.

Unfortunately I didn’t notice how the video was cut off on the online version so I will need to upload the full version later.

Artist Statement for Video

This experimental video is an exploration of the endurance and strength displayed by the communities of Guatemala and the physical, mental, and spiritual toll that it has taken on their lives. Through observation and from various dialogues that were exchanged with the members of the community, we were able to learn about a few of the challenges that they have had to withstand over the past centuries. I have used their traditional practice of textile weaving with the foot loom as a metaphor for the process of survival. The interaction of the tension and contrasting colors of the threads symbolizes the struggle and triumph over the challenges they are presented with. Each thread is positioned with such meticulous precision and refined detail. A strong force is then applied on the loom pounding each thin thread into the textile, representing the tolerance that they have become accustomed to. As no two textiles are exactly alike, each final creation then serves as a unique and one of a kind official documentation of their stories. I have also inserted layers of physical portraits of the members of the communities we visited.

In 2011, I was awarded a scholarship to study abroad in Guatemala. I was enrolled in an Art Education course called Art Transformation: Social Change in Arts and Literacy. The course was taught wonderful by Jan Johnston and Sharon Zumbrunn. They were amazingly empathetic professors who were perfectly suited for framing young and impressionable minds in humanitarian and philanthropic work. To learn more about my trip and the Mayan Arts Program, watch the video below.

Teaching the Comic Book Activity

I was assigned to a group in the class and being that this was an art education course we were responsible for designing and facilitating an activity with students of various age levels. We came up with the idea of using illustration as a means of communicating and teaching language through a comic book activity. I will need to expand on this memory and share more at a later time.

These are drawings from the children in my notebook.

Flag Football Highlight Reels

Introduction to Flag Football

I started playing sand flag football with my husband when we first started dating in 2010. I liked the idea of playing sports in general, but only played on actual teams in grade school briefly. I was on the track team in 8th grade and the tennis team in 9th grade. Joe played on a team called Dynasty with his friends and they were going to have to forfeit the first game I came to watch. As we walked up Joe asked me to put on a Dynasty jersey and I started panicking. I was like “what? I don’t know how to play!” Sure I liked throwing the ball around, but I wasn’t about to make a fool of myself on the field. I finally understood when his teammate Leslie Enriquez explained that I just needed to put the jersey on to show that they had the minimum amount of players needed and so the other team, who also had late players, would have to forfeit instead. All that anxiety for no reason lol. Not long after, I started subbing in on games when I was in town from college. I started playing more often when I came home for the summers and eventually started playing in coed recreation leagues at school.

IMG_1991.jpeg

Highlight Reels

We had started to work on demo reels in school and I learned how to make DVDs with the menu screens and everything. Joe and my siblings bought me a video camera for my birthday so I ended up recording a few videos of the Dynasty games. I ended up making a highlight reel for the team and burned it on a DVD. Joe’s car had a screen we could watch DVDs and that’s how we showed it to some of the players lol. Surprisingly I don’t have a copy of it online, but I will eventually. I just need to find the disc and rip it. Here are a few highlight reels I’ve created since then for the different teams we’ve played with.

The Hustlers

2015 - 2018 Coed Sand League

The Neptunes

2016 Coed Sand League

Granny Panties

2015 Women’s Sand League

The Replacements

2014 Women’s Indoor League

Blue Crush

2013 Coed Sand League


Greetings from the Grave

Kind of an eerie blog title I know, but that’s essentially what this video came to be. In 2014 my dad passed away from cancer. A couple years before that I interviewed my mom and dad about my sister MJ because I had planned on making her a video for her birthday with greetings from her family and friends. For whatever reason I never got around to it.

When my dad passed away that august, I was looking through footage of him to put together for a video for his memorial service. I came across his interview about my sister and knew that I had to make that video happen that year since her birthday is in October. I went to the visit the Philippines, which is where my parents and siblings grew up, and came across a bunch of old photos my grand mother had of my sister when she was young. My siblings didn’t have very many photos of themselves while they were young at our house in the states. So I borrowed the photos so that I could take them home and make digital copies of everything.

Creating that video was one of the hardest projects I ever had to work on, but I knew I needed to make it happen. In essence, it was a way of keeping the memory of him alive. It’s the experience of sharing and creating new memories or general emotive nature of video work that keeps me in the business of digital story telling. I aim to become a producer or director of film documentaries one day. If not a full-time career, for my family at the very least.

Recovered Photos

Excerpt of our Dad’s Greeting

Audio from slideshow portion blocked by YouTube due to use of copyrighted music (Dancing in the Moonlight by Toploader)

I do not own the copyright to use the song Dancing in the Moonlight by Top Loader

Full Video

Viewing Slideshow for Manuel B. Matel


Henna Inktober Challenge

Inktober 2016 Prompt sourced from Witchiii

Inktober 2016 Prompt sourced from Witchiii

In 2016, I decided to do a drawing marathon similar to the Inktober Challenge which is a challenge created by the talented artist, Jake Parker, and is traditionally for illustrators using traditional black pigmented ink mediums. The Inktober account releases a list of prompts for the 31 days of October and illustrators use #inktober when they post their images. Instead of following the prompts, I used the following themes:

  • Melody Monday

  • Repetition Tuesday

  • Warrior Wednesday

  • Freestyle Friday

  • Technique Thursday

  • Symmetry Saturday

  • Spellcheck Sunday

Before the season started I reached out to a couple of friends and family members looking for people interested in being subjects for my challenge.

I created a spreadsheet to help me keep track of logistics as the challenge went along. On days that I didn’t have appointments with clients I either practiced on myself or used an acrylic plate as a surface so it would be easy to clean the henna paste off of.

+ Client Preparation Email

Hello,

First and foremost, thank you so much for participating in my 2016 INKTOBER challenge. I am so excited to have you be a part of my journey and see what dope work we can crank out! Before we get started I have a couple of details I would like to share with you.

OCTOBER

Theme ____

Artist Arrival ____

Session Begins ____

Duration ____

Address ____

PREPARATION

  • Do not wash the design area before your session
  • Wear clothing that does not cover your design area and items that you don’t mind getting stained
  • If you have long hair please plan to have it tied up
  • Think of a pandora station you would like to listen to!

QUESTIONS FOR YOU

  • Do you have any allergies?
  • Have you received henna before? If so, what were the results?
  • Are you okay with being featured in any video or photos?
  • Do you have any events/appts shortly after your session?
  • Any within 2 weeks of your session? If so, what is the event and is it indoors or outdoors?
  • Which Henna Paste would you prefer me to use?
  • Where do you want to get your design?

NATURAL HENNA PASTE

Will leave a brown stain that will reach it’s darkest in 3 days. It takes about 30 minutes to dry, but the longer you leave it on the darker the stain will be. I usually keep mine on overnight when possible. These stains can last up to 2 weeks with proper care.

BLACK/RED HENNA PASTE

I call this my “Fast Food” Paste. This henna paste is chemically enhanced and will dry in less than 10 minutes. It leaves a dark stain instantly, but will last not last as long as natural henna.

Everyone’s skin responds to henna differently and so do different ares of the body. After your session I will email you care instructions as well as guidelines for posting to social media.

I have attached some inspirational photos for your session including those you may have already sent me. Please let me know if you have a preference of style and I will do my best to incorporate it in the design. When researching concepts please do not look up “henna” or “mehndi” designs. Instead try searching illustrations, stencils or line drawings.

Don’t hesitate to call/text me if you have questions or concerns. Thanks again and see you soon!

Best Regards,

Mary Anne “MA” Matel

If you couldn’t tell from the first email, I wanted each client to be well-informed. After their sessions I followed up with the following email:

+ Client Follow-Up Email

Hey hey!

Thank you for participating in my 2016 INKTOBER project! Here are a couple of tips and requests: STAIN CARE

  • The longer you leave the paste on, the darker your stain will be. Keep it on for as long as you can stand it. I recommend anywhere from 2-8 hours.

  • Wait until your design is bone-dry before applying the mefix tape. Be careful not to press down too hard on the design to avoid smudging it. It is okay to sleep with the tape on.

  • Scrape off the design. DO NOT wash it off with water. If the dried henna paste comes in contact with water it can stain your skin again.

  • Avoid contact with water for at least 6 hours or 24 hours if possible. The more contact your design has with water, the sooner it will be removed.

  • When you shower you may rub with soap, but avoid exfoliating your design area.

  • It’s not necessary, but you may apply oil to your design to increase its longevity. Coconut or olive oil work great!

  • If you plan on exposing your design to sunlight, remember there is a heavy chance that you will get a tan line of your design.

  • Natural Paste : Your stain will reach it’s darkest tone on Day 3 and may last for 2 weeks

  • Red or Black Paste : Your stain will instantly be dark and may only last for 1 week

POSTING ONLINE

  • When using hashtags please use : #2016INKTOBER #inktober #MatelArtistry #henna #bodyart- On IG you may tag me with @mamate11 or use the repost app- If you haven’t already, please "like” my previous inktober posts :)-It will help bump up my posts in the IG feed.

PHOTOS

  • Please take a photo of your stain immediately after removing the paste and once again on DAY 3. You may text me or reply to this email.- If possible, have someone else take the photo so the entire design may be included- You don’t have to feature your face if you don’t want to- No mirror photos please (where you can see the phone in the photo)

FEEDBACK

Is there any additional info you recommend I include in my pre or post session emails?What did you least enjoy about your session?What was the most memorable part of your session?Without me telling you how much I charge, how much would you guess your design costs?Were there any misconceptions you had about henna paste?

After inktober I’ll be working heavily on my campaign for releasing my brand. If you know anyone who may be interested, I’m currently taking private session and party requests! However, I won’t be releasing any major promotional material until 2017. I hope you enjoyed your session! As always, I’m here for any questions or concerns you may have. Thank you once more and I can’t wait until our next session :D

Best,

Mary Anne Matel

After the challenge I started to printed and posted flyers to share and I even made a video bumper (featured at the top) to advertise for the upcoming halloween holiday.

Henna Journey

IMG_9282.jpg

I’m embarrassed to say, but I got my first henna tattoo in 2015 at Kings Dominion. My sister and I thought it would be a good way for us to play around with designs and experiment with where we wanted to place our real tattoos. People noticed my designs and started asking me to host parties and be a vendor at events. 

I eventually discontinued advertising my services because I couldn’t help, but feel like I was participating in culture appropriation. Although I had no ill-intentions with the work I was creating, as most guilty parties often say, I still felt like I was a little too close to the edge. Just before I discontinued my service, I reached out to one of my Indian friends and asked about her opinion on the matter and “western henna”. I first learned about the ceremony element of henna at her wedding. She replied:

Hi Hun!! Thank you for the well wishes. I hope all is well with you too!! I think people would def be open to it and it would not at all come off as offensive. I asked my mom and she agrees. The most important thing is talent and professionalism, which I know you have both of! Good luck with the events and if I know of anything that you could come to, I will let you know 

 best wishes!

To be honest, she was probably just saying that to be nice. The feeling kept eating away at me especially once people started asking for cultural designs that I was well aware had specific ancestral symbolism. So I stop advertising my services to the public. Though I am no longer offering these services, it was nice to get back into hand drawn illustrations for a bit.

I attempted the inktober prompts another year except with a focus on ideation and just sketching out ideas for art pieces. Something I thought was going to be easier to fulfill with a lower expectation, but I only got three days before I forgot or occupied with other work lol. I’ll try it again one year.

ROXYGREY+ Brand Relaunch

ROXYGREY+ was a lifestyle brand created and owned by Melicia (Limbo) McGourn. She was looking to relaunch her brand and hired me to help produce a video bumper and some merchandise.

2014 New Logo Debut

ROXYGREY+ had a new logo designed and one of the new features was the plus symbol. She was expanding the focus of her brand. To emphasize this, I animated the + to drop in. The topics culture, community, and conscience rotated in before the reveal of her new logo. The ROXYGREY+ brand colors are purple and grey so I used a gradient of purples for the three topics.

2014 The Neptunes Sponsor

ROXYGREY+ sponsored The Neptunes flag football team so I added her logo to our jersey design. I placed it towards the left shoulder so it would look like a patch.

FINALNep_Combined.jpg
The Neptunes Sand Flag Football Jersey

The Neptunes Sand Flag Football Jersey

2015 Merchandise

Melicia had four concepts for new merchandise pieces she wanted to make. I sketched out a few of the concepts she shared with me.

  1. ROXYGREY+ Tribe Patch
    A variation of the main logo to accompany the Doers Jersey

  2. Love
    Spreading genuine love and kindness has always been a theme baked into her brand.

  3. Power Lift
    Melicia had gotten very passionate about power lifting and began to compete that year.

  4. Doers
    This jersey was a front and back piece. This design was for members of the community taking action into their own hands and doing good for others. Unfortunately, the print vendor forgot to include the ROXYGREY+ logo.

I took a couple of passes at each idea and we ended with these final designs.

Shooting Family Portraits

These are a series of mini photo shoots, both planned and impromptu, that I have done for my family members over the years. I was first introduced to the world of photography when I assisted an editorial photographer in 2013. I picked up a few camera techniques from working with various photographers and I learned about posing and time management techniques after working for retail portrait studios, but at the moment I don’t have any plans of pursuing it full time. My main goal with photography is to be able to capture quality portraits for my immediate family.

160701_Robinson_24.jpg

Portrait sessions are can be very emotional experiences that can either leave clients filled with joy or traumatized for years. Good quality portrait photographers, in my opinion, have a thorough understanding of how important it is to make their clients feel confident and comfortable in their own skin. After all, it directly impacts their work. When it comes to portrait photography, the experience of the session is just as significant as the final products.

When I worked at a retail portrait studio, I had quite a few friends and family members come by. Associates were expected to only spend a total of 30 minutes with the clients with 15 minutes shooting and 15 minutes selling. Although it’s fairly doable, moods and situations can change at the drop of a dime so sessions can quickly get stressful even for experienced photographers. It’s imperative that photographers know how to:

  • Problem solve efficiently and effectively

  • Demonstrate attention to detail practice (This can save a lot of time in post production)

  • Listen and provide quality customer service

  • And most of all, think ahead and try to predict any potential disruptions

To try and help my clients be as prepared as possible, I created the following guide and shared it with them prior to their shoot

Photo shoot preparation guide

Photo shoot preparation guide


September 2019

190927_Evan_FallGraphic1.png
190927_CalliaAva13.jpg
190927_OliviaGrace_LoDreamHiRes45.jpg

I did a multiple shoot session for my inlaws and it was an all-hands-on-deck adventure. We had a lot of great energy on set and needed every hand we could afford. The main event was a series of fall-themed portraits. In an addition to fall portraits, we did a baby announcement and some cultural birthday portraits.

Being that I don’t photograph very often and that I don’t always have an assistant with a photo knowledge base available, I try to plan ahead as much as possible. I create a shot list of basic poses, so that I can cover all my bases and get some addition creative shots. This both gives me peace of mind and allows me to be fully present in the moment since I know that if things ever get too stressful or if we get sidetracked, I have a printed guide of logistics already outlined. Like I mentioned, I don’t shoot often so I’ll even print out a few inspiration poses to help job my memory.

Screen Shot 2021-01-02 at 1.25.52 PM.png

September 2018

My husband and I got engaged in Dec 2017 and wanted to have a meet and greet party for our families. We also set up a mini photoshoot in my brother’s living room because I wanted to get headshots of everyone so I could make family trees to share with our guests and wedding vendors so they would know who was who.

At that time I didn’t have appropriate modifiers of my own to use for portrait photos. I used a clam shell set up because I was aiming to take individual headshots, but then we started to take a few group family photos. The images came out sharp, but would have been a lot better if I had a modifier to soften the light.

July 2018

My nephew Roman’s birthday was coming up and my husband and I were babysitting him and his sister on and off that summer. We decided to do a mini photoshoot in their living room so Roman could have some portraits to use for cards or invitations. We also ended up creating a few games and decorations for his fishing themed birthday party.

December 2016

This was one of those shoot where the experience was more valuable than the final products. Not everyone was thrilled about their final looks so I ended up doing some heavy handed editing and the images ended up having that blurry “glamour” shots feel. We still got some great shots in.

November 2016

One of the first shoots we ever did was in 2015 with my nieces and their sports equipment. We decided to give it another shot, but this time with them in full uniform.

August 2016

2016 was the first year that any of my mom’s grandkids had gotten the chance to meet their great grandmother, Gregoria Ramos. It had been quite some time since my aunts and uncles had a family portrait and I didn’t have any lighting equipment so I shot in natural light. I had a lightweight travel tripod we set up on my grandmother’s patio where we were luckily able to take advantage of the green landscaping.

I can’t remember who came up the idea, but my mom told me that the theme was going to be red. As you go through the album you’ll see that we had a few outfit changes. That’s because we ended up taking more photos each time new cousins stopped by the house haha.

July 2016

I used a 3 light set up for the images on the white backdrop and a clamshell setup for the close ups. I used a one light set up with a large octobox modifier for the images on the grey background and a clam shell setup for the close ups.

My sister, MJ, and her daughters brought a few outfits for the girls try out. I don’t remember if we were shooting for a specific occasion or just so I could practice. Either way, we had a lot of fun and the images turned out great. I remember my youngest niece (at the time) was just dropping by the studio at the end of our session to say hi. We asked her to stand in for a photo and used a ladder to get her level with the clam shell setup. I got her posed and ask her not to smile for the first photo and she unknowingly delivered an astounding performance lol.

October 2015

I want to say these photos were taken in Charlottesville, VA at an apple orchard. We met up with my brother’s family for my sister in-law’s birthday.

September 2015

This shoot was for my nephew’s first birthday. It was entirely too bright the first day we did the shoot, which is the second batch of images shared. It never hurts to redo a project you’re not satisfied with.

The first batch of images shared below is from a reshoot we did in our own backyard. He always has a great smile to share with the camera so I wanted to take the time to capture that and it was well worth it.

I did end up designing a thank you card for his birthday party with an image from the first shoot.

150919_EvanTY-02.jpg

April 2015

My husband’s, at the time boyfriend, family had not taken a family portrait in quite some years. At the time I was working at a retail portrait studio and invited them in to come get a session in. We had a lot of different combinations of shots to get in order to fill up the printed family album. It all ran very smoothly and we got some great images that will last for years.

January 2015

I believe this was one of the first times we used my DSLR camera and we just grabbed some shots in my sisters backyard. Any photos that I’m in were more than likely shot by my husband. I didn’t (and still don’t) have much experience with natural light photography, but I did know that we needed to try and go out around golden hour.

I think we decided to take these photos just so I could get some practice. My nieces played softball for many years so we decided to grab some shots of them with their equipment.

Shooting Business Headshots

2019 Aubriel and Hien Vo

Aubriel and I became roommates while in college at VCU and luckily grew to become the best of friends. She’s always been the most fashion forward of our friend group, so much so that my other roommate, Maria Camia, and I used to go in Aubriel’s closet (with her supervision of course lol) and play “dress up” to help elevate our looks before we went out for the night.

Today she’s a successful Mortgage Loan Consultant and her Husband Hien is a New Home Advisor in Richmond, VA. Along side having crazy admirable work ethics, this power couple is passionate about educating their community on navigating the journey to home ownership and financial freedom.

Living room shoot set up at the Vo household

Living room shoot set up at the Vo household

As you can see in the image above, we set up in their living room. We had a decent footprint to work with, but unfortunately since I am still limited with using a long range lens, I wasn’t able to get any full body shots. I was at least able to work in some 3/4 shots. However, you’ll notice that there is a slight gradient near the bottom of her the images so in the future I need to remember to adjust the angle and position of the background lights in order to get a more evenly lit backdrop. One thing that was very useful to have in addition to shooting with a tethered setup was the full length mirror. I would love to hire Aubriel to be a stylist for any my future shoots, but it was especially helpful to have the mirror so that she could make adjustments on her own as well.

We took a couple of shots with her blazer just for the sake of it, but being that fashion is built into her brand, of course the dress ended up being the favorite look. Thinking back on it now, I’m not sure if we had originally planned on shooting Hien’s photos, but being that he’s a fellow entrepreneur and that we already had everything set up we figured why not. I vaguely remember us trying to convince him to get changed as soon as we walked though the door haha. There weren’t very many edits needed so I was able to turn the images around the same day.


2018 Brianeisha Eure

Headshot of Brianeisha Eure

Headshot of Brianeisha Eure

My close friend and fellow sand flag football teammate, Neisha, works in the field of cyber security and received the 2018 Technology Rising Star Award for helping shape technology for the future. She was going to be featured on a slideshow at the Women of Color Science, Technology and Engineering and Math (STEM) Conference held in Detroit, Michigan and was asked to provide a professional headshot.

At that time I was frequently booking private study rooms at the local library. Each room had at least one glass wall, or if you were lucky two, with a bit of exposure to natural light. I rented a white seamless backdrop from my friend, Chris Paulmino of CpixAperture, but since she was wearing a white shirt we held off on fully lighting the backdrop so that we could get a grey tone. Rather than bouncing light with the umbrella modifier, I used it like a soft box to diffuse the light and placed a bounce card behind her and parallel to the strobe to help fill the right side of her face. Unfortunately, I don’t think I thought to bring any mirrors on set, but fortunately Neisha came ready with a polished look. Neisha was later recognized in the Spring 2019 edition of The Chronicle and her headshot was featured on page 17.


2016 Marvin Joi Robinson

My sister MJ loves fashion and now photography as well. At this time she was in the process of switching careers from the medical to the art and design field. So we figured it was time for her to get some new headshots as well. She also styled her daughters for another photo shoot we had this same day.

IMG_0659.jpg

2016 Nikko Mendoza

Studio set up at TMSSR

Studio set up at TMSSR

Nikko and I had mutual friends growing up and worked together organizing large-scale conferences for the Filipino Intercollegiate Networking Dialogue, Inc. Currently, he works as a product manager in the Bay Area, but before he made his trip out west he mentioned that his mom had been asking him to take graduation photos. Mind you, we took these photos in 2016 and he graduated in 2014, but better late than never! Since he was already dressed up, we decided to take some business headshots as well.

At the time, I was a Production Manager for Glenn Fajota Photography and his office located inside The Makeup School by Sarah Rillon. This was my first time shooting headshots on my own with a full gear setup. I didn’t have much gear for the setup other than my camera and my laptop so I’m thankful that Glenn and Sarah let me use their space and set up.

I’ve always known Nikko to have a passion for art and design. Today he’s proven to be an extremely talented natural light photographer himself.


Teaching Headshot Photography

Before I moved to the west coast in 2020, I had the privilege of collaborating with my sister, Marvin Joi Robinson, and teaching her about the process from start to finish. I assisted her on her first two photo shoots from setup to final edits.

Sonya Phillips, owner of Stretch Couture

Sonya Phillips, owner of Stretch Couture

Sonya Phillips

August 29, 2020
Photographer: Marvin Joi (MJ) Robinson
Assistants: Aralynn Robinson and Mary Anne Laguerta
Makeup: Sonya Phillips
Wardrobe: Sonya Phillips

Our first shoot was with fashion entrepreneur, Sonya Phillips. Sonya is the owner of Stretch Couture, Sexxxy Unicorn, and a handful of other businesses. Sonya and I collaborated on a few pieces for my wedding and we ended up getting into a few more projects. MJ loves the world of fashion so the two hit it off from the start. Sonya plays an active role in her community and we were able to set up shop in a center she has access to.

Sonya had four outfits she wanted to feature. Alongside being an entrepreneur, she was crowned Ms. Plus Culture Galaxy of 2021. We started with getting shots of with her pageant accessories, moved on to a T-shirt with her Stretch Couture logo, and finished with a shot to debut her Sexxxy Unicorn clothing line and community. We wanted to try a “maker” style shot for the final outfit so we brought a few sewing tools a materials to help fill the background and hung her featured outfits on a clothing rack.

With so many ideas to tackle and so few hands to assist, we made sure we wrote down a thorough check list of what we wanted to accomplish for the shoot along with a few inspiration photos. Aralynn was in charge of keeping track of time and double checking that we got all of the shots we needed. This was extremely helpful so that MJ could focus on her shooting techniques and I could focus on assisting and coaching.

Sonya is an all around beauty and kind-hearted individual. We had so much fun working with her and learning more about what drives her life and business ambitions. It’s refreshing to meet individuals who are dedicated to contributing nothing but positive energy into the world.

Holly Anne Matel

IMG_9539.jpeg

September 5, 2020
Photographer: Marvin Joi (MJ) Robinson
Assistants: Aralynn Robinson and Mary Anne Laguerta
Makeup: Kellie Corbett
Wardrobe: Marvin Joi (MJ) Robinson

The second shoot was far closer to home, literally. Our sister-inlaw, Holly Anne Matel, is a water engineer and wanted an updated professional headshot. As I mentioned, MJ loves fashion. Along with being a photographer, she is a talented stylist. We asked Holly Anne to bring an outfit for her professional headshot and volunteered to scoop up a few more for her to try out for some personal portraits. All together we ended up shooting four outfits.

Prior to the shoot I took Holly Anne to see one of my favorite makeup artists, Kellie Corbett. Kellie is extremely talented and can accomodate styles of any scope. Holly Anne wanted a natural “no makeup” makeup look and Kellie delivered.

We put together a 3-light set up in the guest room of our mom’s house. Holly Anne is a lot taller than both MJ and myself and at the time I only had a long range lens for us to work with. MJ ended up having to back up into the hallway for a couple of the shots.

Being that this was also a teaching experience, we shot tethered to ensure that everyone could get immediate feedback and adjust where needed. Being that it was an intimate, family shoot myself and my niece, Aralynn Robinson, acted as both photo, wardrobe, and hair assistants as needed. Since this was a more casual shoot we didn’t prepare a check list to reference. Disregard the drinks near the equipment! That is usually a big no no, but it was a bit of a chaotic day.

As you scroll through the setup shots, you’ll see that we had two little visitors that kept popping by the shoot. Our nephews were very curious so once we wrapped up the last look we suggested they jump in for the last couple of shots. Overall, the shoot went really well with no major hiccups. Our sister-inlaw got some beautiful shots and as usual we got some great family memories.

After the photo shoots, I put together a comprehensive guide of pre production, production, and post production notes and procedures. Thankfully MJ already had plenty of experience with posing clients and can provide great customer service in general. She combined the new tips with her previous photo knowledge and adjusted to each scenario naturally. Not to mention, her love for fashion means she inevitably shows attention to detail so that was extremely beneficial. Overall, it was a wonderful and stress-free learning and teaching experience for us all.

Honoring Nenita Santorum

Video Messages for Nanay’s 80th Birthday

February 2014

2015FebNanayBday.jpg

This video is a collage of birthday greetings from family members of Nenita Santorum (My husband’s grandmother who we call Nanay) that was shown during her 80th birthday celebration. We shot the video on two separate days in different locations. We used a four light setup with two in the front to evenly light the talent and two behind them to light the background. Our main shot was taken straight on and we used a second camera to get a side angle.

To help participants prepare for their interviews, I designed worksheets for them to use and reference during their shoot. We listed the following message at the bottom:

”Jotting down some notes will not only help your memory, but ensure the production crew that you have prepared for your interview. Remember, since a professional crew will be present and there are a lot of people to record we must use our time very wisely.”

2015FebNanayInterview.jpg

I also created a slideshow that played during the party.

IMG_9262.jpg

e-Learning: Teaching Video Production

Designing and Developing a Self-Paced Instructional Unit:

How to Create a Video Presentation

Screenshot from Storyboard

Screenshot from Storyboard

Purpose

This computer-based multimedia instructional unit was designed to introduce upper-level high school students to a set of basic principles that support the production of effective and efficient video presentations. The instruction was created in support of an initiative at Virginia Beach Public Schools that encouraged students to become engaged in curriculum beyond the scope of their traditional Standards of Learning (SOL) material. More specifically, this instruction was designed to support the efforts of a Virginia Beach high school teacher, Raymond Obispo, who wanted to utilize the teaching strategy of the “flipped classroom” to maximize engagement in an alternative curriculum.

In support of “flipping the classroom”, the students would be required to present a 2-3 minute video presentation to their instructor and classmates about food and its ties to their family. This multimedia instruction was designed to support the video presentation project and was consequently titled “Creating a Video Presentation. This unit is made up of a series of videos that were packaged using the Articulate Storyline format along with instructional handouts.

Our tasks :

  • Interviewed the Instructor

  • Performed a Task Analysis

  • Created a packet of Facilitator Instructions

  • Created a packet of handouts for the students

  • Wrote a script, recorded the voiceovers and edited the audio

  • Storyboarded and produced the videos

  • Built the course within Articulate Storyline

  • Delivered final course to Instructor

  • Delivered detailed project management report to e-Learning Course Instructor

+ General Nature of Program

In support of learners who were primarily novices upon the subject, the instructional program was segmented into three distinctive parts in to support the terminal objective of creating a video presentation. The instructional program was segmented into three distinct stages of production as to not overwhelm the learners with new content. This approach was aligned with the work of Clark and Mayer (2016) who shared that “you can help the learner manage the complexity by breaking the lesson into manageable segments—parts that convey just one or two or three steps in the process or procedure” (p. 206). Therefore, the stages of planning, editing, and production were introduced so that the learners could engage new concepts that were broken into manageable chunks, thus reducing the chance of cognitive overload.

The course was also designed to be self-paced in that the learners could engage in instruction at a pace in which they felt most comfortable. The e-Leaning modules are packaged in a manner in which a learner could visit the material, complete knowledge checks, and perform practical application exercises all in an autonomous environment. Using the same e-Learning courseware, the program of instruction could also be facilitated by an instructor as the instructor guide and practice workbook provides the guidance needed to help students progress through the learning modules.

+ Learning Objectives

TERMINAL LEARNING OBJECTIVE

Learning Objective 1

Upon completion of this instructional unit, the learner will identify an introductory framework for producing a video presentation.

ENABLING LEARNING OBJECTIVES

Learning Objective 2

Given an academic scenario that requires a video tutorial, the learner will identify 3 stages for the video production process that lead to the successful production of a video presentation.

Learning Objective 3

Given an academic scenario that requires a video tutorial, the learner will identify 2 procedures for a video planning stage that lead to the successful production of a video presentation.

Learning Objective 4

Given an academic scenario that requires a video tutorial, the learner will identify 2 procedures for a video production stage that lead to the successful production of a video presentation.

Learning Objective 5

Given an academic scenario that requires a video tutorial, the learner will identify 2 procedures for a video editing stage that lead to the successful production of a video presentation.

+ Development Process

This body of multimedia instruction was development using a variant of the traditional “ADDIE” (analyze, design, develop, implementation, evaluate) instructional design model. The project began with an informal task analysis in order to identify the appropriate performance objectives for the course. Additionally, a procedural task analysis was conducted to identify and sequence the steps needed to perform the objectives of the course. The design of the course began with some preliminary instructional mapping as to present a visual of how a learner might progress through instruction. Prototypes were designed through an iterative process that included rough, polished, and versions while receiving feedback at each stage before coming to a consensus on the final prototypes. The same approach was taken with the storyboards until all stakeholders were happy with the look and feel of where the course design was going. Once prototypes and storyboards were agreed upon, content design on individual course pages was initiated in order to facilitate a smooth transition into the development phase. The design phase also included preparing all of the scripts (narration) which would become instrumental for the delivery of instruction during each module of the course.

The design of the course, specifically the video tutorials, utilized a cooking metaphor to help explain the video development process. The metaphor was the concept of preparing a lasagna dish for others. By describing the steps for preparing a lasagna dish in comparison to the steps for creating a video presentation, the learner could make a connection with something they were already familiar with. Connections between the two concepts were made such as identifying who the lasagna dish is being prepared for and identifying who will being viewing the video presentation. This instructional strategy was designed to help the learner make sense of a new concept by comparing it with something they are already familiar with which helps to initiate the schema needed for deeper learning.

The development phase was the most time intensive as all of the audio and visual (multimedia) elements were being developed for the instructional tutorials. Using the scripts that reflected the key elements of instruction for each learning objective, audio narrations were recorded and edited for inclusion. Video tutorials, which would become the primary vehicle of delivery for the instructional content, were developed using advanced editing software and the same video presentation process as covered in the course. Since most of the instructional content was developed prior to using any authoring software, the process of importing instructional material into the software was streamlined. Using Articulate Storyline 360, instructional modules were created that reflected the development plan as defined earlier in the design document. The development process also included an iterative process between developers as each person had an influential element in the look and feel of the course. A polished instructional product was then published in web packaging for distribution, implementation, and evaluation.

Once a polished instructional product was developed in the authoring software, implementation was initiated with the customer. The product was shared with the primary facilitator of the course so that all of the instructional insights of the course could be shared. Sharing the product with the primary facilitator was enlightening because of the feedback from a different perspective, but also because it provided an opportunity for buy in which is critical to product implementation. This element of implementation also served as an opportunity to see how the course functioned without the knowledge of the design measures. A small group of target learners were used to conduct some pilot testing which resulted in positive feedback as well as the identification of some minor changes. The feedback from the course facilitator aligned with some of the comments from the IDT 7/851 class when the course was shared for some formative evaluation. The formative feedback from the class presentations was instrumental in making some final design decisions. All of the formative evaluation feedback was collected and analyzed and worthy recommendations were implemented into the final product of the course.

Invisible Features

The design and function of the multimedia course is relatively transparent other than the sequencing of the instructional content. Understanding that the majority of the material is new to the learners, the design of the course restricted some level of learner control. This design approach is consistent with the research of Clark and Mayer (2016) who shared that “one of the most consistent research findings is that learner control has little positive bene t for novice learners” (p. 327). This approach was paramount to ensuring that the learners engaged with the content in a sequence that makes sense and does not promote cognitive overload with essential processing. Other elements of learner control were facilitated as the multimedia course does allow for learner control over pacing and access to resource. Although these design decisions are invisible to the learners, they were utilized so that learners could revisit the material as much as necessary while conducting practical application of what they have learned and with all of the resources needed to be successful with learning transfer.

+ Additional Methodology

Video Production requires complex processes that are most frequently taught through hands-on training. For the purposes of this project, our instructional unit will present an overview of six introductory procedures for our students. As a reminder, our learners will be viewing our modules as they approach each phase of production as opposed to watching it in one sitting. We have developed an advanced graphic organizer which the students will download to their google drives, a cloud-based server, and fill out as they follow along with the modules. The organizer will also act as an instructional aid for the students during their application exercises. This instructional aid will include a series of checklists that correspond with the requirements of each phase of production. The requirements will be described through text and applicable graphics will be provided as examples so that the learners can evaluate their progress during the application exercises. The use of this additional methodology will allow the learners to self-assess and receive feedback from their instructor by sharing their progress as captured on the instructional aid checklist.

The students use google drive throughout the school year and are familiar with google drive applications. Completing the worksheet on google docs will support the collaborative nature of their projects, safeguard them from losing files, and will allow them to incorporate different types of media into their organizer such as photos or hyper links to reference material. This feature will also allow them the convenience of editing their document from multiple devices. For example, the students can use their phones to edit the organizer in case they forget to bring their chromebooks to the video shoot.

+ Additional Design Notes

INSTRUCTIONAL PROBLEM

This computer-based multimedia instructional unit will introduce upper-level high school students to a set of introductory procedures for producing a video presentation reviewing a topic assigned by their classroom instructor.

CONTEXT / LEARNERS

  • Social Studies Teacher, Rooted Recipe Video Assignment
  • HS students (Net Generation, constantly exposed to multimedia content)

MESSAGE DESIGN

  • Articulate Storyline
  • Less learner control, guide the novice learners
  • Design to age level attention spans. Simple designs, avoid extraneous material

GENERATIVE LEARNING STRATEGIES

  • Graphic Organizer (organization & integration strategy)
  • Learning at the moment of need & Module assessments (Recall)
  • Sequencing procedures for rehearsal

CONTENT PRESENTATION/SEQUENCE OVERVIEW

  • 6 separate, 10 minute modules
  • Reviewing relevant information in sequence with assignment deadlines
  1. Introduction Module
    • Introduce course
    • Provide course overview
    • Identify navigation elements
  2. Planning Stage Module
    • Introduce the Planning Stage
    • Clarify project requirements
    • Create the video sequence
    • Planning stage assessment
  3. Production Stage Module
    • Introduce the Production Stage
    • Clarify production plan
    • Create content
    • Production stage assessment
  4. Editing Stage Module
    • Introduce the Editing Stage
    • Clarify presentation sequence
    • Create video presentation
    • Editing stage assessment
  5. Summary Module
    • Summarize the video production process
    • Final assessment
    • Identify resources for further research
  6. Unit Quiz

+ References

Alessi, S.M., & Trollip, S.R. (2011). Multimedia for Learning: Methods and Development (3rd Ed). Boston, MA: Allyn & Bacon.

Clark, R.C., & Mayer, R. (2016). e-Learning and the Science of Instruction: Proven Guidelines for Consumers and Designers of Multimedia Learning (4th Ed). Hoboken, NJ: John Wiley & Sons.

Project Management

The gallery below includes excerpts from the collaborative planning document we created on google docs. Our cover page listed bookmarks with links to sections that in retrospect, could have been automatically generated by google’s outline feature if we used correct accessibility headers for each section. On this document we listed design notes, charts, timelines, feedback, etc.

Storyboard

We had to create storyboards for each of the five lesson videos as well as for the learning platform. We used Google slides to create the slides so that we could collaborate on creating the content.

We presented the storyboard featured below to our class to receive feedback about our user interface and other instructional elements. Participants used an online survey to provide their feedback.

Learning Platform

We used Articulate Storyline to create our course. Below is a layout of the sequence we created. We included a feature to prevent students from skipping ahead, but once they completed a lesson they were given access to it in order to review it at their own leisure.

Screenshot of Storyline Project

Screenshot of Storyline Project

Course Guides

Course Developer

The course developer was provided with the following items:

  • Instructional Guide for installing and updating course

  • Style Guide for Picktochart Assets

  • Zip File with Course Assets

  • Zip File with Media Project Files

  • Zip File with Published Course

Course Instructor

The course instructor received the following items:

  • Folder with Learner Documents

  • Instructor Manual


Learners

The course participants received the following handouts:

  • Production Workbook

  • Course Glossary

  • Course Navigation

  • Course Timeline

  • Video Pro Tips

Production Workbook

Course Handouts

Video Assets: Course Lessons

Recording and Editing Audio

To create these videos I first started with writing the scripts. I separated the scripts into digestible chunks so that the narrator, my project partner Jimmy, wouldn’t get too winded while reading through them. This also helped us get clean breaks between each section so it would be easier to read later. File names were provided over each section which would help us with editing in post as well.

I then shared the scripts with Jimmy who recorded audio clips using the voice memo app on his phone. Each script was recorded as one long audio piece. I didn’t want him to have to keep worrying about stop and starting back up again. I culled through the audio by listening to each track and marking the best takes for each section. I exported each clip with their preassigned file names.

Creating Graphics

While Jimmy was recording the narration, I referenced the script and started creating a presentation deck for each video using Piktochart. When I make original animations I usually create my own graphics using illustrator and animate them using after effects. Unfortunately, I didn’t have that kind of time for this project so I used a clever powerpoint animation method that I learned from Jimmy, who is not familiar with advanced animation techniques.

Jimmy first creates a finished version of a slide and then creates addition versions of the slide, but subtracts an item. This technique is similar to traditional animation or like a flip book. He then reverses the order of the slides so that when he transitions to the next slide the next object appeared. This method accompanied with using preset graphics from Piktochart helped me create the decks much faster.

Editing the Videos

After the decks were done for each video, I downloaded each slide as a jpeg. I imported these jpegs into after effects along with the audio clips. Splitting up each track ahead of time helped tremendously because my animation rate was limited to the original speed of the narration. I was able to chop up audio and add pauses easily.

Each video ended up needing to be split into several videos because we decided to insert knowledge checks throughout the lessons to enhance learner engagement. Earlier I mentioned splitting the audio up into digestible chunks. This also worked to our advantage when we had to split up the videos later. We didn’t want the videos to be too long, but this also prevents the learner from having to scrub through videos to find essential information. Therefore, the titles of these mini clips build the outlines of each module while also creating a list of key topics for the user to remember. The videos featured below are the module videos compiled together.

Course Introduction

Lesson 1: Planning Stage

Lesson 2: Production Stage

Lesson 3: Editing Stage

Course Summary