
Empathic Design
In 2018, I took an instructional design course with Dr. John Baaki. Dr. Baaki often explained to our class about the significance of empathic design. That is, design that is fundamentally user-centered with deep consideration for the specific user.
One of our design assignments required us to construct a persona and instructional material for this persona.
“When designers construct personas, they build empathy for users, speed the design process, and make certain users’ needs are met.”
VESTERGAARD, L., HAUGE, B., & HANSEN, C. T. (2016) ALMOST LIKE BEING THERE; THE POWER OF PERSONAS WHEN DESIGNING FOR FOREIGN CULTURES. CODESIGN, FEB, 1-18,
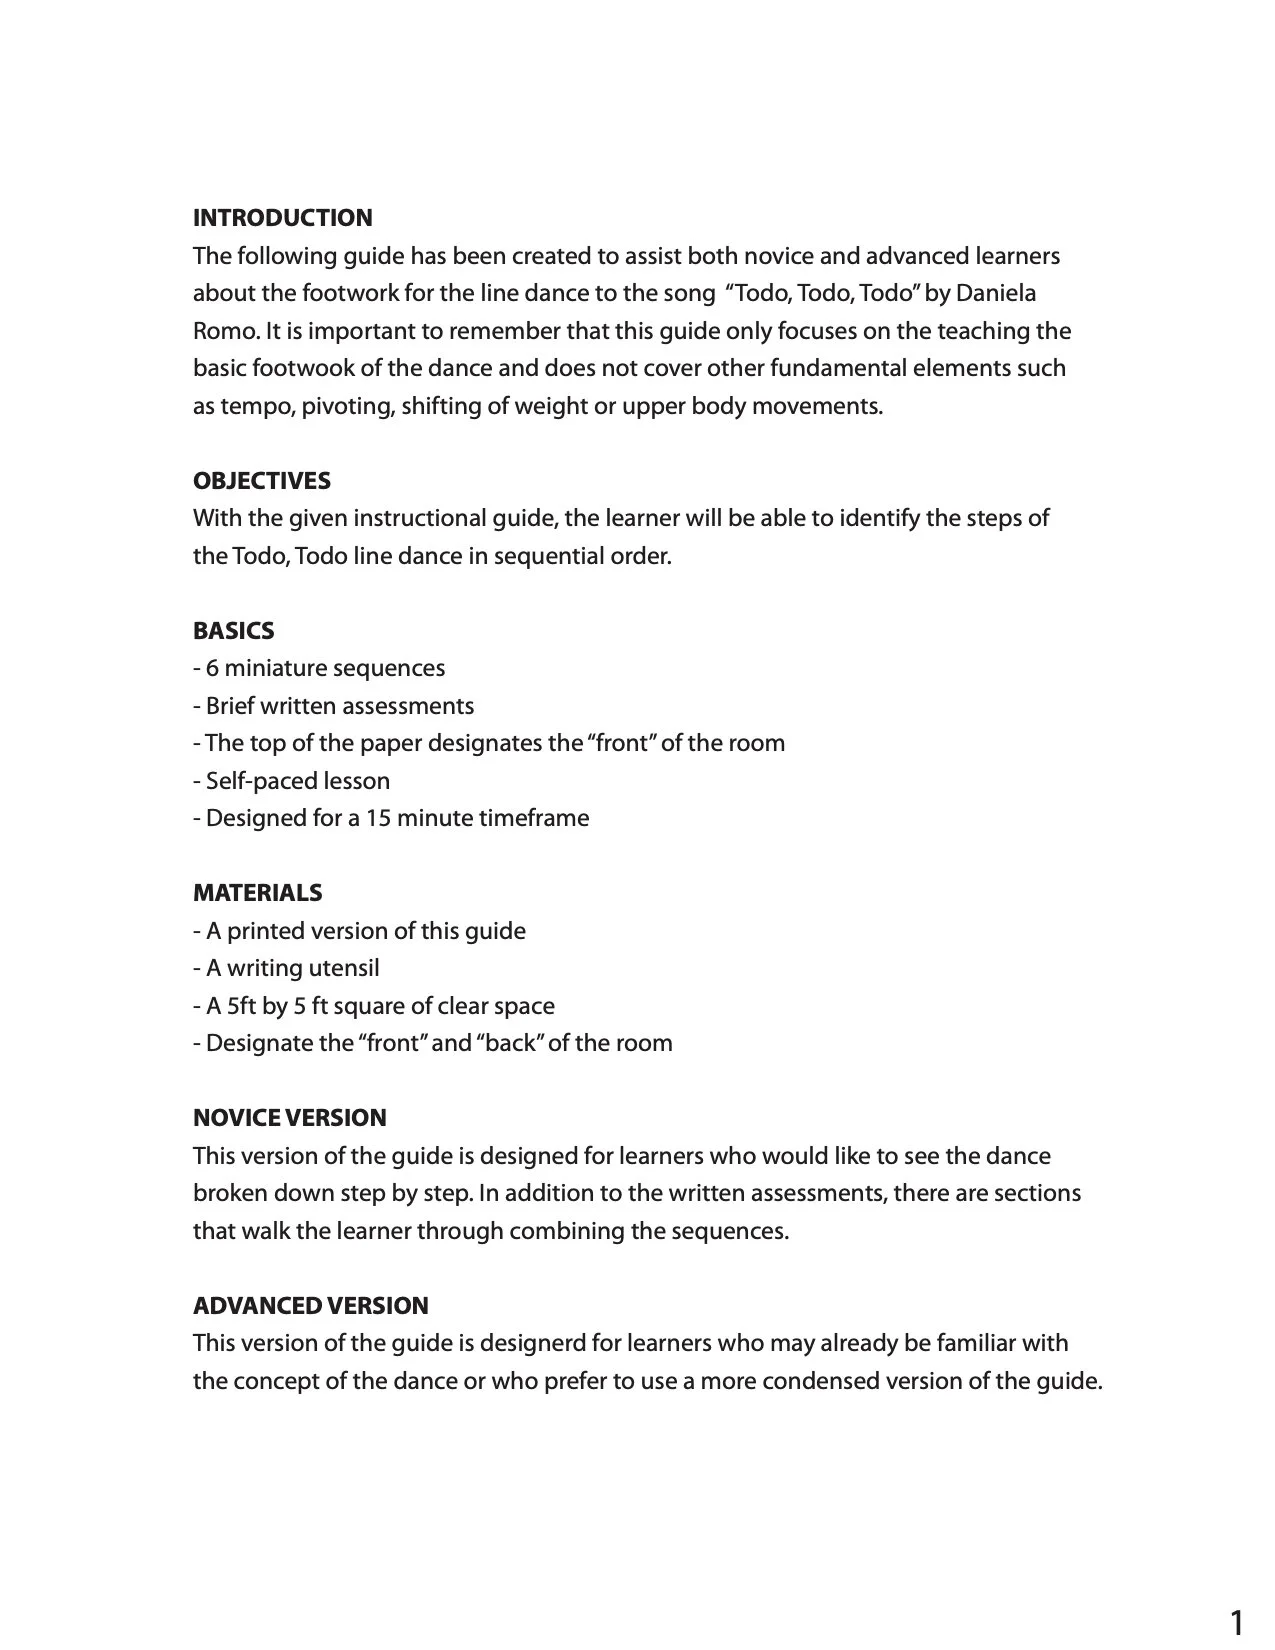
Todo Todo Line Dance
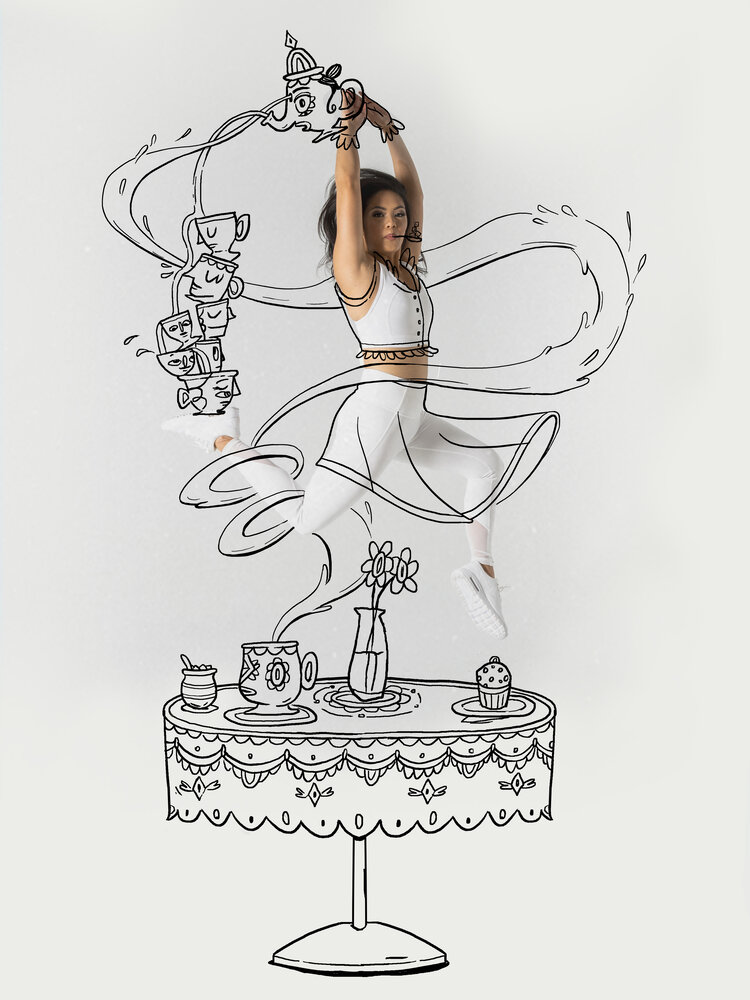
I decided to create instructions for the line dance to the song Todo, Todo, Todo by Daniela Ramirez. It’s very popular to see line dancing at Filipino parties whether it be a wedding, birthday, or just a potluck. I didn’t learn about this dance until I was introduced to my husband’s family.
We have many friends and even family members who have yet to master the dance. Being that we had recently got engaged in Dec 2017 I wanted to use this assignment to create an instruction manual for the dance. The persona I based my assignment on was my mom, Marina Matel. Unfortunately, one major detail flew way over my head. The font was too small for her to read lol!
The Project
The details below are the documentation and creation process for my project. Although I did complete the manual, I’ve listed this under my drawing board blog rather than my process blog because my friend, Carmiliza Riculan, and I are planning to eventually make an animation or video tutorial for this. There are some existing tutorials out on the web, but we plan to utilize more techniques to enhance the learner’s experience such as:
Self-Paced Learning Modules with Short Video Clips
Having short video clips not only allow users to scrub throughout the timeline, but the chunked material helps them find what sections they’re looking for easier rather than scrubbing through one long videoMotion Graphics
Animated illustrations, such as the ones in my PDF, to help reduce cognitive overload and simplify the image into a symbol of a foot rather than a video. Less processing for the brain to doMultiple Video Perspectives
After they learn from the motion graphics, the video element will allow them to see positioning of the entire body and movements other than the feet


Design Process
The following are excerpts from my final report:
+ Context
I recently got engaged over this past winter break. At every wedding my fiance and I have attended for his side of the family, the song "Todo, Todo, Todo" by Daniela Romo is played and his family performs a line dance to it. My family has been to a few events where this line dance was played, but only one of my other immediate 15 family members knows the dance. Usually learners just jump in and learn the dance by observation and practice. Many members of my family have tried to do the same, but still don't know the dance. My fiance and I want to have this and many other line dances played at our wedding.
Having a self-paced guide alleviates the pressure of trying to learn the dance in public, trying to keep up with the fast pace of the music, and most of all it allows them to learn it at their own pace. Once the learner is familiar and comfortable with all of the steps, they will be able to start implementing techniques like shifting weight, adding finesse, and ultimately dancing to tempo.
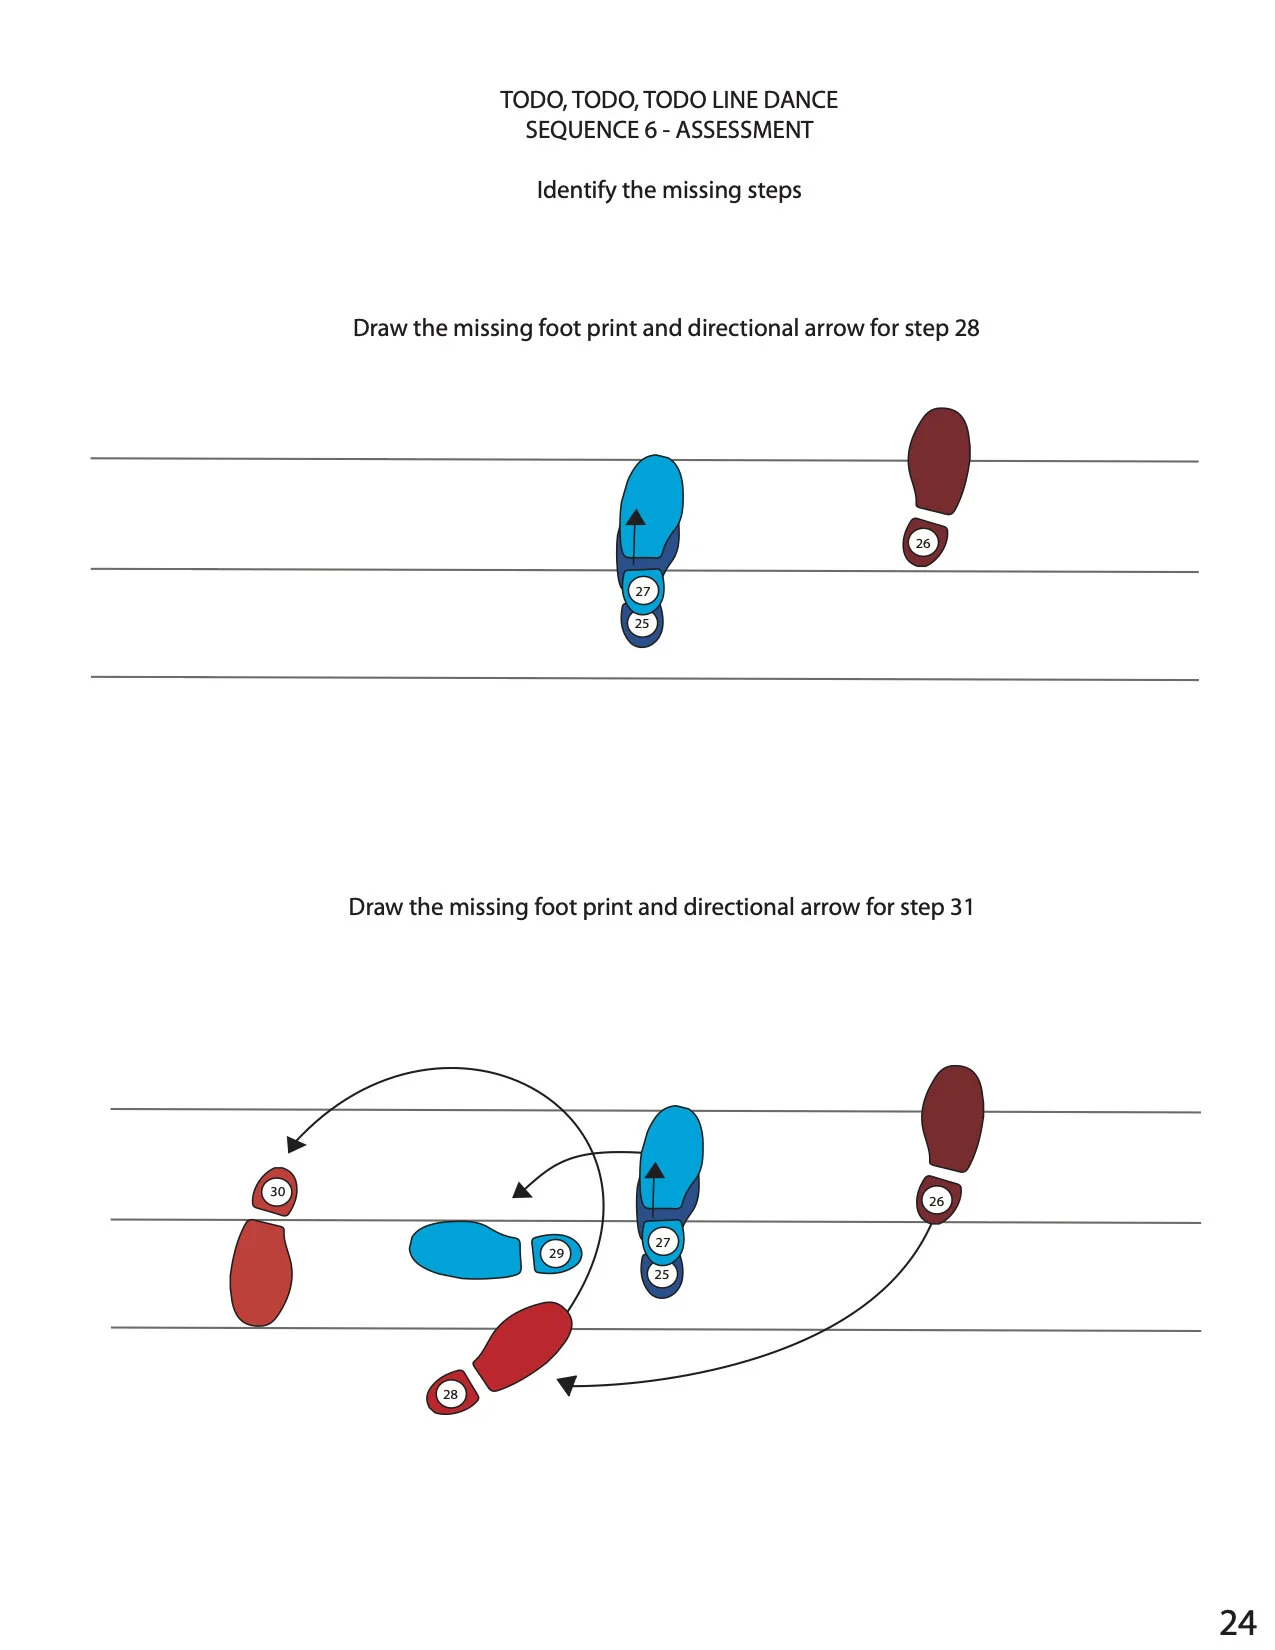
There are a total of 31 dance steps and when performed in tempo, one rotation of the dance is only 10 seconds. However, the dance steps are not as straight forward as dances like the electic slide where you may be moving in the same direction for 4 counts. There are a lot of twists and turns and when people put their own style to it, they might choose to shuffle instead of cha-cha. That can add even more confusion for the novice learners who are observing. One of the initial challenges I forsee happening with this guide, is the learner failing to keep in mind that the objective of this lesson is to learn the footwork of the dance and that the guide will not be teaching about tempo or shifting weight.
+ Persona Construction
I primarily designed this instruction to fit the needs of my mother. She is the only member of our family who refuses to get up and dance in front of others if she is not confident about what she is doing. Having this self-paced instruction will allow her to learn at her own pace and in the comforts of her own preferred environment. She will be classified as a novice learner.
My sister in-law and my sister have both seen the dance and tried to jump in on a round. They are both musically inclined, however are not very physically active. They have a lot of fun trying to learn the dance, but have never succeeded in retaining it. Being musicians, I thought using the elaboration method could help them imagine that they are building a melody of some sort. They will be classified as novice learners as well.
My two oldest nieces, 16 and 13, love line dances. They are always very enthusiastic and ready to jump in on the dance. However, they always get mixed up with sequence 3 , 4 and 6. This guide will help them break down and visualize the turn sequences. They will be classified as advanced learners.
+ Objectives & Instructional Strategies
OBJECTIVES With the given paper instructional guide, the learner will be able to identify each step in the six dance sequences of the Todo, Todo, Todo line dance in sequential order.
INSTRUCTIONAL STRATEGIES
Elaboration
I have used the elaboration in two ways. First, I use it while teaching the individual steps of a sequence and I use it once again in the sections where they are combining the sequences.
Recall
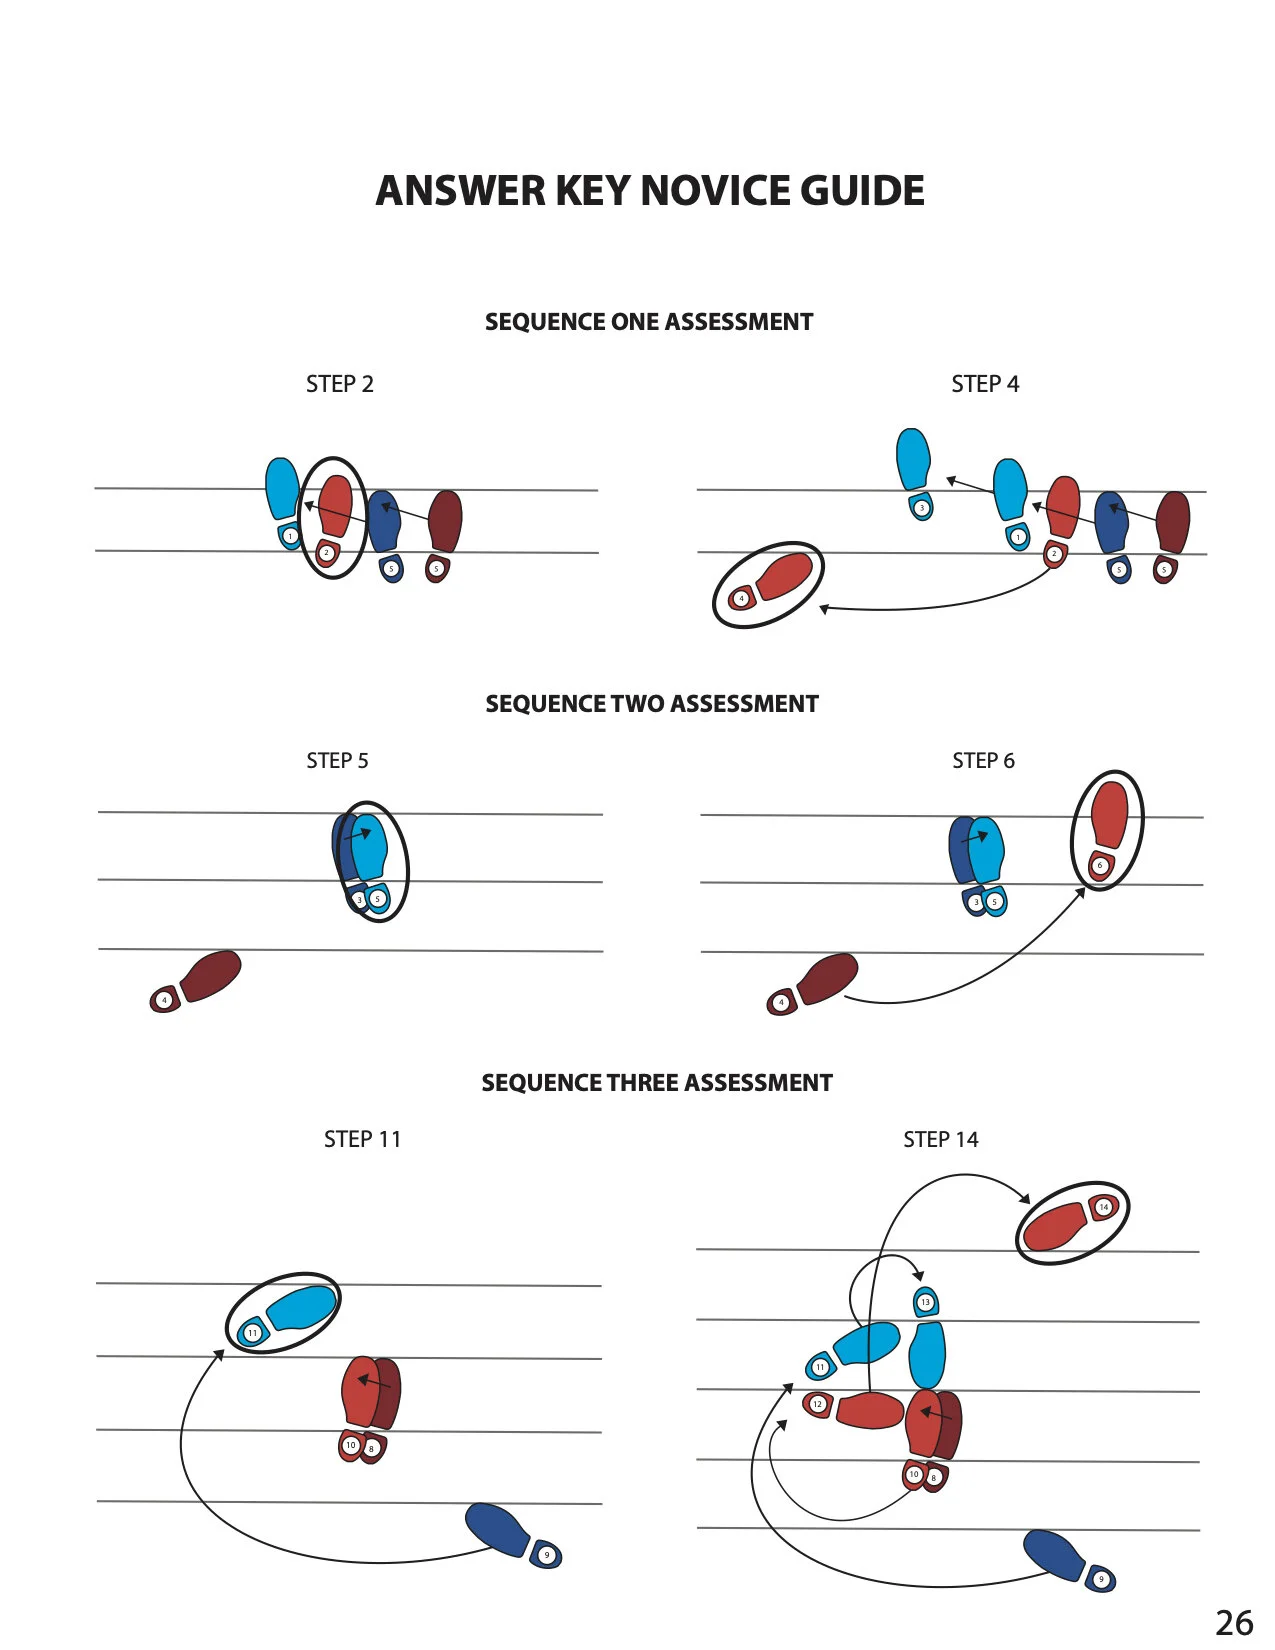
The objective of this lesson is for learners to identify the steps of each sequence. Given the 15 minute time constraint, I only provided the novice learners with two assessment questions after each sequence. I used the worked example method for these assessments. The novice learners are required to fill in one missing step in a sequence. For the advanced learners, they are only given the starting steps of the sequence and are required to fill in the remaining steps of the sequence.
Develop Mental Model
I imagine that most learners who pick up line dances from observation, rarely visualize what their footwork would look like laid out on paper or the floor from a birdseye view. This guide helps learners visualize a path to follow and identify the exact directions their feet should be oriented in, rather than general motions of the dance.
Practice
Once a learner learns a new sequence, they are required to combine it with the previous sequence they learned. This repetition of the previous sequences helps them retain the steps better and get a better idea of how to perform the full dance.
+ Task Analysis
Preperation
- Clear a 5x5 square of space on the floor
- Designate which direction of your area will be the "front"
- Designate which direction of your area will be the "back"
Todo, Todo Line Dance
*Sequence 1 "Cha cha to the left" *
- Take one step slightly diagonally to the left.
- Follow with your right foot.
- Take one step slightly diagonally to the left.
- Keeping your left foot in place, swing your right foot behind your left.
- Pick your left foot up and shift your weight to your right foot.
*Sequence 2 "Cha cha to the right" *
- Step with your left foot down in place.
- Swing your right foot back to the front and slightly to the right.
- Follow with your left foot.
- Take one step slightly diagonally to the right.
- Keeping your right foot in place, swing your left foot behind your right.
- Pick your right foot up and shift your weight to your left foot.
*Sequence 3 "Cha cha turn 180 degrees to the back" *
- Keeping your right foot in place, swing your left foot clockwise and step in front of your right foot.
- Follow with your right foot.
- Take a nintey degree clockwise step with your left foot.
- Swing your right foot clockwise behind your left foot.
*Sequence 4 "Cha cha turn 180 degrees to the front" *
- Keeping your left foot in place, swing your right foot counter clockwise and step in front of your left foot.
- Follow with your left foot.
- Take a nintey degree counter clockwise step with your righ foot.
- Swing your left foot counter clockwise behind your left foot.
*Sequence 5 "Cha cha to the left, cha cha to the right" *
- Take one step slightly diagonally to the left.
- Follow with your right foot.
Take one step slightly diagonally to the left.
Shift your weight to your left foot and pick your right foot up.
- Step slightly diagonally to the right with your right foot.
- Follow with your left foot.
- Step slightly diagonally to the right with your right foot.
- Shift your weight to your right foot and pick up your left foot.
*Sequence 6 "Pivot turn"*
- Step in place with your left foot.
- Swing your right foot clock wise behind your left foot.
- Step ninety degrees counter clockwise with your left foot.
- Swing your right foot counter clockwise, turning your body 180 degrees.
- Follow with your left foot.
+ Assessments
Formative Assessments
Novice learners were provided with 2 worked examples that followed every new sequence. An answer key was provided for the learners in the back of the guide.
Advanced learners were provided with the starting steps and were required to fill in the remainder of the sequence.
Cummalitive Assessments A survey was provided at the end of the guide for the learners to list any feed back for the designer.
Instructional Guide (PDF)


Reflection
Previously, some of the learners expressed that they felt they were just "not coordinated enough" to learn the dance. I thought that having a self-paced lesson could the remove certain pressures from the equation, allow them to learn it under their own circumstances and help build their confidence. I figured that seeing the foot steps from a birds eye view might help the learners visualize a "path" as opposed to standing behind someone. I utilized the elaboration method because the learners were required to identify a lenghty sequence and not just recall a simple fact. Also, I didn't include written directions for steps because I didn't want to determine what type of method the learner should use. Some learners decided to actually get up and practice the steps, while others formed mental models that helped them for the written assessment portion since they were memorizing what the actual image itself looked like.
I felt that it was important to have two versions of the guide, because my family consists of a variety of learners. Although my mom is the only one in my household currently, I gave the guide to some of my other family members to test to get more feedback. However, my mom alone gave quite a bit of feedback and I fear that I may have actually left her feeling even more defeated than before.
If I had not talked to her in person after her attempt, I would have thought that she learned the dance very well. It turns out that she thought that the guide was designed very well, but she was simply "born with two left feet." With that said, I failed to meet my learner where she was at.
Positive
Learned steps they previously overlooked
Enjoyed layout and visual design
Repeating the steps and gradually combining the sequences little by little made it easier to remember
Negative
Not a 15 minute lesson for novice learners
Numbers on footprints were too small
Foot placement competed with natural upper body movement
Typos in document
"This would be easier with music"
Mixed up numbers
A lot of work for 10 seconds
As usual, I was overly ambitious and did not manage my time wisely. If I were to redo this assignment with the same objective, I would think of a way to develop the guide faster. I spent far too much time working on the visual elements and I believe this may have even distracted me from identifying some of my learners issues.
This design will serve as a blue print for a video version I will be making in the near future. Eventually, I will be working with illustrators, animators and videographers to create a video tutorial that we will share with our family and friends through our wedding website. This assignment was a great way to gain some necessary feedback. It has reminded me that I need to take more time to investigate my learners and consider their needs more carefully.